Review author: Terrari School of Design
How wonderful it is to have your own home, where you can enjoy the surrounding nature, spend weekends with your family, and relax.
Some people cannot imagine life in the private sector without animals, especially rabbits. These cute pets will not only delight all family members, especially younger ones, with their appearance, but will also bring great benefits.
In order for them to live comfortably and bring offspring, it is necessary to equip their home - a rabbitry. What it should be like, how to make a rabbitry with your own hands - let's look at it in more detail.
Ideal place for a rabbitry
Where a convenient rabbitry for the garden will be located is of great importance, so you should think about this in advance. During the day, when the sun is shining brightly, its rays should not directly hit the building area. Therefore, a place in the shade is ideal. In addition, it is very good if the structure is located on a small hill.
Any cool winds should under no circumstances appear near the rabbitry. The same goes for damp or stale air. You must also remember that there should not be a compost pit nearby. Such a neighborhood threatens the extinction of some or absolutely all animals.
It is also recommended to install this building away from various sources of noise, such as an enclosure with dogs and the like.
Beginning of work
Between the idea of building a rabbitry and its implementation stands the most important design stage. You must study the features of keeping long-eared pets and make the house as comfortable as possible for both the animals and the person who will look after them. Always remember that rabbits are living beings with their own needs.
Having decided on the breed, plan further livestock. The size of the animals, their gender and age make adjustments to the design of the rabbitry. When starting construction, it is better to provide for the possibility of further expansion.
Choose your location carefully. Try to find an area away from sources of loud noise. Give preference to the shady side and elevations: in summer the sun will not cause discomfort to the animals, and in rainy weather water will not flow into the rabbitry. Under no circumstances should it be adjacent to a compost pit.
Nothing should block access to the cells. They themselves should be as spacious and comfortable as possible.
Materials suitable for construction
To make a simple rabbitry with your own hands, you will need to purchase budget, but high-quality material - it is very important that it is durable. This is all due to the fact that the future residents of this building, despite their cute appearance, are still rodents. Therefore, they will probably want to chew on their home.
For construction you will need:
- wood;
- galvanized metal sheet or slate;
- Rabitz;
- galvanized mesh;
- OSB board;
- plywood.
Let’s not forget about the necessary tool that will be used to assemble the future house for furry pets.
Insulation
Rabbits feel comfortable at a temperature of 10-20º. Therefore, for the winter you need to either move the house standing in the fresh air to a warm place, or insulate the existing home.
Cover the door with plywood. It’s even better if you glaze it - this option will allow the animals to receive more sunlight. Add a layer of hay to the wooden flooring. The walls can be insulated with ordinary polystyrene foam.
An alternative approach is to build a special shed with heating. Be sure to make a foundation, and the room itself can be wooden or brick. The main thing is that there are no drafts anywhere. The doors should also fit tightly in their frames and protect the shed from the cold. On the south side, arrange a walking area.
For a summer residence, the second option for organizing a rabbitry is more convenient.
Types of designs
On the Internet you can find a lot of information, as well as photos of ready-made rabbit hutches, after studying which you can choose exactly what suits your taste and budget allows.
They are:
- Open. It is more popular due to the fact that its size can vary and will allow up to one hundred individuals of this species to live in it, and is easy to use.
- Closed. Due to the fact that this type of structure is placed in a finished building, such as a barn, the number of pets will be limited due to the minimum housing space.
If you are building a new rabbitry, you can consider the following options: single or multi-section structures.
Mini farm
A mini-farm is the most convenient and practical cage for rabbits. Although it is not very easy to do. Experienced farmers spend months building such a cage.
The rabbitry itself is quite large. It can accommodate up to five dozen rabbits. Also, a mini-farm implies full automation and mechanized supply of water and food.
If you are new to farming, we do not advise you to use this method, as it requires large financial investments.
Dimensions and drawings
Before you begin installing the structure, you need to draw a plan for the future building yourself or study ready-made drawings of rabbit hutches on the Internet and make all the necessary calculations.
During which the following points should be taken into account:
- the length of the cage should be comfortable for both males and nursing rabbits;
- large individuals require more spacious housing than other individuals;
- young animals and adults must live separately.
After all conditions have been taken into account, options have been considered and drawings have been made, construction can begin.
Planning the future livestock
How to build a good rabbitry without knowing how many rabbits will live in it? If you just want to have animals “for testing”, one rabbit with offspring is enough. They can easily get by with 1-3 cells on the site. In order for the supply of meat to be regular and uninterrupted, 20-30 individuals of different ages of different categories are needed.
To begin with, you can get a few rabbits and care for them throughout the warm season to determine how well this activity fits your plans
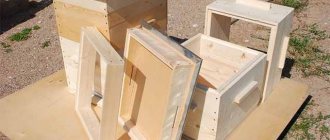
Construction stages
First you need to decide what the building will be like. The easiest way is to look at rabbitry ideas on the Internet and take drawings from there. However, if you wish, you can come up with your own unique sketch.
The advantage of the second is that it becomes possible to build your own individual structure, based on size, quantity of materials and capabilities. After everything is prepared, you can begin work.
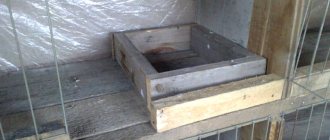
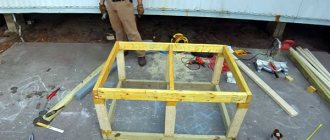
If the frame is wooden, then the slats are cut to the required dimensions and then fastened with self-tapping screws. The absence of any distortions is very important. To check whether they are present, a level (for checking horizontal surfaces) and a square (for vertical ones) are used.
Afterwards the front and rear frames are assembled. Well, then, all that remains is to assemble them into one whole frame, connecting the frames with short jumpers, which are the ceiling and the floor.
The next stage is laying the roof. It is best to use OSB sheet to build the first tier. This material is moisture resistant, so it's perfect.
The sheet must be cut so that 10 to 15 cm of the edge extends beyond the edges of the cage. The roof of the second level should be constructed of corrugated slate, attached to the sloping frame bars.
The only thing that remains is the installation of the door, drinkers and feeders. This completes the construction of the rabbitry.
Useful tips
Pros are always ready to share their observations and advice with novice summer residents, which will not only facilitate installation, but also help make the structure durable.
Here are some of them:
- If you want to extend the life of the structure, you can upholster the wooden parts of the frame with metal. It is not necessary to purchase it separately; tin cans or galvanized steel will be sufficient for roofing work. Upholstery will not take much time, and the product will last many years longer.
- Depending on the size of the rabbitry, a different amount of wood will be required. For example, ordinary pieces of wood with a cross-section of 5x5 cm would be an excellent material for making a frame. They are inexpensive and very easy to use.
- Under no circumstances should you use an antiseptic for impregnation. This product is quite toxic and can be fatal to rabbits. Instead, it is helpful to let the frame dry thoroughly. This will also extend its service life.
- To cover the tiers, use a material that will not conduct moisture, such as slate. If the rabbitry is placed outside, there is no need to make a metal roof. It gets very hot in the sun, which can cause discomfort or even kill residents.
- The sheathing of the frame can be made using a chain-link mesh with 2x2 cm cells. And the sides, doors and facade can be made of steel mesh. To make it easier for the animals to get to the food, the feeders into which the grain will be poured should be made of a mesh with 5x5 cm cells. It will be very convenient if they are of a rotating design. This will greatly simplify both filling and cleaning.
- Solid flooring is not recommended, as this threatens to worsen the microclimate in the rabbitry and cause rapid rotting of the wood. So it is best to make the bottom lattice. The material can be planed floor blocks, the gap between which should not be more than 1 cm.
- Drafts are very dangerous for rabbits; these animals easily get sick. To prevent this from happening, the back wall (using polycarbonate, boards, plywood or OSB) is made blank.
- If the building is located outside, then the supporting frame must be metal. You just need to weld such a structure from a 4.5x4.5 cm corner. Next, you should insert the made mesh sections into it. The mesh is fixed to the frames, which are obtained by welding a steel rod. In addition, you can make the frame wooden.
- To prevent the rabbits from developing corns on their paws, which cause severe discomfort, it is worth placing a sheet of plywood on the floor that will protect the animals’ paws. But at the same time, you need to remember that such plywood should be cleaned and dried regularly.
- The net will not be able to protect you from rain or snow; the animals will not be completely protected. So it would be more correct to install the cage under some kind of canopy, or even better, in a barn.
A neat, high-quality and, most importantly, do-it-yourself rabbitry will not only please your furry pets, but will also look great in the photo. And proper care, feeding and maintenance will soon delight you with new healthy offspring.
How to build a rabbit shed
Rabbit farming is a fairly popular branch of agriculture in our country.
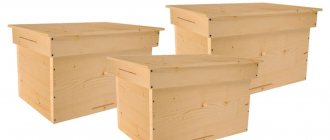
This is explained by the high value of dietary rabbit meat and fur on the market. And keeping these cute mammals is not such a troublesome task. Rabbit barn
Rabbits are known to be productive creatures. The farmer is required to provide them with decent conditions for reproduction. This article talks about what a barn for rabbits should be like and how you can equip it with your own hands using drawings.