- Stage 1. Preparing the side strips, top and bottom bars
Frames for hives are the most important “consumables” that beekeeping cannot do without. This is one of the main elements of the hive. Each beekeeper must have a supply of honeycomb frames, because the demand for them in the bee farm arises constantly - it is necessary to regularly replace old and broken ones, and add new ones when expanding the bee colony.
The quality of the honeycomb frame largely determines the success of the development of the bee colony, the calmness and efficiency of insects, and hence the amount of honey collected.
for novice beekeepers to independently master the production of frames for their hives, since purchasing ready-made ones requires additional cash costs and is not always possible at the right time.
What should the framework be?
Despite the seemingly simple procedure, several important factors need to be taken into account when assembling frames. The quality of the product depends on the following points:
- base type;
- number of frames;
- dimensions;
- string tension method;
- form.
Making frames with your own hands
Frames have a classic design and consist of two elements - a base and a wire . The size is influenced by the volume and type of hive. There are ready-made frames on sale, plastic ones are especially popular, but purchasing them all the time is very expensive (compared to homemade analogues).
Important ! The main function of the frame is to limit the construction of cells. Thanks to it, bees direct potential in the required direction, which a person regulates at his own discretion.
As a rule, several slats are installed inside the hive parallel to each other. Slats of different thicknesses are installed at the bottom and top of the structure. To make your own frames, you need dried wood without defects. Moreover, it is better not to use pine and birch blanks - the optimal material for homemade products is soft larch.
Construction frame in beekeeping
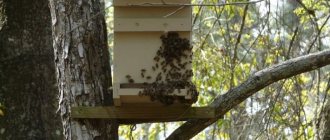
Innovative bee frame
Is it worth using such hives?
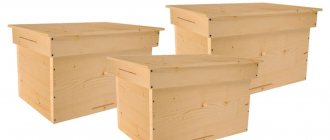
Advanced beekeepers have long noted such a hive. Farrar observed the behavior and condition of all bees, compared honey production under various conditions, and also took into account the use of certain techniques. Such a hive is the most suitable for intensive and mass beekeeping, as it implies a large bribe from one bee family. The main advantage of the device is the preservation of space, which is ensured by the structure of the structure.
The greatest difficulty and problem is the transition process. Beekeepers often use the experience of experienced specialists, adopting some subtleties, secrets and tricks.
What types of bee frames are there?
Although frame hives are a beekeeper's most important tool, they are made and look different. The most common types of products are:
- sectional;
- coverings;
- construction;
- experimental;
- outposts.
DIY bee feeder
Traditional frame designs
There are also species, the use of which is determined by the characteristics of the life activity of insects:
- nesting _ They are installed in the brood zone, often at the bottom of the hive. Performs the function of a honeycomb;
- store-bought . Necessary during honey collection, located in the upper part.
Nesting frame for bees
Using covering frames, the nest is separated from the rest of the space in the house. Insulation pads are placed behind such structures. Such frames are needed in winter, when temperature conservation is required.
Go ahead. The building frame is a regular frame with a strip of foundation. The latter is necessary as a guide - it shows the bees the direction in which they should build honeycombs. As a rule, such a frame is attached in the center of the house or the 2nd one.
Sectional frame
Feeder frame for bees
As for the sectional frames , it is from them that beekeepers obtain honey.
If we talk about nurseries, incubators and feeders , then the latter are most common. With their help, food is supplied. Often, a honeycomb frame lined with plywood can hold up to 2 liters of syrup. The incubator - and this, as you might guess, is an isolated area - contains eggs, larvae, pupae or queen cells. The nursery, necessary for attaching cells with queen cells, is equipped with special movable slats.
Bee frames
Expert opinion
Ponomarev Sergey Stepanovich
Beekeeper with 30 years of experience, Candidate of Technical Sciences
In a regular store kit there are 4 frames and containers, and the dimensions in this case are 145x435 mm. It is worth knowing that insects do not really want to work in plastic frames.
What should frames be made of - plastic or wood?
If you plan to make frames yourself, you must decide not only on the type of construction, but also on suitable materials.
Table. What are the frames made of?
| Material, photo | Short description |
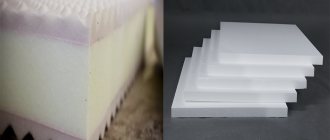
| Plastic parts are practical, lightweight and easy to clean. Moreover, with them you don’t have to pull the wire every time. All you need to do is apply a thin layer of foundation; the insects will do the rest on their own. However, plastic products are not cheap. |
| Easy to process and environmentally friendly material. It is relatively cheap. But they are not suitable for a novice beekeeper, since they have a short service life and are difficult to maintain. |
Useful tips
Experts recommend making hives from coniferous wood; pine, which is easy to process, does not deteriorate for a long time, and is rich in resin, is best suited. When making frames, beekeepers most often use linden or fir tree because they are easy to use and do not crack.
Today there is a wide selection of frames that you can choose and buy depending on the material of manufacture, the cost, and also the shape and size of the bee houses. But you can also make them yourself, following the instructions, because they are a very important element of the entire hive.
Frame sizes
One of the key requirements for a hive is the size of the frames . The productivity of insects will largely depend on them, which, in turn, will influence the future development of the apiary.
Hive frame sizes
It is for this reason that you should not only make the frames correctly, but also install them correctly.
- The distance between adjacent frames should be about 4 cm - this will provide standard streets for the movement of insects.
- The width of the top bar should be approximately 25 cm.
- The lower/upper elements should be located at a distance of about 1 cm from the walls of the house.
- There should be 5-7 mm left from the side slats to the bottom of the structure.
- From the bottom slats - about 2-3 cm.
Note ! The finished frames must be securely fixed inside the hive. On the other hand, if necessary, they should be easily and quickly removed.
The manufactured frames should be securely fixed inside the house
Bee frames are measured by external dimensions and have the following parameters:
- Euro frames – 223x370 mm;
- Zander hive – 220x420 mm;
- Langstron - 232x448 mm;
- Dadan-Blatt hive – 300x435 mm;
- Golets – 250x330 mm;
- Dadana - 285x448 mm.
Alpine hive drawings
It is important that the hive conditions do not differ from the classic sizes.
On a note ! In general, the elements of the entire structure are connected, and therefore a correct comparison of dimensions is required. If the combination is incorrect, you will not be able to achieve family development.
For your own production, you can use common drawings - for example, a Ukrainian beehive.
Dadan, Ukrainian, multi-body hives
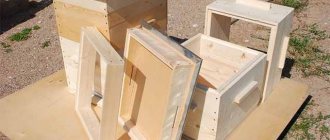
We also note that all frames consist of 4 main slats, let’s get acquainted with them.
Any frame consists of 4 main slats
Top rail
It often has special grooves that allow it to be fixed between a pair of side slats.
Bottom rail
A special block, its length is the same as the gap between the two side slats. The optimal width is 2.5 cm.
Side rails (2 pcs.)
These elements can be:
- rectangular;
- trapezoidal (widening at the top);
- in the form of a fork (the top rail is inserted into its upper groove).
Since most of the load from the honeycomb falls on the side strips, their width in the narrowest part should be at least 2.5 cm. This is regulated by the current GOST.
GOST 20740-75. Hives, technical specifications . Downloadable file (click the link to open the PDF in a new window).
GOST 20740-75
Traditional wooden structures use steel wire
Making your own frames
First, let's look at a few recommendations that are important to follow when assembling frames:
- first of all, select the drawings;
- then select the materials that will be used in the work;
- make frames according to GOST dimensions. Make sure that the structure fits well into the hive and does not wobble in it, otherwise the frame will have to be adjusted by slightly changing its dimensions.
Making hive frames with your own hands
Video - Rules for assembling frames
For what
The quality and quantity of honey and other beekeeping products obtained does not depend on the size and shape of the hives, but on how high-quality the structures are in it. Back in the 19th century, hives did not have frames. In order to collect honey, beekeepers fumigated the bees. This is a cruel method that often leads to the death of almost the entire bee colony. Modern analogues allow us to avoid such sad negativity. Collect a large amount of honey, normalize the development of the family, save the bees.
Modern models are purchased in the store. It's easy to make it yourself. The quantity depends on the size of the hive. But an important parameter is the size of the bee frame. A full-fledged process of work for the whole family is ensured during honey collection, during the wintering period, when the queen is worming and the young are being bred.
Master Class. Simple frames for bees
Let's look at an example of how regular frames of standard width (without extenders) are made.
Step 1 . The work begins with the manufacture of the upper strips. For this purpose, a 2nd grade board with a thickness of 20-21 mm has been prepared.
The frames will be simple
Second grade board
Step 2 . Small slats 47 cm long are cut from the board to organize the top bar. First of all, the board is cut into pieces of the required length (i.e. 47 cm). For 50 frames you will need approximately 10 such segments.
Sections of 47 cm
Next, smaller sections are cut - 41 cm each. To form the side posts of the frame, sections of 29 cm are sawn.
Step 3 . After we have cut all the slats, it is necessary to form a groove in each 47 cm long board that will serve as an “ear” for hanging the frames in the nest. In the example, a conventional milling machine is used to form the groove.
It is important that the size of the “ear” is exactly 10 mm. All 10 boards are processed in the same way.
A groove needs to be formed in each board
All segments are prepared
Step 4 . There is a groove on both sides of each board. All that remains is to cut them longitudinally, for which in the example we use a homemade sawing table (a Makita hand-held circular saw is connected, and a distance of 25 mm is set using a parallel stop).
Smaller planks (41 and 29 cm) will also be sawn, but already 10 mm wide.
Homemade sawing table
The distance is set to 25 mm
Step 5 . All top strips are cut. In the example there were 62 pieces.
Side strips are also ready, 80 pcs. (enough for 40 frames). There are so few of them because there was a lot of material with knots that had to be thrown away.
Upper bars
Side bars
Step 6 . All planks are laid out for drying, since raw wood was originally used.
Important ! This drying method has a significant drawback: parts that are located near the pipe and next to the stove itself may become distorted. Especially if there are at least small knots there.
The slats are laid out for drying
Step 7 . After 2-3 days, when the planks are dry, you can make frames from them. To do this, you can use, say, this simple device - a tablet for making frames.
The device is a regular piece of OSB board and 4 strips located between each other strictly at an angle of 90 degrees and at the distance required for the standard frame size.
Shot of the fixture
Step 8 . Then all the planks are simply placed between these spacers and nailed together. Moreover, you need to start scoring from the bottom corners. Each corner is leveled, nails are driven in, after which you can move on to the top part. Since we have grooves there, the slats will not go anywhere.
All frame strips are placed
You need to start from the bottom corners
At the top there is a groove and an ear
Note ! This simple device will make the job much easier. It will take you no more than 30 seconds to put together one frame.
Frame for the Dadan-Blatt hive
Creating such a frame is also not difficult. For work you will need wood blanks, nails, wire, an awl, a hammer and pliers. The external dimensions of the product will be 300x435 mm. So, follow the instructions:
- the planks are cut out according to the dimensions shown in the figure;
- the planks are assembled, small nails are used for fixation;
- on the side slats, holes are made with an awl in increments of 6 cm;
- a steel wire is pulled through the upper holes on each side, then threaded like a “snake” so that there is no overlap;
- a loop is made at the last hole and twisted;
- The wire is stretched with pliers, but there is no need to overdo it. After this you can start waxing the frame.
History of appearance
The first frame hive was invented by Pyotr Prokopovich. Soon after this, the first proposals to standardize its components began to be heard. But the decision on this was ultimately made only in 1918 at the first congress of beekeepers in the USSR, held in Kyiv. A well-known beekeeper in the former USSR, V. Shimansky, who spoke at it, expressed the idea that standardization, including for handicraft production, will make it easier for beekeepers to work and live and will help reduce the cost of materials for breeding bees, and ultimately honey and other end products of activity apiaries.
Master Class. How to tension a wire
To ensure that the string in the frame is properly tensioned, follow the step-by-step instructions below.
Table. The nuances of wire tension.
| Steps, photo | Description of actions |
| Securely secure the frame to prevent it from slipping. Where the top hole is, a nail is carefully driven in so that it rises only a few millimeters. |
| A second nail is driven diagonally from the opposite side. Next, a special tape measure is attached to the table - it will bend the side rail. |
| It is worth remembering that at this moment the second side rail will also bend, since the structure was fixed on all sides. |
| The string is fixed to the first nail, then its head is hammered tightly. The string is pulled through the holes. Similar manipulations are carried out with the second nail. Then the clamp is released, the sides are aligned, and the string is stretched even more. To avoid damaging the wood, you can use push pins under the wire. |
Wire stringing process
The wire acts as reinforcement when welding frames. Tensioning begins after the wooden frames with installed spacers are made. For this you will need:
- a coil of steel wire (1.5-2 mm in diameter);
- a drill of the same diameter, a screwdriver or a drill;
- hammer;
- pliers;
- conductor or template;
- nails for fastening wire (shoe).
Step by step procedure for stringing:
- using a template drawing or a jig, drill holes in opposite poles;
- a tension nail must be driven into the frame;
- pull the wire through the drilled holes;
- the end of the wire is wrapped around a driven nail;
- Using pliers, the wire is pulled and secured to the appropriate nail.
Important! When twitched with a finger, a stretched string should produce sounds of a musical tone. If this is not the case, then the string needs to be tightened further.
Waxing frames
Foundation is a thin layer of wax on which hexagons are formed using a press (they will serve as cells for honeycombs). When the frames are ready and the wire is stretched, the artificial foundation is attached using a pattern. Typically the dimensions of the pattern are as follows: 295x450x30 mm. The part is stretched onto a board with a fold applied, and thanks to the pattern, the correctness of the folding is determined.
Expert opinion
Ponomarev Sergey Stepanovich
Beekeeper with 30 years of experience, Candidate of Technical Sciences
The frame is expanded by hanging foundation on it. In this case, you need to ensure that the upper rows are filled without fail, otherwise the insects will begin to form honeycombs across.