The top entrances in hives are opened in the spring, allowing bees to enter and exit through the top. In the warm season - summer and late spring, the lower entrance slot is also used.
By the time of wintering, it is tightly closed with a valve, and the upper entrance holes are left completely open - the bees themselves reduce them as needed.
As for multi-body systems equipped with tap holes in each body section, adjustment is made taking into account the following points:
- when raising brood in the same building, be sure to open the entrance hole;
- When placing the body section for commercial honey, the tap holes do not open.
This adjustment is due to the fact that the entrance in the hive determines the location of the brood. The queen always sows near the entrance hole, and the nectar is stored by flying insects in the part of the comb furthest from her.
Important! When adjusting, maximum attention is paid to the strength of the bee colonies. Much of this issue can be decided empirically.
For example, in a weak colony, by nightfall the bees weaken their security at the entrance, which attracts thieves. This means that the gap at the bottom needs to be covered. The removal of a strong bee colony (“beard” on the arrival board) indicates stuffiness inside the hive - all cracks and holes must be opened wide.
What types are there?
As you already understood, hive entrances come in a variety of shapes. Trying to find a more convenient option, beekeepers made them round, square, rectangular and even triangular. In addition, they attached importance to the location: vertical or horizontal, above or below. As it turned out, there is no ideal option, since each option had its pros and cons. It all depends on the bees, their family and many other additional factors.
- Round - this form of taphole is considered universal and the most common. Many beekeepers are sure that this particular shape allows bees to fly out and fly into the house comfortably. It is placed depending on the evidence itself: in the middle, at the bottom or at the top of the case.
- Square - this shape is rarely used and most often in southern latitudes.
- Rectangular - this entrance is also chosen mainly by beekeepers in the southern regions, as it allows for good ventilation. They are located both above and below.
- Triangular - this shape resembles a natural hole in a tree when bees make their own entrances. Many people use this form, bringing their apiary closer to natural conditions.
- Full Width – Full width wall openings are used in warm climates as they are difficult to maintain adequate heat in the winter. However, today this is exactly the form they make in Dadan’s multi-corpus evidence. It has many advantages, mainly related to the convenience of bees. In addition, it allows insects not to waste energy on ventilation in hot weather. It is most often located at the bottom of each case.
Upper and lower entrances
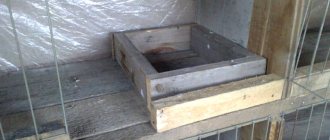
Location is very important. The lower holes are made at the level of the bottom of the hive. It is this entrance that can be considered the main one, since it plays the main role. It is often called garbage, as bees use it to remove dead bodies and debris.
As for the upper entrances, they are often available in winter. They are made in two types: round with a diameter of 25 mm and longitudinal 120x10 mm. Such holes are made approximately 4-5 cm below the upper edge of the body. Created to a greater extent for ventilation, good air exchange, and also as a supplement during intense training.
Advantages of the Dadan hive
Over the past century, the vertical structure for the apiary, developed by the French beekeeper, has not lost its relevance. It is used in small farms. The Dadan hive has many positive qualities:
- availability of materials, ease of manufacturing and assembly of modules;
- frame strength;
- keeping the nest warm;
- ease of inspection and replacement of frames;
- the ability to assemble the most convenient design from individual parts.
The peculiarities of the beekeeping methods used are associated with the large size of the nest frames. It is difficult to fill the free honeycombs with food before wintering the swarm, or to move the module.
Construction of Dadan-Blatt hives
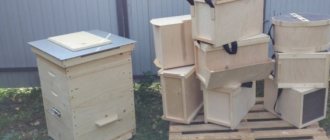
At the bottom of the prefabricated structure, mounted on a stand, there is a nesting housing with holes on the front wall. Near the lower entrance, a bar is attached outside for the bees to land. Most often, 1 body is used in Dadan hives. Up to 16 foundations are installed inside, the standard number is 10-12.
At the beginning of the honey collection, a store is located between the building and the roof. A superstructure with half-frames is necessary to accommodate the nectar collected by bees. During active honey collection, 1-2 more stores are temporarily added. Some of the frames are taken from them as they are filled, replacing empty honeycombs.
During wintering, an underroof is usually placed on the nesting module, and even higher, a roof with ventilation completes the structure.
Construction of multi-body hives Dadan
The version of the house, in which 2 nesting modules are installed one above the other, usually contains 8-10 waxed frames to lighten the weight and reduce the size of the frame. If necessary, a store is located above these modules, but more often - a roof.
Multi-body Dadan hives are usually used to obtain layering from a large bee colony or to organize a common wintering for 2 weakened swarms. A lattice is installed between the nesting parts to separate the families.
https://youtube.com/watch?v=vR2zMg7EWSo
Close in 6
What is the difference between Dadan and Ruth?
Langstroth-Ruth Hives
Vertical hives developed by famous beekeepers are a bit similar. However, in the Dadan-Blatt design, the magazine frames are 2 times lower than the nest frames (14.5 versus 30 cm). Modules of different heights cannot be swapped; work is carried out only with honeycombs.
The dimensions of the frames for the Langstroth-Ruth hive differ from those of Dadanov. Their height in the nest and magazine is 23 cm. Rearranging Ruth's bodies is easy to do, but in the spring during this process you can overcool the nest.
It is believed that the Dadan hive is suitable for beginner beekeepers and small apiaries. Ruth's designs are used by large farms, especially in the southern regions.
Close in 6
Weight of the Dadan hive with honey
The mass of empty foundation is about 0.5 kg. If the wax honeycomb is rebuilt, it becomes 0.1 kg heavier. A Dadan nesting frame filled with honey weighs about 4.5-5 kg, a store-bought one weighs 1.5 kg.
During the period of active honey collection, the body of a 10-frame hive has a mass of at least 45 kg, and a structure with 1 magazine reaches a weight of 60 kg. More spacious bee houses become even more massive.
What should the entrance be like?
An ideal hive entrance should be such that the structure can be freely ventilated in the warm season, as well as in the cold. The nuance is that in summer bees simply need good ventilation, but drafts are contraindicated. But in winter, the entrance should not allow the cold to pass through and must supply just enough air so that the insects can winter comfortably.
Hive entrances in winter
In total, there are two entrances to the hive - upper and lower, these two entrances are called entrances. Many beekeepers wonder what to do with hive entrances in winter. The key to successful wintering is a small loss of bees and the absence of dampness inside the structure. The entrance plays an important role in this; for example, in winter it must be insulated. But you shouldn’t be zealous either - bees emit carbon dioxide, which accumulates inside the hive.
Too much insulation can interfere with the circulation of oxygen and the removal of water vapor. This is how mold forms with dampness. A good winter entrance should prevent excessively rapid weathering of carbon dioxide, since bees, thanks to CO2, are half asleep in winter. Their bodies use vital resources more economically. With over-insulation (excess CO2), stuffiness and dampness arise, bees eat more, and with hypothermia, insects swarm and produce carbon dioxide even more intensely. In the end, the insects simply die.
Types and drawings of pavilions for bees
Upper entrance
Externally, the upper entrance can be of different sizes and shapes. Most often the size of this hole is adjusted with a (movable) block of wood. And for the winter it is completely covered with this block. For greater convenience, the upper taphole and the block with which it will be closed should be approximately the same rectangular shape.
A sliding taphole with a sliding frame is also popular. It is made according to the latch principle. You can also make the valve yourself from a piece of plastic. In winter, it can be closed tightly, since ventilation is carried out by getting air into the cracks of the hive. Particular care must be taken to protect bees from hyperventilation during the period from the start of wintering until the first days of February.
In the next period, starting from the end of January until the first warm days of spring, bees require more oxygen. This happens because the queens are laying eggs. Ventilation should be a little more active at this time. Therefore, the beekeeper can choose to open the upper entrance at intervals or keep it open all the time. But at the same time, the temperature inside the hive should be more than +4 degrees Celsius; at lower temperatures, the insects are in a state of complete stupor.
Most preferred types
Some beekeepers choose round upper entrances, citing the fact that this makes it easier for insects to fly out and into their home. Others prefer flat rectangular ones, proportional to the entrance to the hive. Full-length hive entrances are popular mainly in countries with warm climates.
In Russia, especially in Siberia and other northern regions, this design is not very popular with beekeepers. Of course, in winter it should be completely closed; you can use cork material for this. Sometimes, instead of a tap hole, they use a perforated sheet of metal (with holes about 8-10 mm in diameter), which is not covered with anything for the winter.
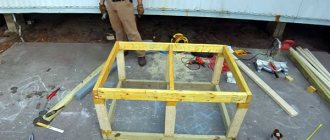
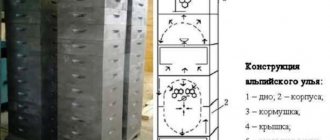
DIY Dadanovsky 12-frame hive
To assemble a 12-frame Dadan hive with your own hands, you will need exact dimensions and drawings. The design is characterized by increased dimensions. Sometimes houses are made with a removable bottom to make cleaning easier.
Drawings and dimensions of Dadan hives for 12 frames
The diagram shows a cross-section of a two-tier Dadan along and across the frames. Using the drawing with dimensions, it is easy to assemble the bodies, bottom, lid and other elements of the hive.
Dimensions and drawings of the Dadan hive for 12 frames with a removable bottom
There is no point in repeating the drawing of the Dadan hive for 12 frames with a removable bottom, since it is identical. The same goes for sizes. The structure is made according to a similar scheme, only the bottom is not completely secured.
Required tools and materials
The materials used are boards with a locking joint. Additionally, you will need nails, self-tapping screws, PVA glue, and sheet metal for roof lining. Tools are needed for woodworking: plane, saw, router, chisels, hammer.
How to make a Dadan hive for 12 frames with your own hands
After sanding the boards with sandpaper and cutting them into pieces of the required size, they begin to assemble the house:
- Frame. The bottom is assembled exactly like an 8- or 10-frame Dadan. The boards are connected with a lock, having previously been coated with glue. The corner joints of the body are tightened with self-tapping screws or knocked down with nails.
- The stores are next in line to be assembled. Inside all cases there are stops for frames.
- When the stores are ready, they begin to manufacture the under-cover part.
- For the entrance, a hole is cut in the body and a landing strip is installed.
- The last thing to make is the lid. The shield is similarly assembled from boards and covered with galvanization on top.
The finished structure is checked to ensure that all elements can be separated and folded freely. The final part is painting the hive.
Important! When making it yourself, it is important to maintain the correct size of the frame space in the Dadan hive. Experienced beekeepers advise making it high up to 20 cm so that the family can freely accommodate
In factory-made Dadans, the sub-frame space is often 2 cm, which is very small for a strong bee colony
Experienced beekeepers advise making it high up to 20 cm so that the family can freely accommodate. In factory-made Dadans, the sub-frame space is often 2 cm, which is very small for a strong bee colony.
Making hives for bees Dadan for 12 frames with a removable bottom
Dadan for 12 frames with a removable bottom is assembled according to a similar principle. The only difference is the lower part. The bottom is assembled from a board in the form of a pallet. The shield is inserted inside the body using folds, allowing you to quickly assemble and disassemble the Hive. The thickness of the removable bottom is 30 mm, and the thickness of the trim is 35 mm. Using liners, an additional taphole is formed. For the winter, they are replaced with other liners with smaller holes to retain heat inside the hive.
Inside the house with a removable bottom, the sub-frame space is kept up to 25 cm. The front part of the bottom protrudes beyond the boundaries of the body by 5 cm, forming a landing board.
Features of keeping bees in 12-frame hives Dadan
The features of caring for bees in 10 and 12 frame hives are the same. The design differs only in the number of frames. For the 12-frame Dadan, it is additionally worth considering the Lonin method, which is also suitable for its brother for 10 frames.
The technology requires the following actions:
- the period from March to the end of April is used to increase the width of the nest;
- from April to May, dividing grates are installed to help expand the nest downwards, but the brood part is not disturbed;
- in the upper sections, until May 15, the queen cells are cut off, or they are allowed to breed a new queen;
- Stores on the hive are increased before the start of honey collection.
When all the honey has been pumped out at the end of the season, the hive is prepared for wintering.
According to the principle of keeping bees, there is no particular difference between hives with 10 and 12 frames. The first version of the house is easier to carry and is more suitable for a weak family. The second version of the house is more stable due to its square shape. The magazine can be placed 2 weeks late, and it can be placed perpendicular to the frames of the nest. The downside is the heavy weight.
in winter
Holes for bees in winter are a topic of debate between experienced and novice beekeepers. Successful wintering of a bee colony is reflected in a small loss of community members and dryness inside the hive. The entrance has a significant impact on these indicators. It needs to be insulated for the winter, but this must be done within reason. Bees also breathe and therefore produce carbon dioxide. If you clog the holes, it will accumulate inside the nest. Overly zealous insulation can interfere with the circulation of oxygen and the removal of excess moisture. Because of this, an accumulation of dampness and mold can form inside the hive.
At the same time, the entrance in winter should prevent too much carbon dioxide from being removed from the hive, because thanks to this gas the bees are in a state of half-asleep. If you over-insulate or plug the hole, the bees will eat more, and if not enough, the bees will freeze, curl up in balls and produce even more carbon dioxide. As a result, the insects will die.
The history of the Ukrainian sun lounger
Beginning in the mid-1860s, bee lovers sought the best frame and shape for the hive. Some preferred narrow-high frames, others preferred low-wide ones.
The development of the hives was carried out by an engineer from Poland, Kazimir Levitsky. His improved designs did not have an extension or a second frame and were easy to use. For wintering, 6-7 honeycombs were left, which were filled with food. This was enough for one family for the winter. At the beginning of 1918 in Kyiv, at a congress of Ukrainian beekeepers, it was decided to call the hive a Ukrainian lounger.
The simplicity of the design allows you to practice bees as a hobby. This factor has made the hive one of the most popular among beekeepers.
Location and dimensions
The size of the entrance directly depends on the time of year, the amount of food reserves, the strength of the bee nest and its placement in the hive.
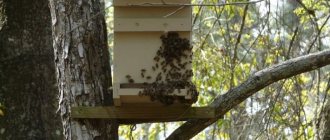
In their natural habitat, bees inhabit tree hollows. The entrance here is always located opposite the nest to avoid it being walled up when it falls to the floor of winter dead.
As for artificial keeping in hives, here the bees have the choice of using the lower or upper entrance. And more often they give preference to the upper entrance, as in the wild.
The upper entrance hole should be located approximately at an equal distance from both the ceiling plane and the floor. The diameter of the hole in the hive is 25 millimeters. If necessary, the hole is sealed with a wooden stopper.
The lower entrance slot is located at floor level. If we are talking about a multi-hull system, the lower entrance is the one that will be located at the very bottom. The size of the entrance in the hive depends on the type of structure - there are slots across the entire width of the body, adjustable with liners in the winter/summer position.
Linear annual calendar of a beekeeper
Side (corner) entrances are made only in hives of a special design, designed to change the position of the frames relative to the entrance - cold or warm drift. The Ukrainian lounger, for example, has this feature. The size of the side slot here is 100 in length and 12 mm in height.
In store extensions designed for a half-frame, there is no need to make an additional entrance.
Any slotted tap hole can be adjusted in length using a valve made of metal or wood.
Dimensions and placement in the lounger
For one body, two holes are cut in the lounger along the front wall, equipped with landing boards and latches.
For two-mother housing in beds (placement of a donor family and a layer or nucleus under one roof), it is necessary to equip two sets of lets:
- At the bottom, the front wall does not reach the floor by 12 mm. This gap is divided by a fixed bushing.
- 25 mm holes are drilled at the top or slots 100 mm long are cut. Each upper entrance will have a separate arrival board. The boards must be different in color! Sometimes the entire hive is painted two different colors.
Dimensions and placement in a multi-body system
In multi-hull hives, there are entrance holes in all sections, with the exception of special designs that provide only a lower entrance.
A 25 mm hole is drilled in the center of the front case walls at a height of 125 mm. A wooden plug (sleeve) is supplied with it.
The lower entrance slot is arranged in the bottom trim. More often it occupies the entire width of the front wall and is adjusted by an insert with dimensions of 20 by 20 mm. The length of the gap varies depending on the time of year: in winter it is reduced to 100, and in summer it opens to 375 mm.
The upper entrances in such hives serve as additional ventilation. And during honey collection they are actively used by bees.
Dimensions and placement in a two-body system
In double-hull hives, the lower entrance slot is formed by the front wall, which does not reach the floor level by 15 mm. The entrance dimensions are regulated by two valves. Above the slot there is a sleeve through which dead air is removed and ventilation is enhanced.
In the upper body section, in the center of the front wall, 70 mm from the top, one 25 mm hole is drilled, complete with a bushing.
Dimensions and placement in a 16 frame hive
In an insulated 16-frame structure, the space between the walls is closed with a liner - the taphole gap must be continuous at the cuts.
This type of hive is equipped only with slotted entrances 10 mm high:
- bottom gap length – 250 mm;
- top length – 100 mm.
Each of the entrances is equipped with gate valves and arrival boards. The bottom support for the board is a block 400 mm long and with a cross-section of 30 by 30. The space under the frames is 20 mm.
Dimensions and placement in the Ukrainian lounger
Ukrainian sun loungers hold 20 hundred frames each. They are designed for two-queen bee colonies. They differ in the original placement of the taphole on the side wall (at the end).
Location:
- One side tap hole is directed by the entrance to the end part of the honeycomb frames. Equipped with a gate valve and an arrival board. Size 100 by 12 mm. It is located 35 mm from the bottom of the sidewall and 170 mm from the corner edge of the hive.
- The two lower front entrance slits are 200 mm long and 12 mm high. Entrances are made 100 mm from the corners of the house.
- The two upper entrance slits are located strictly above the lower ones, 160 mm from the corners of the hive and 340 mm from the lower cut of the front wall. Dimensions 100 by 12 mm.
The side entrance most often contains layering. After the old and young bee colonies have united, this entrance is closed tightly.
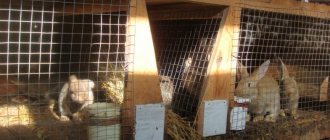
Hive Lezhak
The simplest and most common type of hive, usually designed for 24 frames, less often for 16 or another number. A structure such as a beehive does not require complex structures, is easy to maintain, and provides large free space for the successful development of families. It looks like a rectangular case, inside of which there are:
- stationary bottom;
- liner;
- roof;
- frame;
- frames for queens.
A spacious, simple hive that has a beneficial effect on the development of offspring and a solid harvest. Crowded nests oppress families and reduce their productivity. Therefore, many beekeepers prefer to equip their apiaries with beehives.
Varieties
According to many professionals, a 24-frame hive is a convenient home for the development of families and for maintenance. The appearance of such a hive is a small box with dimensions of 450x390 mm. Inside the hive there is a solid bottom on which two protruding bars are nailed, serving as a support for the landing area. There are other types designed for 16, 20 frames.
There are two folds installed in the upper part of the body. Frames are attached to one. The other is used for installing ceiling planks. There are several dividing boards with which the space is divided into several compartments. The roof is gable and simply fits onto the body. Having a little carpentry experience, making such a hive yourself is not difficult. The presented image makes it possible to understand the structure of the sunbed hive.
Selection of materials
Prepare the necessary materials in advance. For this you will need:
- plywood or pine boards treated with an antiseptic;
- fasteners;
- roulette;
- screwdriver;
- pliers.
Choose well-dried boards without traces of knots for the body. During service they will not be deformed. Some beekeepers use polymer materials, but bees do not always like this.
Advantages
In nature, bees create spacious homes. The collected honey is stored in the upper part of the natural nest, and cells for brood are created below. Just below there are free honeycombs where the bees carry nectar and keep it just in case. When creating hives for apiaries, people have always strived to make them as close as possible to natural nests. Has advantages:
- the ability to contain two families in one hive;
- does not present difficulties in caring for and harvesting;
- a large internal space allows bees to work more productively and actively develop families, create large food reserves for the wintering period;
- the space stimulates the uterus to a high level of egg production;
- serves as a reliable home in adverse weather conditions.
Design Features
You can make a gate barrier with your own hands, following the recommendations, dimensions and step-by-step instructions:
- for the manufacture of valves you will need wooden slats;
- if it is not possible to use wooden slats, then you can use galvanized plates made of plastic, aluminum or hard rubber;
- the taphole valves must be inserted into the appropriate grooves;
- to ensure safe transportation of the hives, as well as to prevent the opening of the entrance, it is important to use reliable and durable fixation;
- The adjustment feature of all valves directly depends on the type of taphole barrier. It can be lower or upper. If you are making a slotted taphole at the bottom, then you need to use valves for adjustment. If the upper type is used, then the round entrance is closed with a pear-shaped pinwheel, which can be wooden or aluminum. It is recommended to fasten using a self-tapping screw;
- if a slot-type type is used at the top, then it is necessary to use valves.
Apilift in beekeeping. How to make?
Making a barrier for a bee hive with your own hands will not cause any difficulties if you listen to the recommendations of professional beekeepers.
Hives “Dadan-Blatt”
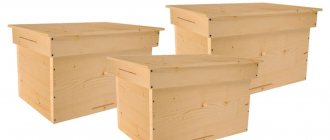
History has revealed attempts to keep honey insects since the middle of the last millennium. Decks were used. In the 19th century, professionals began to think about creating devices for transportation and versatility. An emigrant from France, Dadan came to the conclusion that the most rational would be a 10-frame hive for bees with dimensions (hereinafter in all drawings everything is given in mm) 450x450. He did not have enough remaining years of his life to complete his research. What was started was continued by another American, originally from Switzerland, Blatt. He patented the brainchild, nobly mentioning his predecessor. Officially, their first-born was given the name Dadan-Blatta.
In principle, the classic twelve-frame standard with a frame of 300x450 mm is generally accepted. However, these also include 8- and 10-frame beehives. Some beekeepers prefer weanable bottoms. They are easier to change and clean
It is important to note that detachable bottoms for bee hives require special care: precision manufacturing of the component parts (to avoid blowing and moisture penetration). Others prefer tightly nailed bottoms
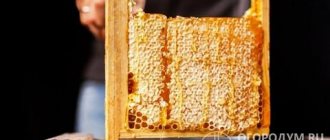
Some people like single-case ones with 2-3 magazine extensions. Such hives with finding bees are subject to a man with average static physical indicators. Convenient to lift and rearrange. Store-bought half-frames are filled with solid honey, without bee brood. Therefore, time wastage is greatly reduced.
What should a summer house be like?
The entrance must meet a number of generally mandatory requirements. These include:
- free access of bees to the environment;
- high-quality ventilation of the bee nest in high temperature conditions, removal of excess moisture in winter and during a large supply of nectar;
- arrangement of the entrance in such a way that rodents cannot get inside the hive;
- the presence of a special plug that allows you to adjust the width of the tap hole. For example, the entrances in hives in the spring have a clearance of no more than 5 cm, and in the honey-bearing season they can open up to 15 cm.
General information
The bee entrance is a hole made from the front of the hive, it is required to perform such functions:
- protects insects from rodents;
- allows the bees to have a free exit;
- participates in the organization of natural ventilation;
- makes it possible to adjust natural air exchange in the hive;
- helps to quickly and conveniently clean houses from dirt and bee pestilence.
Minelayer
Hive gates provide a protective barrier against rodents and thieving bees. They are also used as a summer limiter when transporting an apiary or treating fields with chemicals. Attached to the tap holes.
In the standard version, these are two metal plates, one of which has cutouts for the passage of insects. The plate with holes is movable - it fits into the grooves of the upper fixed part of the barrier.
Material – black tin or galvanized sheet iron (steel or aluminum).
Dimensions (in mm):
- 250 length;
- 31 width.
Round from old plastic
To save on this equipment, you can assemble entrance barriers for hives with your own hands from scrap materials. For example, used plastic cans.
To do this, purchase one factory round barrier, which is used as a template. Sharp scissors are suitable for cutting out blanks. The holes are drilled with a drill and sanded with sandpaper.
This simple model is suitable for upper tap holes. It can be used instead of a bushing (cork) to limit the summer and protect against thieving bees during the off-season.
Rectangular made of metal profile
On the lower entrance slots, which have a length that spans the entire width of the hull, homemade metal gratings are used, secured with self-tapping screws.
An angle profile 23.5 by 23.5 made of steel 0.3 mm thick is suitable for the same purpose. The holes in the profile do not let rodents through and at the same time do not interfere with the work of bees.
This building material is sold in 3-meter sections. After cutting out the parts of the required length, the homemade barrier is inserted into the taphole and fixed to the bottom with self-tapping screws and a press washer. If the part fits tightly enough between the bottom and the front wall, you don’t need to use screws at all.
A U-shaped profile for drywall with 7 mm holes is well suited for the same purpose. A fence with a “corridor” is made from it, protecting the hives from tits and being clogged with snow. To clear the snow, it is enough to lift the structure - on one side there is a slot that works on the principle of a hook.
This is the simplest and cheapest solution for protecting bee housing from pests. From eight standard-length corner profiles you can make up to 50 apiary barriers!
Share a link to the article on social networks:
Flaws
The main disadvantages of 16 frame sun loungers are:
- Large size, heavy weight and inconvenient operation;
- Reduced rate of increase in bee strength compared to hives with 12 frames;
- Reducing the volume of honey collection, especially in spring;
- High risk of swarming - separation of the family into parts;
- The complexity of care increases if 2 families are accommodated;
- Impossibility of use in nomadic beekeeping.
Also, bee colonies exclusively develop the first 12 frames, so the level of development of the swarm and the volume of honey collection between 12 frame and 16 frame hives are the same, which increases cost inefficiency.
Content Tips
Typically, 16-frame dadan hives are used to care for 1 bee colony, the care process is simple compared to other types. There is no need to replant bees after wintering, as there are no problems with fluid accumulation and mold growth.
After the first spring flight of bees, the entire apiary of 16-frame Dadan hives should be inspected for the condition of the swarm in order to remove dead individuals.
It is important to check the amount of food reserves remaining after wintering. If they are absent, honeycombs and bee bread should be placed; Remove empty and unused frames. Afterwards, do not disturb the insects for 2-3 weeks.
After the beginning of the flowering season, it is necessary to place 4 frames with a gradual increase in their number in proportion to the strength of the family. When all the frames are filled out, proceed to the division of the family.