23 May
2018Chicken cutting: schemes, standards, technologies
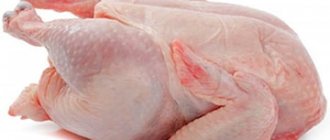
Chicken meat is supplied for cutting in the form of gutted and semi-gutted carcasses. In the first case, it is a bird without a head, neck, internal organs, legs up to the tarsal joint, but with fat in the lower abdomen, lungs and kidneys. Semi-gutted carcasses - without cloaca, intestines, crop, oviduct.
Depending on the technology of cutting chicken, there are three ways to obtain semi-finished chicken products:
- Waste-free. The most economical and profitable option, since semi-finished products are obtained from the carcass for main courses, broths, and soups. This type of chicken cutting is used in automated production.
- Portioned. All excess is separated from the carcass, and the resulting semi-finished products are used for grilling, frying, and stewing. Pieces (portions) can be either symmetrical (classic method) or equal in size.
- Boneless. The meat is completely separated from the skeleton. The resulting fillet is ideal for rolls, minced meat, and gourmet dishes in restaurants.
Why is it important?
The quality of carcass processing directly affects the taste of the meat. If the intestines or spleen are touched during gutting, the organ fluid will flow out and be absorbed into the pulp. Such chicken will have an unpleasant odor and bitter taste.
In addition, professional cutting skills allow you to use parts of the carcass as economically as possible.
Knowing the nuances, it is easy to make preparations for a soup set, meat for frying, baking, salads, separate fillets for minced meat and pieces for feeding animals.
For farmers, this is also an undeniable plus, since semi-finished products sell better than whole chickens.
Proper cutting is also rational from the point of view of allocating space in the refrigerator and freezer. The carcass takes up a lot of space, while even pieces are easily laid out like “Tetris”.
Finally, an organized, streamlined process takes less time and stress. Perfected movements are performed quickly, a minimum of waste eliminates lengthy cleaning.
For equal portions
If previously it was common practice to buy separate sets of chicken parts, and you didn’t have to deal with cutting up chilled carcasses, convenient step-by-step instructions for portioned pieces will come in handy. At first, such a process may seem complicated and incomprehensible, but this is only at the start, and on the second attempt no difficulties will arise.
Cutting poultry into portioned pieces involves obtaining 8 parts and a back. This is very convenient, because you don’t have to spend money on buying ready-made semi-finished products. Cutting process step by step:
- Place the carcass breast side up. Let's start separating the thighs. You need to cut the skin with a knife - for convenience, pull the leg away from the body. Hold the leg in your hand and run the knife along the skin at the base of the thigh. Confidently break off the thigh, moving it to the side - the joints and protruding white bone will be visible.
- Cut the joint at the white bone. Move the knife in the same direction - the thigh will completely move away from the carcass. Repeat the same steps with the second leg.
- From two legs you will get four portions - 2 drumsticks and 2 thighs. To separate chicken legs, use your finger to feel the joint between the bones and press with the blade of a knife.
- The next step is cutting off the wings. Repeat the same steps as with the thigh. Holding the wing with your hand, cut the skin, then bend the wing to the side and cut the joint under the bone. The same is repeated with the second wing.
- Now separate the chicken breast from the back. It is recommended to use kitchen scissors or a sharp knife. The carcass is placed on its side, back up. There is a fat strip on both sides under the breast; they begin to cut it from the bottom up. Next, the carcass is cut to the very top on the left side. Similar actions are carried out on the other side of the chicken carcass. This will separate the back of the chicken from the breast. The back is used for cooking broth.
- Next, you need to start cutting the chicken breast into portioned fillets. First, cut the breast in half, turn it skin side up, and make an incision with a knife exactly in the middle to rest against the bone.
- The breast bone is considered one of the hardest, so you will have to make every effort. If you press well, you will be able to cut the breast along the bone into two equal parts.
- Next, carefully separate the fillet from the rib bones and remove the skin. The fillet is folded to the side and cut off from the bone with the tip of a knife.
This way we managed to get 8 portioned pieces of chicken and a back for preparing chicken broth.
The man in the video shows how to quickly and accurately, without mess, cut a chicken into portioned pieces in his kitchen:
What comes before cutting?
Before hitting store shelves and tables, a chicken carcass goes through several stages of preparation.
The following are produced sequentially:
- Slaughter. A fattened chicken is caught by the legs, placed in a confined space, and given water to completely cleanse the intestines. The bird is then killed by electrocution or mechanical means (cutting off the head or cutting the arteries).
- Bleeding. The bird's body is hung upside down so that all the blood drains into the prepared container.
- Plucking. The feather covering is removed mechanically or manually from the still warm carcass and washed.
- Evisceration. The internal organs are removed from the chicken; cutting The resulting carcass is cut into portions.
Preparatory process
Before it hits store shelves and tables, the chicken carcass undergoes several stages of preparation. The sequence is done in this order:
- Poultry slaughter. The fed bird is caught, held upside down, placed in a tight space and given water, which allows the intestines to be completely cleaned. Then they use electric current (in industrial farms) or cut off the chicken's head and cut the artery.
- Bleeding the carcass. The chicken carcass is hung by the legs so that the blood drips into the placed container.
- Feather plucking. The bird is first scalded in boiling water, which makes it easy to remove all the feathers from the carcass.
- Evisceration of the entrails. All internal organs are removed from the carcass.
- Cutting into parts. The resulting carcass is cut into portions.
How to choose chicken?
It's better to buy chilled chicken. So you will pay only for the weight of the carcass itself: unscrupulous producers pump chickens with water before freezing to increase weight.
In addition, the freshness of chilled meat is easier to determine.
Express check of freshness of chilled chicken:
- Examine the chicken. If there are scratches or bruises on the carcass, the skin is damaged or has yellow-gray spots, it is better to refuse the purchase.
- Pay attention to the color. The age of chickens is determined by skin color. In young ones it is soft pink, with distinct veins. The skin of an old chicken is thick with a yellowish tint.
- Touch the carcass. Press your finger on the breast: fresh meat is elastic, it will quickly return to its previous shape. If a dent remains after pressing, this is a sign of damage to the product.
- Smell the carcass. Fresh chicken just smells like raw meat. Avoid buying chicken that smells like medicine or other off-flavors.
We take out the breast fillet
Very often, chicken fillet is used for salads or diet food - it has low calorie content, is rich in proteins, and saturates the body.
But when buying a whole chicken, housewives are sometimes faced with the problem of removing chicken breast from the carcass. But this is a simple process that does not require much time:
- An incision is made along the chest ridge, pressing the knife against the bone.
- Carefully trim the meat from the frame.
- Separate the other half of the brisket from the back.
Preparing the carcass for cutting
Tools
Before the cutting process, be sure to prepare the tools and work surface.
Gutting a carcass is considered a dirty process; it is recommended to cover the surface of the table and all surrounding objects with oilcloth. It is advisable for the hostess to wear an apron and rubber gloves on her hands.
To cut poultry you will need the following tools:
- Cutting board. Working with chicken is not complete without using a cutting board. For cutting meat, it is recommended to choose a hard plastic board. Wooden surfaces absorb odors and are therefore not suitable for this task. Or, if there is no other board other than a wooden one, it is advisable to wrap it with durable film before work.
- Capacity. Be sure to prepare a container - the elongated giblets or ready-made portioned pieces will be placed in it.
- Knives. There are special knives for gutting and cutting - they have curved ends. If such a tool is not at hand, wide and narrow knives made of thick steel and with a strong handle will do.
- Carving fork. With its help, you can carefully remove the heart, lungs, intestines, crop, liver, and stomach from the carcass. The fork allows you to do everything quickly, without putting any effort, without contaminating the surface.
- Kitchen scissors. They are used to cut the tendons of wings and legs. If there are no such scissors, it is quite acceptable to replace them with a sharp knife.
Having a set of kitchen tools on hand is ideal when cutting up chicken. But it is not always possible to purchase a kitchen set.
For this reason, it is permissible to use several knives of different sizes. Tools must be well sharpened and washed.
How to gut and remove offal?
After plucking the feathers, you need to prepare the chicken carcass for cutting. To do this, the bird is thoroughly cleaned of internal organs.
If there are giblets in the carcass, this will lead to rotting and spoilage of the chicken, and in the end you will have to throw it away and it will be unfit for consumption.
Before slaughter, the bird should not be fed for 12 hours so that there are no undigested foods in its intestines, as food residues are completely excreted in the feces.
This facilitates the further process of gutting without any difficulties.
After removing the internal organs, they do not have to be thrown away; they are useful for preparing poultry feed - they are washed and thoroughly crushed.
How to gut it correctly:
- Remove the anus. The chicken carcass is turned over on its back, using a sharp knife, they begin to cut out the anus in a circle, without inserting the blade deeply so as not to pierce the insides. If the intestines accidentally cut through, the remaining contents will come out, causing the meat to completely deteriorate and the chicken to be unfit for food. The anus is not pulled out.
- Make an incision by running the knife from the anus to the keel. This process is carried out equally carefully so as not to damage the bird's intestines.
- Get rid of the entrails. The entrails are removed into a previously prepared container. The intestines are carefully removed by lightly pulling the anus. After removing the intestines, they begin to cut out the stomach and liver. The liver is cut out without separating it from the gallbladder - it is removed afterwards. This minimizes the risk of crushing the bubble and spoiling the product.
- Get the goiter. The bird's crop is usually empty at the time of slaughter. But if the animal was killed without preparation or died as a result of an accident, and its crop is full, to remove it, you need to make an incision in the skin on the neck and pull out the organ through it.
- Remove the genitals. When cutting a chicken, the ovaries are removed, and the testes of a rooster are removed. This process requires a sharp knife.
- Get the heart. It is cut out with the same knife as the genitals.
- Rinse the carcass. After all the insides of the carcass have been removed, it must be rinsed under cold running water.
This gutting system is great for quickly cleaning the carcass and further using the bird for cooking.
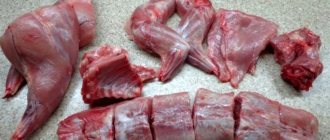
For 8 parts
The most economical option is to purchase a chicken and cut it into pieces. In this case, it will be possible to cut the bird into 8 parts; they will later be used for boiling, frying or baking in the oven. An additional bonus when cutting is getting chicken broth for making soups and borscht.
For the cutting process, be sure to use a well-sharpened knife so that there are no difficulties when cutting off parts, cutting the skin and tendons.
After purchasing chilled poultry that has not been frozen, begin the cutting process:
- Pull the leg slightly away from the body of the bird and cut the skin with a knife, then the meat to the joint. Turn the thigh to the side - this will help the two bones separate. Cut off the leg from the body. Repeat the same with the second leg. Divide the resulting parts into thigh and drumstick. At the junction of the two main bones, cut with a knife. This makes 4 delicious parts.
- Place the chicken on its side, cut through the rib bones and cut the breast and wings from the back. After these manipulations, we managed to get a chicken breast and back for the broth.
- Transfer the breast to a cutting board, skin side up, cutting off the skin at the neck area. Using your hands and a knife, remove the cartilage bone in the center of the breast. Cartilage can also be used to make broth. Cut each breast half into two parts, just below the wing. This made 4 more meat parts. Cut off the top of the wing and use it for broth.
As a result, we managed to obtain 8, almost identical pieces of meat - they will be used to prepare mouth-watering dishes. Cutting a chicken is not a difficult process, especially if you practice regularly.
If you need to cut the chicken into 8 pieces, but the instructions are very difficult to understand how to do this, then a video will come to the rescue, where everything is explained in detail:
How to butcher at home?
Classic way
If you practice, then over time it will take much less time to cut the chicken, and the pieces will turn out neat and the breast will be whole.
The housewife will be able to learn how to do everything carefully in order not only to leave the surface on which she works clean, but also to minimize waste.
A classic cutting method is proposed.
Follow the instructions:
Wash the carcass well, dry it a little, and pat dry with a kitchen towel.
Place the carcass on the board so that the back is down. Grab the leg and pull it in the direction opposite to the bird’s body, cut the skin.
Hold the carcass with one hand, and grab the leg and thigh with the other. Separate the thigh from the carcass, turning it slightly upward. This promotes separation of the joints and the release of the femur.
Now you can easily cut off the leg and thigh by turning it inside out and turning the carcass onto its back. Make a cut down to the tail to completely separate the leg.
Cut the second ham in the same way. Next, start separating the wings. Feel the shoulder joint with your hands - it connects the wing to the carcass. Cut through it.
Separating the breast from the back is not difficult, as long as you cut in the right direction. It is determined using a white fat line.
Cut the breast from the other side in the same way.
There is cartilage along the entire length of the breast - you need to get it out. To do this, lightly cut the top of the brisket, where there are two bones. Cut between them until the knife hits the dark cartilage.
You can't do this without using your hands. In order to remove the bone with cartilage without damaging the carcass, pry this bone with your thumbs, forcefully push it up and push your fingers under it.
Without removing your fingers, move down the breast, pushing and squeezing the cartilaginous bone.
The cartilage is almost completely removed. To complete the process, grasp the cartilaginous bone and gently pull it.
The process of removing bone and cartilage is complete.
Divide the breast into two parts.
On the inside of the chicken breast there are rib bones - they are removed by cutting them off with a knife. The chicken fillet is left untouched or cut into two parts.
The chicken leg is divided into two parts - drumstick and thigh. They cut at the joint.
The wings are also cut to make them more attractive and provide convenience for further use.
As a result, according to this scheme, the housewife can get 8 or even 10 portioned pieces of carcass. As an additional bonus, the back and bones from the breast can be used to prepare aromatic chicken broth.
In half
Another popular way of cutting a carcass is halving. This method is especially suitable if you want to cook tobacco chicken.
They operate according to the following scheme:
- Place the carcass breast side up and hold the bird with your hand. Make incisions on both sides of the spine, which are then removed.
- Cut the breast bone (keel) and then unfold the carcass. The breast bone is removed by simply pulling it out of the flesh.
The chicken is left unfolded or divided lengthwise into two even parts, depending on what dish the hostess will prepare.
For 8 parts
The most economical option is to purchase a chicken and cut it into pieces. In this case, it will be possible to cut the bird into 8 parts; they will later be used for boiling, frying or baking in the oven.
An additional bonus when cutting is getting chicken broth for making soups and borscht.
For the cutting process, be sure to use a well-sharpened knife so that there are no difficulties when cutting off parts, cutting the skin and tendons.
After purchasing chilled poultry that has not been frozen, begin the cutting process:
- Pull the leg slightly away from the body of the bird and cut the skin with a knife, then the meat to the joint.
- Turn the thigh to the side - this will help the two bones separate.
- Cut off the leg from the body. Repeat the same with the second leg.
- Divide the resulting parts into thigh and drumstick. At the junction of the two main bones, cut with a knife. This makes 4 delicious parts.
Place the chicken on its side, cut through the rib bones and cut the breast and wings from the back. After these manipulations, we managed to get a chicken breast and back for the broth.
Transfer the breast to a cutting board, skin side up, cutting off the skin at the neck area. Using your hands and a knife, remove the cartilage bone in the center of the breast.
Cartilage can also be used to make broth.
Cut each breast half into two parts, just below the wing. This made 4 more meat parts.
Cut off the top of the wing and use it for broth.
As a result, we managed to obtain 8, almost identical pieces of meat - they will be used to prepare mouth-watering dishes. Cutting a chicken is not a difficult process, especially if you practice regularly.
No waste
If a housewife knows how to cut up a chicken so that there is no waste, she is a real smart person, because such an activity is an art. This option is considered the most profitable.
The process itself is simple and takes minimal time.
They operate according to the following scheme:
- Separate the legs. The carcass is placed on its back, grasped by the leg with one hand and pulled to the side, where its junction with the body is cut. With a sharp movement, turn the leg out of the joint and finally run the knife along the skin so that it is separated from the body.
- Separate the wings. Cut the shoulder joint, completely separate the wing, slightly pulling it to the side.
- Divide in half. Make a cut along the spine and in the middle of the breast of the carcass.
- Separate the breast and back. Run a knife along the junction of the ribs.
If you get a large carcass, each half of the breast is additionally cut into two more parts. Pieces of poultry are hidden in the freezer for storage.
For equal portions
If previously it was common practice to buy separate sets of chicken parts, and you didn’t have to deal with cutting up chilled carcasses, convenient step-by-step instructions for portioned pieces will come in handy.
At first, such a process may seem complicated and incomprehensible, but this is only at the start, and on the second attempt no difficulties will arise.
Cutting poultry into portioned pieces involves obtaining 8 parts and a back. This is very convenient, because you don’t have to spend money on buying ready-made semi-finished products.
Cutting process step by step:
Place the carcass breast side up. Let's start separating the thighs. You need to cut the skin with a knife - for convenience, pull the leg away from the body.
Hold the leg in your hand and run the knife along the skin at the base of the thigh. Confidently break off the thigh, moving it to the side - the joints and protruding white bone will be visible.
Cut the joint at the white bone. Move the knife in the same direction - the thigh will completely move away from the carcass. Repeat the same steps with the second leg.
From two legs you will get four portions - 2 drumsticks and 2 thighs. To separate chicken legs, use your finger to feel the joint between the bones and press with the blade of a knife.
The next step is cutting off the wings. Repeat the same steps as with the thigh. Holding the wing with your hand, cut the skin, then bend the wing to the side and cut the joint under the bone. The same is repeated with the second wing.
Now separate the chicken breast from the back. It is recommended to use kitchen scissors or a sharp knife. The carcass is placed on its side, back up.
There is a fat strip on both sides under the breast; they begin to cut it from the bottom up.
Next, the carcass is cut to the very top on the left side. Similar actions are carried out on the other side of the chicken carcass.
This will separate the back of the chicken from the breast. The back is used for cooking broth. Next, you need to start cutting the chicken breast into portioned fillets.
First, cut the breast in half, turn it skin side up, and make an incision with a knife exactly in the middle to rest against the bone.
The breast bone is considered one of the hardest, so you will have to make every effort. If you press well, you will be able to cut the breast along the bone into two equal parts.
Next, carefully separate the fillet from the rib bones and remove the skin. The fillet is folded to the side and cut off from the bone with the tip of a knife.
This way we managed to get 8 portioned pieces of chicken and a back for preparing chicken broth.
Boneless cutting
When it is necessary to prepare minced meat, meat rolls, or semi-finished products from pulp, the ability to separate meat from bones comes to the rescue.
It is important not only to be able to cut meat, but also to maintain the attractive appearance of the pieces. It is best to remove the bones from the entire carcass without damaging the skin.
Farmers who supply chicken products to restaurants may face such a request.
Such skill is appreciated and considered a plus for the seller.
For boneless cutting, use the sharpest possible knife. The process provides two cutting options: open and closed.
Public method
For the open method of separating meat from the bone, follow this scheme:
- The skin is incised vertically along the entire back. It is acceptable to start with the breast, but this may cause damage to the carcass. The bones in the back are located very close to the skin and can tear it if pressed.
- Using a knife, carefully remove the meat from the skeleton, moving from the tail from bottom to top. The ischium, wing and hip joints are broken to expose the ribs. Use your hands to help move the pulp.
- Free the femur completely by trimming the veins in a circular motion. Move the meat with your fingers.
- Carefully scrape the flesh down to the outermost cartilage, maintaining the connection between the thigh and body. Having reached the bottom point, cut the upper joint.
- Turn out the resulting “stocking” and repeat the same on the other side.
- Trim the ribs using scissors. Get rid of the keel and fork bones by trimming the remaining joints.
- Leave the wings on the carcass along with the bones or cut them off from the skin.
The process is over.
Private method
In order to use the closed method of boneless cutting of a carcass, follow these recommendations:
- Through the lower hole in the carcass , through which the bird is gutted, cut the tail and expose the ischial frame. The incision is made in jerky movements, moving up to the upper femoral cartilage. For convenience, it is permissible to slightly tuck the skin and pulp during the process. Next, use a blade to carefully cut the joint at the junction.
- The veins are trimmed along the entire circumference of the ham. Where the knee touches the shin, a fracture of the joint is made. The same machinations are carried out on the second side of the carcass.
- Then you need to trim the meat from the ribs to the neck, still tucking in the skin with the flesh already separated.
- The neck is sharply pulled out with hands. The breast fillet is cut off from the body and the wing joints are broken off.
- The fork-shaped bone must be removed , and the flesh of the drumstick must be cleaned around the circumference, cutting the ligaments. The bones are cut off in front of the cartilage, the skeleton is removed and the skin and meat are turned out.
The closed version of cutting meat is great for stuffing a carcass. This way you will be able to prepare incredibly tasty and presentable-looking dishes that will surprise your guests at the festive table.
Cutting for rolls and shish kebab
To prepare a delicious dish - a whole chicken roll, you will need to use a closed boneless cutting method.
Even if the housewife wants to cook the roll in cling film, or bake it with vegetables, one way or another, removing bones from the carcass is a necessary procedure.
You can prepare chicken kebab from individual parts of the bird. To do this, they use the method of portioning the carcass into 8 or 9 parts - they are marinated and then grilled.
If you use skewers or want to enjoy boneless kebab, the open method for boneless cutting of poultry is suitable. Then simply cut the chicken breast into pieces of the required size.
How to get breast fillet?
Very often, chicken fillet is used for salads or diet food - it has low calorie content, is rich in proteins, and saturates the body.
But when buying a whole chicken, housewives are sometimes faced with the problem of removing chicken breast from the carcass.
But this is a simple process that does not require much time:
- An incision is made along the chest ridge, pressing the knife against the bone.
- Carefully trim the meat from the frame.
- Separate the other half of the brisket from the back.
In half
Another popular way of cutting a carcass is halving. This method is especially suitable if you want to cook tobacco chicken. They operate according to the following scheme:
- Place the carcass breast side up and hold the bird with your hand. Make incisions on both sides of the spine, which are then removed.
- Cut the breast bone (keel) and then unfold the carcass. The breast bone is removed by simply pulling it out of the flesh.
The chicken is left unfolded or divided lengthwise into two even parts, depending on what dish the hostess will prepare.
Recommendations from chefs
All chefs have their own tricks when cutting poultry.
Many world-famous masters suggest paying attention to the following details:
- Freshness. All processing must be carried out on a fresh carcass. If you use frozen poultry, before cutting it, you need to completely defrost it, rinse it well and dry it.
- The right tool. To cut the chicken into pieces, you will need to take a large knife, and to separate the flesh from the body, it is advisable to use a small tool. Kitchen scissors with serrated blades also come in handy.
- Maintaining hygiene. Before cutting, it is important to inspect the carcass for the presence of parasites and check the sanitary documents from the suppliers. It is recommended to wear rubber gloves before handling poultry. After the procedure, the instrument blades are doused with hot soapy water and thoroughly cleaned. Hands are washed with soap.
- Aesthetics. By removing the outer phalanx of the wings, it will be possible to significantly increase the visual appeal of dishes prepared in any way.
- Removal of tendons. Poultry fillets have tendons - one in the large muscle and another in the small muscle. They need to be removed, which will help make the meat soft and attractive after cooking. Using the end of a sharp knife, cut both tendons in turn. The blade is moved along the fibers until it comes out.
- Help with your hands. A sharp tool does not always help in such matters as removing skin, finding a joint and moving meat from a bone. In this case, you need to help yourself with your fingers so as not to damage the carcass.
- Separate storage. Parts of the carcass should be placed in the freezer separately from vegetables and fish. In the refrigerator, portioned pieces are left where there are no foods nearby suitable for raw consumption. This will help prevent the taste of the food from spoiling.
No waste
If a housewife knows how to cut up a chicken so that there is no waste, she is a real smart person, because such an activity is an art. This option is considered the most profitable. The process itself is simple and takes minimal time.
They operate according to the following scheme:
- Separate the legs. The carcass is placed on its back, grasped by the leg with one hand and pulled to the side, where its junction with the body is cut. With a sharp movement, turn the leg out of the joint and finally run the knife along the skin so that it is separated from the body.
- Separate the wings. Cut the shoulder joint, completely separate the wing, slightly pulling it to the side.
- Divide in half. Make a cut along the spine and in the middle of the breast of the carcass.
- Separate the breast and back. Run a knife along the junction of the ribs.
If you get a large carcass, each half of the breast is additionally cut into two more parts. Pieces of poultry are hidden in the freezer for storage.
The video shows an amazing way to cut up chicken so that there is no waste left - everything is used for further use as food. A man finishes a carcass in a few minutes without dirtying the work surface:
Egg Quest
When buying a package of eggs, I personally evolved like this: - At first I took it without looking; — Then he began to open and examine the eggs for damage; — Now, after inspection, I move each of them slightly to exclude cracks at the bottom (if there are any, the egg sticks to the tray and does not move). I recently learned from friends that one is interested in the packing date in order to buy fresh eggs, while another actually weighs several identical trays on check scales to choose the heaviest one! What is your egg buying ritual?
Slaughter and plucking of poultry
To make the meat tasty and healthy, the chicken must be slaughtered correctly. The bird is killed in different ways: the head is cut off, the arteries in the neck are cut. On an industrial scale, electric current is used.
If you are interested in details, read the article “How to slaughter chickens at a poultry farm and at home.”
After the chicken is killed, you need to bleed the carcass. She is hung upside down on a special hook. And they allow the blood to drain into a previously prepared container.
Then they begin to remove feathers and fluff. To make the task easier, the carcass is kept in boiling water for 20-30 seconds. Plucking begins from the tail. Then they move on to the wings. Then on the chest, stomach and back. The neck and paws are cleaned last.
All the details in the article “How to quickly pluck chickens at home.”
Body structure
In the chicken family, the cervical vertebrae are elongated and make up the main part of the spinal column. The first vertebra of the neck connects to the condyle of the occipital bone, which has a spherical shape. Thanks to this difference in the occipital joint, the bird's head can move in different directions.
The thoracic region has 7 vertebrae, some of which are fused together to form one bone. A chicken has as many ribs as there are thoracic vertebrae.
One rib is formed by the vertebral and sternal bones. There are two types of chicken ribs:
We buy a high-quality welding inverter for cheap
People often ask in the comments, what kind of welding do you recommend to buy for your home?
If you live in Ukraine, then you can buy Paton there; he makes very good devices.
Well, if you live in Russia, then you won’t see Paton like your own ears here, and that’s why we’ll buy Resanta.
Why resanta? Yes, because there is a lot of information on them, all his sores and weak points are known. You can, of course, look for three-story buildings like BRIMA ARC-200, but they are now difficult to find on sale and even on the used market.
I'll tell you right away. We will not buy a new Resanta in the store because Resanta has lost quality, we will buy the old Resanta because they used to make their welding inverters conscientiously.
And so, we go to flea markets and look for Resanta 250 there.
Refurbished devices are not recommended for purchase. Since it is impossible to say with certainty that the repaired device will work, God knows who the master repaired it and how exactly he did it.
Here we turn on the mailing mode and ask sellers to send photos of the insides. The inside should look like this. Blue relays can be different, but the main criterion for choosing the interior is the SIZES OF THE RADIATORS. If the radiators are large, we move on. Particular attention should be paid to the radiator of the diode bridge; radiators of this size ensure that 2 diode bridges of the KBPC5010 type are installed here. (In the center next to the blue relyushki). It is also worth paying attention to the number of network capacitors. for 250A there are 4 pieces, for 220 there are 3 pieces, for 190 there are 3 pieces
And so, by this moment you should have lost half of the sentences, and our next object of attention is IGBT transistors.
I’ll tell you right away which keys you can use.
If you find an option from Infenion, the keys look something like this. You can take it, I haven’t come across these IGBTs pierced yet. The letters on the transistors may change, but the company logo must remain.
These transistors from firechild are also normal. By the way, if instead of F it is written on in a circle, then this means that the IGBT has changed. Naturally, this option is not recommended for purchase.
If the transistors differ from the options I proposed, then we do not buy them. Here we are still a bit out of options.
Next, we select according to the internal cleanliness of the device. We give preference to clean devices.
We have carried out remote screening of options, now we can go offline and look at the device live.
And so, before us is a welding inverter.
Before buying, we open it and check the condition of the fans; they should spin easily, and there should be no signs of repair on the board. TRACES OF FLUX AROUND power transistors and diodes - this is the norm, this is a factory.
Next, we start the device WITHOUT A COVER, in order to make sure that both coolers are working, and working powerfully. and the fact that the welding does not beep. IF THE WELDING BEEPS A LOT, we don’t buy it. If the coolers spin weakly, or they are generally set to 0.1A instead of the required 0.4A, then you can again bargain for 500 rubles on this.
Then we evaluate the condition of the power wires, power cord, and plug. Usually they break, burn, melt and you can bargain on this.
Next is a test on the electrode. We check how the device cooks, whether the anti-stick protection works, and if everything is ok, then we buy it.
And so, you bought the device. And before preventive varnishing of weak areas, go to a car service to purify the device.
After blowing, you buy ACRYLIC GLOSSY VARNISH in a can for 150 rubles.
And spray it where I highlighted it with red circles.
You need to spray ON THE BOARD, these are the weak points of the welding machine, it is in these places that the tracks SEW because of dust. It also sews under capacitors, but you won’t be able to spray varnish under it, so I didn’t mark them.
Next, you can replace the cord, since it becomes dull in the cold, buy a new KG 2.5 kV cable and plug. Then you can update the mounts if they are worn out, we take the cooler on Alik AUB0912VH and cost 300 rubles.
That's all. the welder is ready for a cheap price. Enjoy the shopping
Rules for slaughtering poultry (chickens, geese, ducks and turkeys)
The bird has large veins on both sides of the neck, called “jugular” veins, connecting at an angle to another vein (pontine). In order for the most complete removal of blood to occur when slaughtering a bird, the junction of the jugular veins with the pavement, on the left side of the neck, is cut.
Insufficient removal of blood causes a change in the color of the carcass: red spots form under the wings and on other parts of the body. Insufficiently bled carcasses are poorly stored, as bacteria quickly develop in them, causing spoilage of the meat.
The most common technology for slaughtering poultry is by hanging it by its legs in special wire loops and then cutting the veins. Blood should be collected in a special vessel. Boiled blood can be successfully used to fatten pigs and chickens.
According to the rules for slaughtering poultry such as geese, ducks and turkeys, their legs are usually tied, their wings are laid one behind the other, and they are hung by their legs on a crossbar upside down, so that the bird's head is in line with the carver's chest. Slaughter is also carried out by cutting the blood vessels through the beak, followed by an injection through the palatal fissure. After this, the wings are straightened so that the blood does not linger, otherwise bruises on the carcass are possible.
Modification of technological lines
Poultry meat processing production complexes have a modular design. Therefore, if necessary, they can be modified to solve specific problems in production. The modular design allows you to reduce the cost of purchasing equipment by eliminating unnecessary elements, as well as simplify the process of delivery and installation in small production areas.
Equipment for food factories is made of stainless steel, therefore it is not subject to corrosion, is easy to clean and meets the requirements of sanitary standards of the Russian Federation.
Removing Skeletal Bones
Cutting chicken from the bones is required for preparing rolls and other semi-finished products:
Make a cut along the ridge. Place the chicken breast side down on a cutting board. Using poultry shears or a chef's knife, make a cut along one side of the spine. Uncover the chicken, being careful not to damage or tear the skin.
Removal of skeletal and spine bones. Make a cut on the other side of the ridge and remove it. Discard the backbone or save it for broth.
Flatten the chicken. Turn the chicken breast side up, opening the cavity so the chicken lays as flat as possible. With one hand on top of the other, press firmly on the breastbone area to break the breast bone and completely flatten the bird. You should hear and see the chest bone break.
Secure the wings. Bend each wing away from the body and secure its end under the cervical region.
Watch how chicken is cut in the video, which illustrates the production process:
Useful tips
In order to cut up a chicken quickly and accurately, and then not waste time on cleaning, you can use the advice of experienced chefs:
- To work, prepare a knife, scissors, board, bowl or other container for pieces of chicken, and place a trash can nearby. By placing the cut elements in a bowl rather than on the table, the latter will remain dry and clean.
- To process the carcass, use a special meat cutting board. If you don't have one, you can take the plastic version. It, unlike a wooden model, will not absorb moisture and odor. As a last resort, a regular wooden board can be wrapped in cellophane.
- In the process of cutting off the legs and wings, be sure to feel the joint and turn the limb in order to clearly see the place of the cut. There is no need to saw the bone, even if the knife is very sharp and you have a lot of strength in your hands. Proper cutting produces neat pieces without bone fragments.
Dividing poultry into parts is necessary not only for preparing dishes, but also for convenient, compact storage of meat in the refrigerator. At any time you can take out a bag or container with the desired part of the chicken and cook soup, make goulash, or fry a cutlet.
| Chicken lula kebab | Chicken wings marinated | Marinated chicken fillet |
Chicken skull
The detailed structure of this part of the skeleton is presented in the photo below.
The second section (facial) is not so pronounced. It is formed by the incisive, nasal, palatine, pterygoid, zygomatic, quadrate, quadratozygomatic, maxillary, mandibular and hyoid bones. These can also include a coulter. The entire bird family has no teeth.
The nasal, incisive and maxillary bones form the basis of the upper half of the beak. At the junction with the frontal bone it is plastic. This provides the beak with slight mobility. The square-shaped bones are responsible for the mobility of both halves of the beak, which helps them swallow large pieces of food.
About mechanical deboning
What it is
In business, the entire process is automated. Large poultry farms have special cutting equipment. And not a single poultry processing plant can operate without mechanical deboning.
Mechanically separated meat (or mme) is obtained using a meat and bone separator. He separates the muscle pulp from the bones, passing the carcass through filters. MMO is used for the production of minced meat, semi-finished products and other products in which the absence of solid particles is important.