Density of milk depending on temperature
The density of whole milk does not depend on the month of milking of cows and goats. During long-term storage, the density of milk changes .
It was found that after 10 weeks of storage of goat milk, its density decreased from 1032 to 1030 kg/m3, and as a result of 20 weeks of storage, the density of milk increased to 1033 kg/m3. This pattern is caused by changes in the content of solids and gases in milk during storage. Gases present in milk have a noticeable effect on the density of the milk. As the pressure on the milk decreases and the duration of its exposure decreases, the gas content in the milk decreases, therefore the density of the milk increases.
Sterilization, pasteurization and homogenization do not affect the density of milk. However, if the pressure is less than 20 atm, the density of the milk increases noticeably during homogenization.
Experimental data indicate that as the fat content of milk increases, the density of the milk decreases . A relationship has been established between the density (hydrometer degrees) of diluted milk ρр and the proportion of water added to it D:
The temperature (in Kelvin) at which diluted milk has its maximum density can be determined by the formula:
Density of milk (in kg/m3) depending on temperature (at T=274...283 K) and dry matter content (n=11.5...16%) or fat-free dry matter (TSV=8.2...10.2% ) is expressed by the following formulas:
With an increase in the content of nonfat solids (SFS) in milk, its density increases.
How to increase density
To get a good quality dairy product, you need to know how to increase its density. This is done through the following steps:
- Monitor the health of animals.
- Feed them quality food.
- Keep livestock in good conditions.
- Monitor the condition of the product from milking to transportation to the buyer.
As we have seen, a milk drink is natural only under certain conditions. Watch what you drink yourself and what you give to your children. Don’t be lazy to carry out a simple experiment at home, and then you will only benefit from this product.
Density of milk depending on fat content
The table shows formulas for calculating the density of milk depending on the fat content at different temperatures. Milk density values are indicated at temperatures from 293 to 353 K (20 to 80 °C).
The nonfat solids (SFS) content of milk has a more significant effect on milk density than the fat content. This is determined by the fact that the density of WWS (about 1600 kg/m3) differs more from the specific gravity of water than the density of fat (930 kg/m3) at T = 288 K.
The table shows formulas for determining the density of milk depending on the content of skim solids at a temperature of 20...30 °C. Milk density values are indicated with a content of nonfat solids from 8.6 to 9.1% and a fat content of 3...4%. It should be noted that as the temperature of milk increases, its density decreases .
Note: Temperature in the formulas is entered in degrees Kelvin!
Is it possible to increase the indicators
They can be increased by observing the regime for keeping animals. Cows should be examined regularly by a veterinarian. It is necessary to ensure that animals do not suffer from mastitis or diseases of the gastrointestinal tract. Be sure to monitor calving cows.
Milk from sick animals is checked additionally; it is usually discarded and not sold or processed.
Pedigree livestock is capable of producing a high-quality product. Dairy animals provide an increased amount of protein and minerals in milk compared to other types of cattle. The feed requires mineral supplements and vitamins. Animals are provided with high-quality hay, vegetables, roughage to improve digestion in winter, and are grazed in summer. Careful selection of pasture affects the quality of the product.
Regular cleaning of the barn, changing bedding, treating drinking bowls and feeders prevent the development of dangerous diseases in cows.
Expert opinion
Zarechny Maxim Valerievich
Agronomist with 12 years of experience. Our best country expert.
Ask a Question
Important to remember! After calving, during the first days the cow produces colostrum, which is necessary for the calf, then milk with a high protein content.
The complex of these measures allows you to increase the amount of protein, mineral salts, and therefore the quality and density of the product.
It is necessary to ensure that water does not enter the product during milking and storage of products. Immediately after milking, the indicator will be higher, since milk fat is still evenly distributed in the product. After storage, when it rises to the surface, the density indicator will decrease.
Specific heat capacity of milk depending on temperature
The table shows the specific heat capacity of milk with a fat content of 3.2% (whole milk). The heat capacity values of milk are located depending on the temperature in the range from 5.6 to 69.79°C. The table clearly shows that with increasing temperature, the heat capacity of milk increases .
What happens if you add salt to milk?
1) Salt will remain dry for a long time if you put some rice grains in the salt shaker. 2) If you add a pinch of salt to milk that has burnt during boiling, its taste will noticeably improve. 3) A pinch of salt added to milk protects it from rapid souring.
Interesting materials:
Why do eggplant flowers fall off in a greenhouse? Why do cucumber flowers fall off? Why is it dangerous to eat cinnamon? Why does it swell after a bee sting? Why does the cupcake sink? Why did the eagle peck at Prometheus' liver? Why do crows scream in the morning? Why is there blues in autumn? Why is there no thunder in autumn? Why are spicy foods bad for the liver?
Specific heat capacity of milk depending on fat content at different temperatures
The specific heat capacity of milk of various fat contents is presented depending on temperature. The heat capacity values of milk are indicated at fat content from 2.91 to 4.3% and at temperatures from 283 to 343 K (from 10 to 70 ° C). The specific heat capacity of milk increases with increasing temperature. Data on the heat capacity of milk may vary depending on the sample, since the heat capacity may be affected by different amounts of fat in the samples studied.
Sampling of milk and dairy products and preparing them for testing - according to GOST 26809 and GOST 13928.
Areometric method for determining density
Equipment, materials and reagents:
- hydrometers for milk type AM with a scale division value of 0.5 kg/m3 or type AMT with a scale division value of 1.0 kg/m3 (hereinafter referred to as hydrometers) according to GOST 18481 for measuring the density of whole milk (Fig. 2);
- glass cylinders for hydrometers, version 1, with outer diameters of 31, 39 and 50 mm; height 215, 265 and 415 mm, respectively, according to GOST 18481;
- mercury glass laboratory thermometers with a measurement range of 0–55 °C, division values of 0.5 and 1.0 °C, group 4, types A and B according to GOST 28498;
- liquid glass thermometers (not mercury) with a measurement range of 0-30 °C, division values of 0.5 and 1.0 °C according to GOST 28498;
- mechanical stopwatch, class 3;
- water bath;
- distiller;
- stirrer (see Appendix 1);
- linen towels according to GOST 10232 or fabric according to GOST 10138;
- distilled water according to GOST 6709.
Rice. 2. Sequence of operations when determining the density of milk:
1 – filling the cylinder with milk; 2 – immersion of the hydrometer in milk; 3 – cylinder with a hydrometer immersed in milk; 4 – milk temperature reading; 5
– reading of milk density readings
Preparing for measurement . The density of prepared pasteurized cow's milk is determined at (20 ± 5) °C.
The density of pasteurized cow's milk with a high content of fat, cream, as well as milk of other animals is determined at (20 ± 2) °C.
The density of the prepared milk should be determined no earlier than 2 hours after milking.
Before determining the density of the sample with the settled layer of cream, it is heated to (35 ± 5) °C, mixed and cooled to (20 ± 2) °C.
Hydrometers and the necessary glass equipment must be thoroughly washed with washing solutions, rinsed with distilled or boiled drinking water, and any remaining moisture removed with a linen cloth or towel, then all equipment must be kept in air until completely dry.
During mass analyses, it is allowed to rinse the cylinder with milk selected for the next determination of the density of the milk sample under study.
After preparing the hydrometer for measurements, it is not allowed to touch its working part with your hands. The hydrometer is taken by the upper part of the rod, free from the scale. Hydrometers, thermometers and stirrers prepared for measurements are stored in cylinders covered with a cover glass or polyethylene cover.
A sample with a volume of 0.25 or 0.50 dm3 is thoroughly mixed and carefully, to avoid the formation of foam, poured along the wall into a dry cylinder, which should be kept in a slightly inclined position (Fig. 2, item 1). If foam has formed on the surface of the sample in the cylinder, remove it with a stirrer.
If disagreements arise in assessing quality when determining the density of milk, the hydrometric method is used, which consists in heating the sample to (40 ± 2) °C, maintaining it at this temperature for (5 ± 1) minutes, then cooling it to (20 ± 2) °C and measure the density of milk using AM or AMT type hydrometers.
Carrying out measurements . The cylinder with the test sample is placed on a flat horizontal surface and the sample temperature t1 is measured. Temperature readings are taken no earlier than 2–4 minutes after lowering the thermometer into the sample.
A dry and clean hydrometer is lowered slowly into the test sample, immersing it until 3-4 mm remains to the expected mark on the hydrometric scale, then it is left in a free-floating state. The hydrometer should not touch the cylinder walls.
The location of the cylinder with the sample on a horizontal surface should be, in relation to the light source, convenient for reading readings on the density scale and thermometer scale (Fig. 2, item 5).
First reading of density ρ1
carried out visually from the scale of the hydrometer 3 minutes after placing it in a stationary position.
After this, the hydrometer is carefully raised to the level of the ballast in it and lowered again, leaving it in a free-floating state. After establishing it in a stationary state, a second reading of the density readings ρ2
. When taking density readings, the eyes should be at the level of the meniscus. The readings are taken along the upper edge of the meniscus.
Readings for hydrometers of types AM and AMT are taken to half the value of the smallest scale division. In hydrometers of the AON-1 and AON-2 types, the readings are taken to the value of the smallest division, then the sample temperature t2 is measured.
Measurement of the sample temperature when using hydrometers of types AM, AMT, AON-1 and AON-2 is carried out using mercury and non-mercury glass thermometers.
The discrepancy between repeated density determinations (one determination after another in the same sample) should not exceed 0.5 kg/m3 for hydrometers of types AM and AMT and 1.0 kg/m3 for hydrometers of types AON-1 and AON-2 .
When carrying out mass measurements when determining the density of the next sample, it is allowed to touch the lower end of the hydrometer removed from the milk to the inner surface of the cylinder and immediately after the main part of the milk has drained from the hydrometer, immerse it in another cylinder with a new sample, preventing the milk from drying on the surface of the hydrometer. Then the measurements are repeated.
Processing the results.
The average temperature t of the test sample is taken as the arithmetic mean of the results of two readings
t
1 and
t
2.
Example 1 of the calculation is given in Appendix 5.
The arithmetic mean of the results of two readings ρ1 and ρ2 is taken as the average value of the hydrometer readings at temperature t (ρtav) of the milk sample under study.
Example 2 of the calculation is given in Appendix 5.
If the sample at the time of density determination had a temperature above or below 20 °C, then the results of density determination at this temperature must be normalized to 20 °C in accordance with Appendix Tables 1 or 2.
Using the tables, in the leftmost column, find the line with the value ρtav, and in the subsequent columns of the tables, find the temperature t. At the intersection of the corresponding line and column, the value of the density of milk at 20°C is found, which is taken as the final result. Examples 3–5 of bringing the density of milk to 20 °C according to tables are given in Appendix 4.
If the prepared or skimmed cow's milk has a temperature of 10 to 15 °C, then to determine its actual density, the correction found from the tables of Appendix 4 or 5 is added to the obtained value of the density of the sample of this milk ρtср. An example 6 of finding corrections from the tables is given in Appendix 5 .
The result of determining the density of milk ρ20m, taking into account the error of the method, should be presented in the form of a formula:
ρ20m = ρт ± Δρа; R
= 0,99,
where ρт – density value normalized to 20 ºС, kg/m3, found from the table of appendices 2 and 3; Δρа – error in determining the density of milk using the hydrometric method (no more than ± 0.5 kg/m3); P is the probability with which the measurement error is within the range from minus Δρа to plus Δρа.
The permissible discrepancy between the results of determining the density of milk ρ20m using one type of hydrometer under different conditions (at different times, in different places and by different operators) should not exceed 0.8 kg/m3.
Pycnometric method for determining density
The pycnometric method is intended for scientific and experimental research to determine the density of milk and canned condensed milk.
Equipment, reagents and materials:
- pycnometers type PZh 2 with a capacity of 50 cm3, with a neck diameter of 6 and 9 mm in accordance with GOST 22524 (Fig. 3);
- mercury glass laboratory thermometers with a measurement range of 0–55°C, division value 0.1°C according to GOST 28498;
- mercury glass thermometers for precise measurements of group 1, numbers 5, 6 with a division value of 0.01 ° C according to GOST 13646;
- thermostat type SZhML-19/2.5-IT, which allows maintaining the temperature in the range of 10–50 °C with a temperature control error of ± 0.05 °C;
- general purpose laboratory scales of 2nd and 4th accuracy classes with the highest weighing limit of 200 g according to GOST 24104;
- mechanical stopwatch type SOPpr 3rd class;
- laboratory glass beakers according to GOST 25336;
- laboratory funnel B-25.36–50 HS according to GOST 25336;
- pipette 1-2-2 according to GOST 29169;
- medical syringes of the “Record” type with a capacity of 20 cm3;
- injection needles for Record type syringes 1A1 12 x 120-115;
- laboratory resistance electric furnace according to OST 16.0.801.397;
- distiller;
- linen towels according to GOST 10232 or fabric according to GOST 10138;
- chromic mixture (60 g of dichromium potassium according to GOST 2652; 1 dm3 of distilled water according to GOST 6709; 1 dm3 of sulfuric acid according to GOST 4204, chemically pure, density 1840 kg/m3);
- distilled water according to GOST 6709;
- laboratory filter paper according to GOST 12026.
Rice. 3 .
Pycnometer:
a – with a thermometer, b – without a thermometer
Preparing for measurement .
Pycnometers (at least two) must be thoroughly washed with cleaning solutions and rinsed with distilled water. After this, they are dried in an electric oven at (110 ± 10) °C for at least 30 minutes, removed from the electric oven, kept at room temperature for at least 30 minutes and weighed using the precision weighing method.
Then the pycnometers are again placed in the electric furnace and kept at the same temperature for at least 15 minutes, removed from the electric furnace, kept in the room for at least 30 minutes and weighed. The difference between the results of two weighings of each pycnometer should not exceed 3 • 10-7 kg for scales of the 2nd accuracy class and 5 • 10-6 kg for scales of the 4th accuracy class. If this condition is not met, drying should be repeated.
The arithmetic mean of the results of two weighings m 1
.
The pycnometers are filled using a syringe with freshly boiled and cooled to room temperature distilled water slightly above the mark on their neck and closed with stoppers, placed in a glass of water so that the water covers the filled part of the pycnometers, and the glass is lowered into the thermostat. Pycnometers are kept in a thermostat at (20.00 ± 0.05) °C for 30 minutes. The water temperature is controlled by a thermometer with a division value of 0.01 °C, lowered into the thermostat.
The pycnometers are removed from the thermostat and the water level is adjusted using a syringe and filter paper to the mark on their neck (along the upper edge of the meniscus). The inner surface of the neck of the pycnometers above the mark is thoroughly wiped with filter paper, without touching the water level in the pycnometers, the outside is wiped dry with a towel and left in the scale display case for at least 20 minutes. After this, the pycnometers are weighed. The experiment is repeated at least three times for each pycnometer. The arithmetic mean of the results of all weighings m2 is taken as the value of the mass of weights balancing each pycnometer with water. The mass value of the weights balancing the empty pycnometer and the pycnometer with water is determined again for each pycnometer after 20 determinations of milk density.
The water is poured out of the pycnometers and dried.
A sample of milk and canned condensed milk is heated to (40 ± 2) °C, kept for (5 ± 1) minutes and cooled to (20 ± 2) °C.
Carrying out measurements. Pycnometers prepared for measurements (at least two) are filled using a syringe with a previously thoroughly mixed test sample of prepared cow's or skim milk slightly above the mark on their neck and closed with stoppers. Pycnometers are thermostated and the level of the test sample is brought to the mark on their neck. The arithmetic mean of the results of two weighings T3 is taken as the value of the mass of weights balancing each pycnometer with milk.
After measurements are taken, the milk is poured out of the pycnometers, the pycnometers are washed, dried, capped and stored until new measurements are taken.
Processing the results . The density of milk ρ1 at 20°C, kg/m3, is calculated using the formula:
where t1, t2, t3 are the masses of weights balancing, respectively, an empty pycnometer, a pycnometer with water and a pycnometer with milk, kg; ρв – density of water at 20 °C and normal pressure equal to 1.01 • 105 Pa (ρв = 998.20 kg/m3); e – air density at 20 °C and normal pressure (e = 1.2 kg/m3).
Similarly, the density ρ2 of the same milk sample is determined using a second pycnometer.
The permissible discrepancy between two results of determining density should not exceed 0.3 kg/m3 in absolute value for milk. If the discrepancies exceed the permissible limits, then repeat control measurements of the density are carried out.
The density ρav of milk at 20 °C is taken to be the arithmetic mean of the results of the two obtained values of milk density ρ1 and ρ2 at 20 °C (see calculation examples 7 and 8 in Appendix 5).
The result of determining the density of milk at 20 °C – ρm should be presented in the form of the formula
ρм = ρср ± Δ ρn; R
= 0.99 – for milk,
where ρav is the arithmetic mean value of density at 20 °C, obtained by the pycnometric method, kg/m3; Δρn – error in determining density using the pycnometric method: (± 0.2 kg/m3 – for milk); P is the probability with which the measurement error is within the range from minus Δρn to plus Δρn.
The permissible differences between the results of determining the density of milk by pycnometric and hydrometric methods should not exceed 1.0 kg/m3 at 20 °C.
Freezing point of milk
The table shows the effect of the degree of dilution of milk with water on the freezing point. The degree of dilution of milk with water in the table is given in the range from 0 to 25%. According to the table, it can be seen that the freezing point of milk is only 0.5 degrees lower than the freezing point of water and does not decrease significantly when milk is diluted with water.
What is it and how to determine it
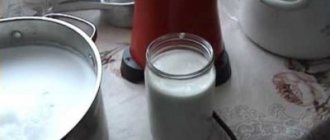
There is a special device that is used on an industrial scale. It is called a lactodensimeter or a hydrometer. To determine the density level, 200 milliliters of milk is poured into a measuring cup, the diameter of which should not exceed 5 centimeters. You can check it at home if you have such a device; there is a table by which you can compare the indicators.
The liquid is slowly poured along the walls into the container, filling it to 2/3 of the volume. Place the device inside so that it is afloat, and wait for the result in a few minutes. The readings are confirmed by shaking the device a little and taking the measurement again. In this case, the temperature of the milk should be at around 20 degrees.
If the last condition is not met, then 0.0002 should be added to the data obtained for each additional degree; if the temperature is lower, then it is subtracted.
Of course, such a device may not be available at home, so measurements are taken in a different way. To do this, you will need to dilute a small amount of milk in water and wait. The milk will either sink to the bottom after some time or spread out at the top. In the first case, we can conclude that it is of good quality, in the second, the opposite is true.
It is permissible to take not water, but alcohol, which is mixed and poured onto the bottom of the plate. In a diluted state, flakes will not form; otherwise, the process of protein coagulation will begin.
Read also: Manchurian walnut (photo) - growing seedlings, Website about the garden, cottage and indoor plants
You will learn more about how to determine the density of milk in the following video.
Physical properties of natural milk
The table shows the thermal and physical properties of milk depending on temperature, in the range from 0 to 90°C. The table shows that the density, heat capacity and thermal conductivity of natural milk weakly depend on its temperature. When milk is heated, its physical properties such as kinematic viscosity and Prandtl number undergo significant changes, which decrease their values several times.
physical properties of milk are given :
- milk density, kg/m3;
- specific (mass) heat capacity, kJ/(kg deg);
- thermal conductivity coefficient, W/(m deg);
- kinematic viscosity, m2/s;
- Prandtl number of milk.
How is the normal density of cow's milk determined: ways to increase this indicator
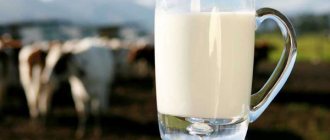
People have been using milk for food for centuries. This product is known for its unique qualities and high content of various vitamins and microelements. All of them are combined in such a way that an optimal balance and easy digestibility by the human body is achieved. One of the main indicators of the quality and nutritional value of milk is its density.
Density indicator
The average density of natural undiluted milk is 1.028. This value is relevant for raw milk. Deviations of 2-3 units are allowed.
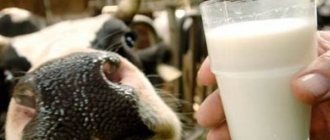
Various components can increase the density of milk: lactose, protein or minerals. Fat also has a relationship - with the highest fat content, the density, on the contrary, will be less. If the product is diluted with water, its density becomes less.
Thus, if it is determined that the density of milk is less than 1.027, this means that there is water in the milk. That is, a density indicator of 1.027 should raise suspicion. At the same time, an indicator above the norm indicates the addition of skim milk to the milk. Milk suppliers who are not conscientious towards their customers resort to such tricks.
The conclusion is this: density is one of the indicators by which the naturalness of a product can be determined.
Factors affecting milk density
It is clear that milk from different animals can have completely different indicators. All this is purely individual, especially when you consider that density is influenced by many different factors:
How to increase milk density
To increase the indicator, you must follow the following recommendations:
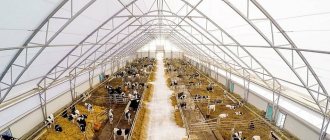
- Treat cattle diseases, isolate sick individuals to prevent the spread of diseases in the herd. In order to catch the disease at an early stage, you need to carefully monitor the animals daily.
- Prepare a balanced, complete diet for cows, especially in winter and during lactation. Good care and maintenance in a normal barn, regular walks are also of no small importance.
- During milking, storage and especially cooling, water should not get into the milk.
Important! Do not dilute milk with water, because this is the most common reason for insufficient density of the product.
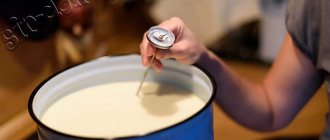
Density measurement method
In order to determine the density of milk at a professional level, a lactodensimeter and a measuring cylinder are used:
- The milk is placed in a cylinder so that no thick foam appears. The cylinder is filled to approximately 2/3 of its total volume.
- A lactodensimeter is immersed in milk.
- You need to look at the meniscus so that it is at eye level. The density is set along the upper edge of the meniscus, the measurement accuracy is 0.0005. To obtain the most reliable result, you need to move the lactodensimeter twice, and it will determine the arithmetic average of the two measurements.
- The suitable milk temperature for measurement should be +20 degrees. Warmer milk produces a larger error (0.0002 for each additional degree).
There are several ways to determine the density of milk at home:
- You need to add a few drops of milk to the water. If it is a whole natural product that does not contain impurities, then the drops will begin to sink to the bottom of the container, gradually dissolving. Drops of milk, already diluted with water, spread immediately over the surface of the water.
- If you mix the milk under study with alcohol in a 1:2 ratio and then pour it onto a plate, then good whole milk will immediately turn into flakes, that is, it will curdle. Diluted milk may not produce cereal at all (this depends on how much the milk is diluted with water).
Composition of milk
Milk is a product with a complex composition. In addition to beneficial substances, it also includes harmful ones. It is clear that the animal receives all these components as a result of human activity. Pathogenic microorganisms in cows are obtained when a large number of animals are kept together in close quarters, which causes various epidemics in cattle. Harmful substances enter milk very quickly, and therefore enter the human body too.
The chemical composition of milk also depends on the same factors as its density. During the 300 days that a cow lactates, the composition of milk changes three times:
- The first 10 days after calving is colostrum. It even feels thick to the touch and has a yellowish color, a salty taste, and a characteristic smell. It contains the maximum amount of protein (up to 11%), minerals (up to 1.2%) and very high acidity (40-50). Colostrum is never used as food by humans. Due to its specificity, this is considered impractical, but for the calf it is of great value, because it contains the maximum amount of useful substances, and all of them are necessary for the calf for the normal formation of its immune system. Therefore, the calf receives colostrum in full. Or, if the suckling method of housing is used (the calf together with the mother), then it sucks out the required amount of colostrum itself.
- Then, for almost the entire period, regular milk follows. The fat content of milk may depend on the age of the animal; the content of milk sugar (lactose) does not depend on this indicator and remains unchanged. Milk contains components that are not present in any other product. These are breech, lactose, milk fat, lactalbumin, lactoglobulin.
- The last two weeks before calving - old milk.
Chemical and physical properties of milk at 20°C
The table shows the chemical and physical properties of milk (average value and range of fluctuations).
properties of milk are given :
- acidity;
- buffer capacity for acid and alkali;
- redox potential, V;
- milk density, kg/m3;
- dynamic viscosity, Pa sec;
- surface tension, N/m;
- osmotic pressure, MPa;
- freezing temperature, °C;
- specific electrical conductivity, S/m;
- specific (mass) heat capacity, J/(kg deg);
- thermal conductivity coefficient, W/(m deg);
- thermal diffusivity coefficient, m2/s.
Density measurement method
In order to determine the density of milk at a professional level, a lactodensimeter and a measuring cylinder are used:
- The milk is placed in a cylinder so that no thick foam appears. The cylinder is filled to approximately 2/3 of its total volume.
- A lactodensimeter is immersed in milk.
- You need to look at the meniscus so that it is at eye level. The density is set along the upper edge of the meniscus, the measurement accuracy is 0.0005. To obtain the most reliable result, you need to move the lactodensimeter twice, and it will determine the arithmetic average of the two measurements.
- The suitable milk temperature for measurement should be +20 degrees. Warmer milk produces a larger error (0.0002 for each additional degree).
Thermal conductivity of milk
The table gives the thermal conductivity values of milk in the dimension W/(m deg) depending on the fat content (from 1.6 to 4%), for temperatures of 293K (20°C) and 353K (80°C).
The data on the thermal conductivity of milk in the table indicate that with a fat content of 1.6...4%, the coefficient of thermal conductivity of milk weakly depends on the fat content in it.
Sources:
- Thermophysical characteristics of food products. Directory. Ginzburg A.S. and others. Moscow, 1980. - 288 p.
- Chubik I. A., Maslov A. M. Handbook on the thermophysical characteristics of food products and semi-finished products. M.: Food industry, 1970 - 184 p.
- Gorbatova K.K. Chemistry and physics of milk: Textbook for universities. - St. Petersburg: GIORD, 2004. - 288 p.
- Tsubanov A.G. Heat transfer: method. instructions for practical classes for students. - Minsk: BGATU, 2007. - 160 p.
Factors affecting density
It increases when water is added to milk and decreases when skim milk is added to it. But even for a conscientious owner, indicators may change for a number of reasons;
- seasonal fluctuations in fat content;
- feeding characteristics of the livestock;
- breed of livestock;
- depends on the lactation period (in the first months after calving, the fat content of cow's milk is higher);
- animal health.
To bring the indicator to the average value, collected milk is measured (from different cows, with different percentages of fat content).
How much fat is in cow's milk?
What affects fat content, why does a cow have fatty milk: factors If we are talking about animals living on domestic farms, then their product contains about 3-4%. This percentage is considered average and occurs most often.
Interesting materials:
How to get to the Peter and Paul Fortress from Gorkovskaya metro station? How to get verified on PokerStars ES? How to improve your stealth skill in Skyrim? How are entrance exams for master's programs conducted? How did the Battle of Stalingrad take place? How is the internship at the pedagogical college? How to rinse fish after salting? How to register an Internet IP address? How to register a key for a visit intercom? How to skip flight school in GTA San Andreas?