How to make a halter for a horse using your own means? If anyone doesn’t know, a halter is a piece of equipment for horses and is worn only when there is a need for it.
A horse is accustomed to a halter from foal age. She should get used to it, as this will help in the future to ensure proper communication between man and horse. Everyday care of the animal, riding, tying, will be possible only if he does not have a dislike for this equipment.
Application for tying
Advantages of rope halters
Today we will learn how to weave a rope halter for your four-legged friend. This halter is called a rope halter. It has a number of advantages over conventional halters. It is quite light and does not irritate even the most finicky horses who do not like wide buckles on their halters.
If the horse begins to pull hard on the harness, the knots put pressure on certain sensitive areas of the horse's muzzle, forcing the head to return to the desired position. After the horse does this, the knots will stop pressing and he will not feel it at all, which will allow you to work more softly, but more effectively. Conventional halters are heavier and put pressure on the bobbin simply because of the weight; if the horse pulls on the bobbin, the pressure is distributed evenly across the wide straps, so you need to put more effort into reducing the pressure.
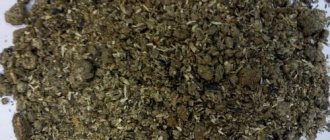
The advantages of rope halters also include its relative cheapness. For the rope halter you will need rope, scissors and matches (to melt the ends of the rope).
Don't be discouraged if you don't get it right at first, the halter will gradually become easier and you'll soon be able to make a halter in just 10 minutes.
What does the bridle consist of?
Each bridle has its own component parts, which vary depending on the model. Before purchasing a snaffle harness, you need to know what the differences are and how each option is used.
Snaffle headband
Refers to classic models that are ideal for beginner riders. It is very easy to use and has minimal straps. So, the bridle consists of:
- occipital strap;
- cheek (paired);
- chin;
- forehead;
- reason;
- iron (snaffle);
- noseband (may or may not be part of the bridle).
Snaffle headband
Mouthpiece headband
It is distinguished by the presence of another piece of iron in the horse’s mouth – a mouthpiece, with which you can give a command to your four-legged partner with maximum accuracy. Such headbands are used in dressage when performing elements from the higher school of riding. In addition to the belts listed, there are several more:
- mouthpiece;
- rein (two pairs)
- capsule;
- snaffle.
Mouthpiece bridle
There are several other types of bridles, for example, the hackamore: it is interesting because there is no iron and the effect on the horse is carried out due to pressure on the bridge of the nose. It is used for animals that either have increased sensitivity of the oral cavity or have had any injuries that do not allow putting on the bit.
We invite you to join our Zen channel and group on VKontakte or Odnoklassniki, where new articles are published, as well as news for gardeners and livestock breeders.
Similar articles:
- Tips for choosing saddle pads for horses
- Why are stallions castrated?
- Requirements for keeping horses in a private yard
Learning to knit knots
Rope halter is knitted with double knots, if you don’t know how to knit them, you should practice a little.
The basis for a double knot will be the most ordinary knot
Now, you need to tie a knot inside this knot. For learning, it is better to take a rope of a different color to knit a double knot, it will be more clear.
It is tied like this: the end of a rope (for learning a different color) is pulled into an untightened simple knot, passes over the loop of a simple knot and, returning again to the loop, a second knot is tied.
Let's look at the technique of tying a double knot step by step.
Tying a regular knot.
Next, we take the end of the same rope (here it’s easier to start with a different color rope) and thread the end through the first loop, parallel to it.
Returning to the loop, we carefully tie a knot in the knot, trying to tighten the knots equally. You will end up with a round knot with an “x” on both sides.
If you absolutely cannot knit double knots. You can tie a halter with regular knots, but since they are flat, they will not work as effectively and they will not look as beautiful as double ones.
We weave a halter
We take the rope and measure the distance A - measure about 25 cm for the fastener. If you doubt the size of the halter, then it is better to lean towards the larger side.
Tie a simple knot, measuring the distance according to the table, do not tighten it. Next, using the diagram below and the table, tie simple knots.
After tying the knot at point E, you will need to make a loop. The loop should be approximately 10 cm long. Carefully measure the distances to the points, then correcting everything will be quite problematic.
It is tied very simply.
Next, using the diagram below and the size chart, measure point F and tie your first double knot.
After you have tied point F, according to the diagram we tie point G - at the end you should have two parts of the rope parallel to each other, connected with double knots. Please note that the two ends of the rope must be the same length.
Now we measure the distance H and tie a double “neck knot”. To do this, we use the diagram below. Please note that the distance between the H and D lines must be the same. These will be the lower parts of the carrying strap and the strap that goes to the chin strap under the horse's lower jaw. Check the measurements again.
Well, our halter has finally acquired its familiar shape. Next, position it as shown in the figure below. Now you will need to tie a double knot, measuring the distance I. Remember that all lines must correspond to the table ones.
Place the two long pieces of the halter (H and D) in regular knots, you will have two loops about 10cm long. It is not recommended to tighten them until you have tried the halter on the horse.
Melt the ends of the rope and if you wish, you can connect them with a leather strap - it’s up to you.
It's time to try your creation on a horse. You can already adjust the knots on the animal, and even move them a little somewhere.
If the halter fits well on the horse, all the knots are corrected, tie it on the horse to make a knot as in the picture
The main principle of this knot is that it can be easily untied on occasion. So, the halter is ready, it's time to test it!
Manufacturing process
Using the measurements from the compiled table, you need to tie four regular knots in sequence at one end of the rope.
- Again, using the measurements, you need to fold the rope into a loop and tie a regular knot from it, such as the one usually tied on shoelaces. The loop should be approximately ten centimeters long.
- Now the left nasal knot is tied from the loop. It is made double, as described above.
- Next you need to tie the right double knot, moving from the left. After tying this knot, the halter will have two pieces of rope parallel to each other and tied between the left and right nose knots. They must be the same length.
- The next step in making a halter is to tie a double throat knot. Using the dimensions in the table, you will need to tie the knots so that the distances between the right nose knot and the throat knot and between the left nose and throat knots are the same. The length of the ropes on both sides will be different, so the difference in length must be corrected.
- Next, a double knot is tied in the horse's right ear from the throat knot. The halter should already have the proper shape. It is necessary to check all the dimensions of the resulting product against the table; they should not diverge much.
- The next step is to tie the two long parts of the halter with a regular knot. You will get two loops about ten or twelve centimeters long. You should not tighten the resulting knot before the halter is tried on the horse.
- Now the ends of the ropes must be cut so that they are the same length. If the rope is synthetic, the ends are melted with a lighter. You can leave the ends of the rope untied or tie the two ends, for example, with leather.
Stages of tying
Safety precautions
But remember, since your halter is made from a single piece of rope, it is very strong and not easy to remove, so if used incorrectly, your horse could be harmed.
To prevent this from happening, remember these simple rules:
- Do not leave your horse in a stall wearing a rope halter.
- Do not let her frolic in the levada without removing the halter.
- Do not tie your horse in it for a long time.
- Playing with other horses is also prohibited while wearing a rope halter.
- And, of course, the halter must fit the size of the horse.
Using the video below, you can clearly see how rope halters are made.
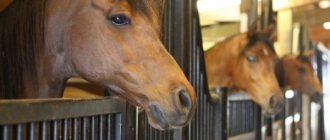
What is a halter and what is a horse needed for?
The halter got its name due to its strong similarity to a bridle, but without a bit. It is made from leather, rope, fabric or braid. With the help of this device, a person tames a horse. The halter is used to control the horse during water procedures, cleaning hooves, and saddling.
With its help, it is convenient to lead the horse from the ground on the reins. It is also convenient when handling horses in the pasture. The halter allows the animal's mouth to be free, and the horse can calmly nibble grass while grazing, but if necessary, it can be easily controlled.
Precautionary measures
Special attention is required when using the halter. If an animal gets stuck with a device in a fence or trees, especially at full speed, it can cause severe injury and death. To increase safety, special breaking products are used, in the upper half of which there is a leather insert. The replacement part is fixed with fasteners that can burst under strong impact.
When using nylon straps instead of leather, the replacement part is made thinner, which will allow it to break. It is located on the cheek part.
The basic safety requirements when using a halter include the following recommendations:
- When the horse is tied, the device is removed from its muzzle.
- The halter you buy or make yourself must match the measurements of the horse's head.
- On pasture or during various games, the animal does not feel the need to be reined.
When the horse is in contact with other animals, its movements should not be constrained by anything. In this case, you do not need to use the device.
Halter sizes: table
A halter made with your own hands can be adjusted at your discretion, because the sizes of horses' heads are not always the same and sometimes it is difficult to choose a bridle.
Since in order to sew a product from leather belts, you must have certain skills, it is best to make a halter from a synthetic rope (halter). Such a bridle will not rub the skin and will be a budget option
Below is a table with standard sizes of rope halters and the distances between nodal points, and the length of the rope used.
Details
A horse bridle consists of three parts:
Consists of a metal bite and rings attached to it. The snaffle is inserted directly into the horse's mouth.
Made from leather or braid. They are attached to the bit rings.
- Belt system:
- Cheek - located along the horse's cheeks, divided into snaffle and noseband.
- Suglobal - located on the back of the head behind the ears.
- Forehead – located on the horse’s forehead in front of the ears.
- Chin - fastened loosely under the horse's head.
- Portable (fast) noseband strap - fastened on the horse's muzzle above the nostrils.
How to weave a rope halter for a horse with your own hands
In order to make a rope halter with your own hands, you should use the following materials and tools:
- yacht rope - 670 cm (this is the length for a medium-sized Cob-Large halter);
- a marker in a contrasting color to the color of the rope;
- scissors;
- lighter;
- ruler.
When weaving a halter, we perform the following steps:
- Cut the rope to the required length (670 cm). We singe the edges of the cut piece with a lighter so that they do not unravel.
- We measure 90 cm from the end of the rope with a ruler (point A from the size table) and mark it with a marker. We tie a knot in the intended place - hold the rope with our left hand, and then throw it with our right hand over the top of our left and pull the rest of the rope through the resulting loop. Carefully tighten the knot so that it is in the intended place.
- We measure and mark the distance to the next point 22.5 cm (point B). We tie exactly the same knot as described in the previous paragraph.
Video: making a halter
How to wear it correctly
You need to know how to put on a halter correctly. If you put it on incorrectly, it can irritate the animal. It should not cause a feeling of discomfort in the pet. And if everything goes well, the horse will work with positive emotions.
Video: how to put on a halter correctly It is quite possible to make a halter yourself, following the size table with points for knitting knots. A product made from synthetic rope is easy to wash and dries quickly, but its shelf life will be less than that purchased. This will be a gentle bridle for bathing and grazing the animal, but it is not suitable for restless individuals.
Problems and their solutions
A horse is a wayward animal, with a character, and if it doesn’t want to, it can take a lot of time to put on a bridle. Tall horses like to throw up their heads, which makes it very difficult to put on a bridle, because it is impossible to even reach and throw the reins, let alone put the bridle on. In this case, you need to pet the horse and talk to it in a calm voice. It is better to hide the bridle behind your back; you can offer a treat. Even the most harmful horse will reach for a treat.
It happens that a horse becomes mischievous and will never take the bite into its mouth, clenching its teeth tightly. Experienced horse breeders use this method. You need to put your finger in the horse’s mouth, where there are no teeth, and press on the lower jaw with your finger, while its reflex is triggered, and it briefly opens its mouth. But during this time it is necessary to have time to put a bit in her mouth and tighten the bridle. You can also insert the bit along with a treat, sugar or carrots, but it is better to achieve this with patience and perseverance and then give the horse a treat.
Horses have a good memory and next time they may not take the bit until you give them a treat. This can lead to the formation of incorrect habits in the horse; you must always remember that in this union the person should be the main one, not the animal.
Video: How to put on a bridle
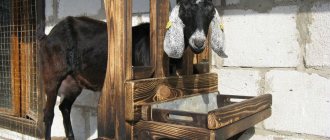
One of the main accessories in horse breeding is a halter. It is intended to make the horse easier to care for and is not used while riding.
With the help of a halter, the horse is led out, tied, cleaned and other basic actions are performed. The device can be purchased at a specialized store or made independently.
We make our own halter for our horse
The halter is a very important element of a horse's equipment and is used to carry the horse in the hands, to secure it in the stable or during transportation. Any horse should have this piece of equipment and should be taught to use it from a very young age. Today, in any horse shop you can find a wide variety from leather and synthetic halters to rope halters. However, you can make a halter for your horse with your own hands. We'll talk about this in this article.
Master class – synthetic halter
Tools and materials
Video “Weaving a rope halter”
Comments and Reviews
Horse measurement
First you need to determine its size. This is an important point. It must be approached very responsibly. Measurements must be accurate. A table of measurements of all parameters of the horse will be useful, because without it it will most likely not be possible to do the job correctly. If you are not completely sure that the dimensions are correct, you need to focus on the larger side. Let the halter be a little larger, it's not scary.
Horse measurements
Halter sizes
So, a halter for a horse is a free headband without a bit and, like a bridle, is fixed on the animal’s head using straps or carabiners. Their structure is almost identical in different species, they differ only in size and material. Leather ones are more durable with good care, but are impractical for everyday wear. But for everyday work, synthetic halters for horses will be more convenient, which you can do without fear of getting wet or dirty. A type of rope halter - halter - is made of durable nylon cords and secured to the head with knots.
Halters are used for calm horses or for show breeding of thoroughbred horses. They are quite impractical in everyday life, although they are popular among amateurs.
In order for a halter to be practical and safe to use with a horse, it must be the right size. Therefore, before you start making it yourself, take a very responsible approach to taking measurements of the horse’s head. Do not do it by eye, you need to take accurate measurements. If it is small, it can rub the skin on the head; if it is large, it can easily come off at the most inopportune moment.
Scheme for taking measurements from a horse's head
Characteristics of elements
The structure of a horse's bridle consists of the following elements: five straps (occipital, cheek, forehead, muzzle and chin), a bit with rings, bites, and reins. Agricultural headbands are usually divided into four sizes.
Photo of a horse in harness
All traction force from the horse's collar is transferred to the cart or implement, depending on the type of work. A clamp consists of the following parts: a clamp, pliers, a pillow, a tire and a support. Clamps for arc harnesses are marked by the presence of a pair of tugs that connect the shafts and the arc. A drawbar harness or a double harness has rawhide eyelets where the trailing harnesses are fastened. At the top there is a strap called a gort, used to fasten harnesses. Clamps are made to size. And these dimensions are determined by length and width. In this case, the length is the distance inside from the clamp pad to the pincer horns that are located below. And the width is measured at the height of the holes intended for tugs between the inner sides of the pliers.
The harness protects the clamp from sliding forward slightly as a result of the braking process. Its depth depends on the length of the transverse and slope belts. It should be of such a size that the rim straps settle below the ischial tuberosities by 5 cm.
The nurse is used to maintain the collar in the desired position, and the arch and shaft - the midsection and the abdominal region. There are two types of caregivers for horses: straight (for horses with wide and low withers) and humpbacked (for high and sharp withers).
Reins are ribbons, combined or rope
The horse's bridle girth directly holds the saddle in place on the back, preventing it from slipping. There are three sizes from the smallest 1200 mm to the large 1500 mm.
The cross-saddle supports the heavy mass of the collar with the arc and shaft on the back of the animal, and is also responsible for the normal position of the collar when the horse moves and transfers a small part of the traction force to the horse’s back. It is also manufactured in three versions: with or without an underbelly, solid or dismountable, and with a ring or a loop. The belt length is No. 1 – 2100 mm, No. 2 – 2400 mm, No. 3 – 2600 mm. It should be noted that the sizes of the abdominal and midriff straps are the same.
Reins are ribbons, they can be combined or rope. According to the structure, they are distinguished: single-horse and double-horse, one-piece and with tips, with carabiners or lambs, with clasps and cakes.
The arc, together with the tugs, binds the collar and shafts, and they also function as shock absorbers when the cart is pushed. Regarding the functions performed, arcs are distinguished:
- traveling passenger cars - used for carts whose load capacity does not exceed 500 kgf;
- agricultural - 500-1000 kgf;
- half-mule – 1000 -1500 kgf;
- dray - up to 2000 kgf.
Photo of an arch for a horse
Of all of the above, only horse arches are made solid, while the others are solid or glued. For solid-bent arches, wood from ash, elm, maple, elm, birch, bird cherry, willow and others is used, and bent-glued ones - birch, aspen or larch.
If there is an arcless harness, lines are used to transmit the draft force from the clamp to the rolls. And the bibs and stripes fasten the collar to the drawbar in the double-cone drawbar bridle.
Shorka also transfers the traction force only to the harness horse, using lines to the carriage. The collar is used as a decoration for a horse that is in harness. The coupling is included in the harness kit and is used to support the internal lines.
Master class – synthetic halter
If the dimensions are taken, you can proceed to the selection of materials. We recommend making your own synthetic halter, which can be sewn with strong threads. It is more difficult to work with leather, as it requires some skill. If everything is ready, you can get down to business.
Tools and materials
- Durable synthetic straps;
- fleece or soft velor;
- sewing machine;
- strong threads;
- needle, scissors;
- awl;
- other tools as needed.
The request returned an empty result.
Step-by-step instruction
- Knowing the size of the horse's head, draw up a diagram of the halter and measure each strap to the correct size. You should get seven straps with allowance for stitching.
- Thinner material straps need to be double stitched. If you are ready to take them, then additionally you can only sew the edges.
- We attach a buckle or carabiner with a ring for fastening the halter to the top left side of the head strap. To adjust the length of the buckle, we make holes at the other end of the strap. To work with a carbine, immediately measure the required size of the neck strap.
- We leave an empty ring on the lower strap at the junction with the fastening strap. For this, either a chomp, or a cord, or an interchange will be attached to the halter.
- We connect all the straps using rings. An additional fastening with a buckle can be made on the capsule strap to adjust the size of the guard.
- We sew thin fleece or velor onto the inside of the snatch and back strap to prevent chafing.
- To see more clearly how to make this type of equipment for a horse, watch the video from newfriz sun.
Purpose
A halter is a bridle without iron and is a necessary item for stable use. It is put on horses to take the animal out of the stall, pick it up from the pen or put it on the junctions (leash). This necessary item is made using very thick braid or rawhide. Today, there are also decorative options that are widely used in shows.
Halter
To put a halter on a horse, it does not need to insert a bit into its mouth. To control the animal, a chombur is used in the form of a strong rope, which is attached to the halter with a carabiner. It is an indispensable tool for cleaning horses, especially those with an obstinate character or excessive ticklishness. To prevent the animal from accidentally injuring a person, a halter is put on it, then it is secured in the passage of the stable at the junctions, and only after that the necessary procedures are performed:
- cleaning;
- saddle;
- forging;
- veterinary activities.
What does it consist of?
If you look closely at this necessary device, you will see that it consists of several straps, namely:
- capsule (put on the muzzle);
- chin;
- buccal;
- occipital;
- carabiner or buckles to fasten.
Rules for dressing a halter
Halters are much simpler than bridles, and therefore, if you know a few simple rules, putting it on will not be difficult even for a beginner. The step-by-step instructions are as follows:
- Before putting on a halter, it should be carefully inspected for damage. All fastenings and straps must be in perfect order. Modern models have buckles or carabiners that are attached to the left side of the back strap.
- Before opening the door to the stall, the horse must be called so that the animal does not get scared. The animal must be handled calmly and, if possible, without sudden movements, especially if the horse is unfamiliar. Chombur is worn around the neck.
- The next step is to unfasten the buckle on the back strap.
- The halter is taken with the left hand, the right hand is thrown over the animal's head. The noseband fits over the muzzle, and the neck strap goes behind the ears. Only then can you fasten the buckles.
Rope halter
Do you have a young horse and want to train him to a halter? It's easy to do it yourself. To do this you will need regular other rope and the ability to tie knots. Stick to the plan and you will succeed.
Step-by-step instruction
- First of all, you need to learn how to tie double knots. They hold and fix the rope well and do not put pressure on the horse's skin.
- Tie a simple knot, but do not tighten it. The end of the rope must be brought behind the first knot parallel to the loop. Then a second knot is tied inside the first one.
- Now you can tighten two knots at once at the same level. The result will be a cross knot in the shape of the letter “X”.
- Once you learn how to tie knots, the rest will be quick and easy. Since all you need is to have measurements and tie knots according to these measurements to get the desired part or side of the halter top.
- For more details, see the diagram in the video.
Sorry, there are no surveys available at this time.