A self-made electric grater allows you to get finely chopped vegetables and fruits.
Although the original goal was to have our own starch, that is, to make it at home. To do this, it was necessary to make a grater equipped with an electric motor and starting equipment.
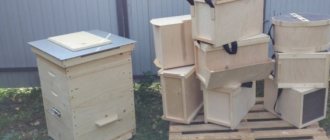
The hopper and casing can be completely riveted by yourself, but the driving and driven pulleys had to be taken from an old Riga-60 washing machine. The design of an electric grater is very simple; anyone with even a little knowledge of technology can make it.
The operating principle of such an electric grater is as follows.
A grater disk rotates inside the hopper at a speed of 600-700 rpm. Pour washed potatoes in their skins into the hopper. To prevent the tubers from slipping through entirely or in large pieces, limiters are installed on both sides in the center of rotation of the grater disk with a gap between them (the sides) and the grater disk.
We turn on the unit, place the dishes under the grater - and just have time to add the potatoes. The smallest tubers will be used for starch.
Electric grater: 1 - hopper Art. 1 mm; 2 - corner frame 25 x 25 x 2; 3 - electric motor from the washing machine; 4 — grater disc, stainless steel. steel 1.5 mm; 5 — driven pulley from the washing machine; 6 — ball bearing 202 (2 pcs.); 7 - flange; 8 — limiters, steel 2 mm; 9 — housing, bearing with driven shaft.
Manufacturing of hopper and casing
The dimensions are shown in the figure; all that remains is to add that it is better to make them from thin metal 1 mm thick. This is quite enough. You just need to select the metal so that it does not oxidize.
Making a disc.
On the disk we use a special notch for the grater. For convenience and to obtain torn and sharp edges, we cut one hole after another at the end of the hardwood. First, on a disk with a diameter of 250 mm, you need to mark the holes in a spiral, and then alternately cut one hole on one side, another on the other. And so on until the end throughout the entire disk. The holes should be tetrahedral, with antennae. Over time, after a long period of operation, they will have to be renewed.
In this article we will present to your attention an idea for making a spiral grater yourself. The manufacturing process is extremely simple, but the result will definitely surprise not only you, but also your family and friends.
What we need: - a hacksaw for metal; — PVC pipe; - blade from a stationery knife; - glue gun.
First of all, stepping back from the edge of the pipe by approximately 10-20 mm, we make an incision using a hacksaw to the middle. According to the author, the angle of the cut should be chosen individually, since the thickness of the cut carrots or cucumbers depends on this angle. After making the cut, take a utility knife and cut out all the burrs. We measure 20-25 mm from the cut made in the previous step and cut off the pipe. We again process the incision site using the same stationery knife. The blank for the final assembly of the future grater is ready. At this stage, you need to rinse it thoroughly with alcohol and disinfect it. The blade of a stationery knife must be boiled in water for approximately 10-15 minutes, then lubricated with vegetable oil so that the blade does not rust in the future. Now insert the blade into the cut.
We take a marker and mark with lines the places that remain outside the pipe.
Using pliers, carefully break off all excess. Finally, to prevent the blade from accidentally jumping out of the cut, drop a few drops of hot glue into the cut.
A household vegetable chopper is capable of processing any juicy food into a homogeneous mass, which can be used as an independent food or as part of a mash. Prices for a feed cutter start at 3,500 rubles, but despite its availability, many farmers prefer to assemble it themselves.
A home-made device does not differ in functionality or performance from its store-bought counterpart. The cost of such a feed chopper will be lower - it is made from materials available in every farm. The cost of replacement parts will also be lower.
The basic model is designed for processing vegetables, root vegetables and fruits. If you have an additional set of shaped double-edged knives, the device can also be used for grinding grass, hay and pine needles.
It is necessary to load grass into the working chamber in small portions, otherwise engine clogging cannot be avoided.
When working with a homemade electric feed cutter, you must follow safety precautions:
- Stop work immediately if smoke or sparks appear,
- Do not leave the feed cutter running without supervision.
- Be careful when loading vegetables into the cooking chamber,
- Do not touch the operating shaft of the device when it is turned on,
- Disassemble and wash the feed cutter only after disconnecting from the power supply.
How to care for your home crusher
If you managed to make a shredder, then the hardest part is over. Don’t worry about caring for and cleaning the crusher yourself – it’s as easy as shelling pears.
The main rule for operating devices that come into contact with food is the cleanliness of the units. After each grinding, thoroughly rinse the surface of the device, clean and dry even in hard-to-reach places - these are the main areas of accumulation of bacteria and mold, which not only lead to rapid spoilage of the juice, but are also dangerous to human health.
Important! Before you start cleaning, turn off the power to the crusher!
To be able to enjoy delicious juice both in summer and in winter, it is enough to design a home apple crusher and learn how to squeeze the juice. Assembling such a unit is quite simple. You will receive undoubted advantages and significantly save money.
Types of homemade vegetable choppers
Manual feed cutter
To prepare feed for several cows, chickens or piglets, you can use a simple vegetable cutter. The device works on the principle of a grater, but is distinguished by its productivity: with its help you can process up to 10 liters of vegetables or fruits in 10-15 minutes.
An ordinary galvanized bucket with a volume of 10-12 liters is used as a grater. The bow is knocked off, the bottom is cut out, and holes are punched in the walls. The edges should be as sharp as possible, and the dimensions should be from 0.2 to 1 cm. The grater will be more effective if you punch holes in a checkerboard pattern.
For structural strength, the bucket is covered at both ends with metal stiffeners. Strips of hard metal are welded to them, in which recesses with a diameter of 1 cm are drilled in advance. A piece of reinforcement is pulled through the holes, drawn around the edges of the bucket and bent into the shape of a handle.
To supply raw materials for processing, a receiver is installed above the bucket - it can be a wooden or metal box with a knocked out bottom. The receiver is mounted on a wooden frame with bolts or self-tapping screws. The final stage of assembly is making the base. It is knocked down from durable timber in the form of a table. The front part must be strengthened with additional rails, and made lower than the back by 5-7 cm.
A root crop chopper works like this: rotating the handle drives the drum. Since the bucket is cone-shaped, the cuttings will be pushed into the front, and from there into the container underneath. Vegetables and fruits are crushed under the force of their own gravity.
Assembly of other elements
A high-quality apple crusher should have devices for adjusting the start. Despite the “high-tech” name, there is nothing complicated about it - we just mean a switch button. The electric motor is placed on the side of the main structure of the crusher.
With high-quality design and careful operation, homemade crushers are often superior to branded products. You need to think through everything so that washing even the farthest corners of the shredder is not difficult.
Grinder feed chopper
An electric homemade vegetable cutter is made using a motor from a grinder. The simplest option is a disk feed cutter with vertical feed of raw materials.
The machine's power is sufficient for shredding:
- Beetroot,
- turnip,
- Potatoes,
- carrots,
- Batata,
- Turnips,
- Rutabagas,
- pumpkins,
- Zucchini and squash,
- celery,
- Radishes,
- Radish.
Assembling a grinder grinder begins by welding a metal frame with a thickness of at least 5 mm.
The frame is made on legs: the minimum distance from the ground to the motor is 20 cm. A durable steel disk is used as a cutting element, which is equipped with four knives with serrated blades. It is easier to make knives from old hand saws: for this, two plates, about 50 mm wide, are cut out of the blade. The disk is installed in the working chamber so that there is a gap of 1 cm between the edge of the knife and the wall. The working chamber can be a large bucket, a frame from an old washing machine or vacuum cleaner, or a metal barrel. Another option is to weld the chamber of the desired shape from steel sheets.
The cutting disc is attached with adapters, and a receiving hopper is mounted immediately above it. It is made from an ordinary bucket with the bottom knocked out. An unloading hole is cut in the lower part of the chamber, under which a box for chopped vegetables is installed. The engine is used from a grinder: it is attached to the cutting unit using several couplings, and connected to the shaft using a drive belt.
Description of the device and its functions
A crusher is a device with a manual or electric drive.
It consists of a chute for supplying raw materials, a chamber with a grater, disk, knives or drum for chopping and a device for discharging cut fruits into a prepared container.
Depending on the design, units may have different performance, purpose and cost.
For domestic use, there are models up to 10 thousand rubles, and to ensure industrial scale for such a crusher you will need to pay over 30 thousand rubles.
Design options
For processing apples with a soft structure, high-speed knife drum devices are used. Grinding is carried out through the interaction of pressing pads with several rows of comb knives of different thicknesses.
Hard fruits are crushed more efficiently by hammer machines. It is based on a shaft with hammers that crush the raw materials as a result of their movement. The rotor location can be horizontal or vertical.
As a rule, professional and semi-professional machines are equipped for filtration with a special replaceable sieve.
Depending on the required volume of raw materials at the output, a sieve with the required mesh size is selected.
Vegetable cutter from a barrel
How to make a root vegetable chopper with your own hands from a tank or barrel:
- If the working container is welded independently, then it is better to use steel 1.5 mm thick,
- The walls are given rigidity by flanging the edges with rubber tubes,
- The bottom is made of 5-6 mm steel sheet,
- A hole is drilled in the center of the bottom to install the motor. For this model, a conventional single-phase motor is suitable,
- An unloading hole is cut out at the bottom of the barrel, under which a tray or box is placed,
- The body is mounted on four legs made from a piece of pipe or angle,
- Two knives are installed inside the working container,
- The upper knife is made double-edged with the edges bent down,
- The lower knife is made in the shape of a propeller with one cutting edge,
- The shaft is connected to the engine using a chain drive.
- The dimensions of a homemade barrel depend on the thickness of the steel used. If you use a 1.5 mm sheet, then the maximum wall height should not exceed 60 cm.
Crusher knives are made from a hand saw blade - the size should be one centimeter smaller than the diameter of the working chamber.
The role of the upper knife is chopping, and the lower one is to teddle and lift uncut particles of feed. To set the size of the crushed feed fraction, a sieve with the required cell pitch is installed on the discharge opening. Depends on the purpose of using ground vegetables: for feeding to adult large and small livestock, pigs, horses and rabbits, a sieve with a cell of 0.7 -1.2 cm is suitable. For feeding to young animals and poultry, it is better to use a smaller size: 0.2 -0.7 cm.
A feed cutter is a necessary thing in a household. You can buy it ready-made, or you can make it yourself. It’s easier to buy something, but you don’t always have the means. Moreover, if you have a suitable electric motor, then a homemade feed cutter will cost you several times cheaper than a purchased one. Feed cutter designs
are also different. A description of a simple and reliable electric feed cutter with a capacity of about 150 kg, with good quality of grinding various raw materials, is offered. Tested in operation over many years - only positive reviews.
Design and technical description
Rice. 1. Homemade feed cutter:
1 - wooden board; 2 - ejection chamber; 3, 9 — studs; 4 — front cover; 5 — ejection blade; 6 — scoring plate; 7, 11 — bolts; 8 - feed chamber; 10 - knife; 12 — feed cutter body; 13 — knife plate; 14 — M10x1 screw securing the bushing; 15 — bushing; 16 — back cover; 17 — electric motor.
The device is powered by a suitable electric motor (Fig. 1). For a single-phase electric motor (you can also use a 3-phase one with the appropriate capacitors), you need to make a sleeve 15. A plate 13 is welded to it, two ejection legs 5 are welded to the plate, which push out the product - the crushed mass, and their short ends serve to support the cutting knife . The cutting knife 10 is attached to plate 13 with two bolts. These bolts must have countersunk heads so that they do not protrude from the plane of the knife. This all makes up one unit, mounted on the shaft of the electric motor, with which it rotates. The bushing is secured by screw 14 so that it does not move on the shaft.
Housing 12 of a homemade feed cutter
It is a steel pipe with a diameter of 300 mm, in which a window is cut to remove the crushed mass. Two studs 3 must be welded to the body to secure the front cover. Corners with holes are welded to the sides of the outlet chamber, through which the body is bolted to a 40 mm board. An electric motor is attached to the same board.
The case has two removable covers; front 4 and rear 16, the rear has two holes: one in the center, the second offset, it is drilled opposite bolt 11 and is used to unscrew the nuts securing the knife. A square hole is made in the front cover 4 for supplying feed mass. A cutting plate 6 is attached to the inside of this cover opposite the hole. The hole is shifted from the center to the left side. Opposite it, on the outside of the cover 4, a square tapering feed chamber 8 is attached to feed the mass into the feed cutter. Plates with holes for attaching it to the body are welded to the front and rear covers.
Assembling the feed cutter
A hole is made in the board intended for installing the feed cutter for the passage of the finished chopped mass. The housing 12 with the back cover 16 is installed on this hole and bolted to the board. The electric motor shaft is inserted into the central hole of the back cover. Next, install the cutting apparatus assembly, this is a bushing with a plate welded to it and an installed knife, onto the shaft of your electric motor until it stops and fasten it with a locking screw 14. After this, attach the front cover with the scoring plate 6 to the studs. Next, set the required gap of 1 mm between the scoring plate plate 6 and cutting knife 10, bringing the electric motor with the cutting device closer to the scoring plate or moving away from it. In this position, the electric motor is attached to the board, and the feed chamber 8 is attached to the front cover.
Startup and operating principle
Turn on the electric motor and begin feeding the green mass into chamber 8. The rotating knife cuts, the blades pick up the crushed mass and throw it out through the ejection (output) chamber. The raw material is served so that it is cut across the stems. Capacity 150 kg. The feed cutter shreds any grass well, even timothy, if you reduce the gap between the cutting plate and the cutting blade to 0.5 - 0.1 mm.
Homemade feed cutter
It perfectly chops not only grass, but also various root vegetables. Large nodo root vegetables must first be chopped or cut into smaller pieces so that they pass through the feeding chamber. If someone decides to make a unit only for root vegetables, let them increase the feeding chamber - that’s enough.
If necessary, productivity can be doubled. You just need to install a cross-shaped knife or an electric motor with a rotation speed of 2800 rpm, and if it is four times, then install both a cross-shaped knife and an electric motor with a rotation speed of 2800 rpm.
Specifications:
| Modification | Optimus |
| Dry grain up to, (kg/hour) | 155 |
| Root vegetables up to, (kg/hour) | 280 |
| Grass up to, (kg/hour) | 54 |
| Hay/straw up to, (kg/hour) | 30 |
| Voltage, (V) | 220 |
| Net power of the electric motor, (W) | 750 |
| Power consumption, (W) | 1200 |
| Overall dimensions, mm) | 780x330x330 |
| Net weight no more, (kg) | 10 |
| Hopper volume (dm3) | 7,7 |
| Electrical safety class | I |
| Warranty period, (months) | 6 |
You can read the instructions for Farmer "Optimus" DKU-05 here:
And another homemade feed cutter scheme
The design of this electric feed cutter
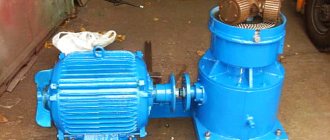
also extremely simple. The working container is a large metal tank - ready-made or homemade, purchased or any available on the farm. If you make it yourself, you will need a 0.8-1 mm sheet of galvanized iron. In the figure, only the diameter is specified; the height of the workpiece can be selected within the range of 350-600 mm. Since the material is thin, to increase the rigidity of the structure, the upper edges of the barrel must be beaded and edged with a rubber tube cut lengthwise. At the bottom, a steel bottom made of a sheet 4-5 mm thick is welded or installed with screws. Pre-drill holes in the bottom for the motor shaft and mounting to the stand. It is better to use a single-phase electric motor (for example, from an old washing machine), but you can, as in the previous case, use a 3-phase one, with a power of 1-1.5 kW at 1400 rpm, with an appropriate electrical connection circuit to 220V using a capacitor batteries or powerful resistance wire.
1 - protective cover; 2 — tank; 3 - lock nut; 4 - base; 5 - knives; 6 — stand; 7 - electric motor; 8 - hub.
Cut a hole for discarding crushed food at the junction of the bottom and side wall, as shown in the figure. Hang the box-shaped tray below on hinges. Weld four inclined legs made of steel pipes to the bottom of the tank and to the support slides bent from pipe sections.
Now about the feed cutter knives.
There are two of them, they are made from an old two-handed saw blade or a heated steel strip 0.8-1 mm thick. The lower knife has no sharp edges and is curved like a propeller. Its main purpose is to throw uncut stems onto the upper knife and sweep the green mass into the outlet window of the hopper. The working knife has sharply sharpened cutting edges, the ends of which are better bent down a little - this way they cut better. Assembling the knife will not be difficult if you make hub parts from steel blanks in advance on a lathe. It, together with a parallel key, is put on the electric motor shaft.
Launch and working principle.
Turn on the engine and close the throttle. Root vegetables, grass or stems are thrown in small portions into the inlet hole in the lid. The rotating knives will quickly turn them into a homogeneous green mass. The degree of grinding depends on the time it is in the hopper: the longer, the finer it is. On average, 5-6 seconds are enough for this. Large root vegetables will require 3-5 times more time. At the end of the work, open the damper and, with the engine running, release the green mass from the outlet. To ensure safe operation, install a conical lid with a hole on top of the hopper. Galvanized roofing iron is best. To avoid cutting yourself, the sharp edges of the lid must be rolled or put on a rubber tube.
In an hour, such a do-it-yourself feed cutter can prepare from 80 to 150 kg of feed. Productivity depends on the power of the electric motor and the quality of grinding of raw materials. Good luck, do it yourself and enjoy the result of your labor.
You've probably come across graters that cut vegetables/fruits into a spiral. Today I will show you how to make a spiral vegetable grater at home. Of course, it would be easier to buy it, but if you are a real master, you will do everything yourself. Moreover, the process is very easy.
Tags
varieties of apples Processing apples for apples with your own harvest of apples and for apples for apples with your own for apples with your own for apples with your own hands for the handle. with your own hands with your own hands with your own hands with your own hands with your own hands with your own hands apples with your own hands apples with your own hands from your own site productivity with your own hands processing your personal space of your gardens you give your consent and your nearest one change your settings fruits with your own hands How to make a grater How to make a grater How to make a grater Made it easy to do it yourself.
disk homemade adaptation process photos we will further products similar noscript
Manufacturing process
First of all, we retreat 10-20mm from the end of the pipe and make a cut to the middle of the pipe. We select the angle of the cut individually, because The thickness of cutting products will depend on it.
We clean the cut area from the inside and outside with a stationery knife. We measure another 20-25 mm from the cut and cut it off. We also clean off any burrs with a utility knife. It should look something like this:
Do not forget about hygiene: we treat this workpiece with alcohol, the blade of the stationery knife needs to be boiled for 10-15 minutes, lubricated with vegetable oil so that the blade does not rust in the future. Well, to finish... insert the blade, make marks with a marker and use wire cutters to bite off all the excess. To prevent the blade from jumping out, add a couple of drops of hot melt glue.
Now you need to check the functionality of the spiral grater.
Take a cucumber and insert it on the side that is longer, because... This part serves as a guide and we begin to scroll. It turns out not bad! Facebook
Improving the device
For ease of operation, tighten the belt, which is secured using a special bolt for clamping and by means of the main block along the guides.
Rollers and a handle are screwed to the frame, which makes it easy to transport the chopper.
The apple crusher body can be avoided from bending by attaching it to the upper corners of the frame using bolts.
Note!
To avoid splashing when processing apples, make sure that the container in which you collect the puree at the end is wide. When designing, make sure the frame is low, otherwise processed food will flop into the basin and splash around.