Specifics of the core
The practice of using the same word to refer to a special mini-hive (for example, in the phrase “nucleus for bees”), which contains a relatively small colony of bees , is, in principle, correct. But we must understand that this meaning, although true, is secondary. This is what this bee colony is originally called, and the tradition of also naming the place where it is located comes from this.
Such a colony usually includes an average of 0.5–1 thousand worker bees.
It is not recognized as a full-fledged bee family for the following reasons:
- insufficient number of individuals;
- weaknesses.
While most modern beekeeping methods recommend mercilessly culling weak colonies and stocking the apiary only with strong ones, the nucleus is an exception. Since its main function is the breeding of bees, and often the industrial breeding of queens, from this position the weakness of such a mini-family becomes precisely its strength.
The feeling by the bees that are part of it of their inferiority and vulnerability, on an instinctive level, stimulates them to more intensive development than in a bee colony or the composition of a bee package.
Sometimes the expression mininucleus (or mininucleus) is used in everyday life. But its application is not entirely correct. Considering the ratio of the sizes of both the nucleus to a regular bee colony and the hives intended to contain them, the “mini” component is already automatically taken into account at the level of the meaning of the word, and there is no need to mention it again: how much smaller?
In general, this word came to beekeeping from archaeological terminology. In archaeology it means core. This is what archaeologists usually call fragments of Stone Age tools at various stages of processing. For example, ancient prototypes of an ax or hand axes.
Depending on the geometric shape, archaeologists classify cores as, for example, prismatic, wedge-shaped, etc. However, for a beekeeper, the specifics of using the term in another subject area are not so important.
Some beekeepers use a distorted version - nuclex. But this is a conversational option.
Characteristics of the core
A nucleus is a mini-hive that contains weak bee colonies; only two frames can be placed in it. The device is used to place queens that have only recently emerged and preserve them during the winter. The nucleus is also used to preserve the brood.
The device provides normal wintering for bees and queens, which plays a big role. Often beekeepers have a problem: in winter, many bees and queens die, but there is no replacement, and when the time for the main bribe comes, there is not enough strength to work.
In severe cases, an entire family can die. Beekeepers have found the optimal solution; they use a mini-hive, which contains queens as a reserve. This is not difficult to do, the queen needs the maintenance of a small number of bees, and the nucleus is specially adapted for the normal development of the queen.
The peculiarity of wintering cores is that the insects will spend the winter on the Rutov semi-frame, and you also need to carefully prepare for it. The beekeeper specifically grows a colony, which includes young bees. It is necessary to replant the queen in mid-summer, so a new seeding will appear.
If the nucleus is placed inside the hive (how to make a hive with your own hands?), you need to pay attention to ensure that the bees do not start moving from different devices, this is dangerous for the queens, they may die due to the battle of the bees.
Usage
This design has the following purposes:
- Nuclei are used to produce young queens and fly drones around them.
- Working with such a house greatly simplifies the life of the beekeeper, since he does not have to constantly disturb insects in large hives.
- Development and increase in numbers occurs much faster here.
This small house for a young family can be purchased in specialized stores. But, if you use the instructions, making a nucleus for bees with your own hands will not take much time and effort. But before you begin such manipulation, you need to decide why this design will be used and what its main types exist.
What is a core needed for?
When using a nucleus, beekeepers assign the following basic functions to it:
- industrial breeding of queens;
- fertilization of queens, which is less beneficial as part of a full-fledged family;
- maintenance of reserve fetal uteruses.
In the old days, beekeepers did not resettle the formed colony into a separate mini-hive, but fenced off space for them in the same hive with the bee family. However, this type of content was fraught with too many problems . In particular, it was necessary to ensure that there were no holes in the partition separating the family from the nucleus. That's why one day it was decided: to resettle - just to resettle.
The nucleus is created to remove the fetal uterus - most often. Let's calculate the losses for the usual change of uterus in a family.
- The young queen flies out for fertilization no earlier than on the 6th day, and only if the weather permits.
- Bees are often given a mature queen cell, which plus another day or two. “Mature” is a 14-day-old queen cell in which the bees have chewed off the waxy top, exposing the cocoon. They do this for the convenience of the emerging uterus.
- It is impossible to remove the fetal one, replacing it with a queen cell or an infertile uterus: they will kill. It takes time for the bees to feel the orphanhood, then, with precautions, they give the queen cell. They may not accept it; repeated attempts will be required (more time).
- The young queen does not immediately develop high egg production; she “swings” for some time.
Therefore, they create a small family (nucleus), where the uterus is fertilized. This is an additional family; literally a handful of bees are taken from the main one, which is unimportant for it. After a short time, the beekeeper receives a fertile uterus.
It is also used as storage for a spare queen. Her death is the loss of her family. If this happens, often during the winter, the nucleus and the queen are attached, preserving a full-fledged family. It is not possible to store the queen bee in a different way - without bees, or several pieces per family: the bees are against it. Biology doesn't allow it. Each family has only one queen. An exception is that sometimes during swarming or quiet shifts, several exist simultaneously for a short time.
Specifics and equipment for pumping honey
After fertilization, they act differently. For example, you can select the fetal uterus and reuse it. Again we substitute the mother liquor and start the cycle again. You can leave it, add brood and add frames.
Goal: to turn over time into a full-fledged unit in the apiary, but it can also be disbanded by joining an ordinary family.
Advantages of polystyrene foam types
When choosing a material for making a core with your own hands, you should choose expanded polystyrene, which is obtained from polystyrene. It has many advantages:
- it prevents bee colonies from freezing during wintering; it is always warm and quiet in such a hive;
- Equally important is the ease of maintenance;
- such a core is easy to transport;
- it is lightweight and durable;
- unnecessary water vapor is also removed, because expanded polystyrene does not warp, does not crack, does not absorb moisture, and does not rot.
Styrofoam hives are not styrofoam nucs, although they are somewhat similar.
Family formation
Forming nuclei, as shown in the video, is necessary only on strong and healthy families. This can be done before the main bribe is completed, but it is best to form it in the pre-swarm or swarm period. In terms of time, it is better to choose the first half of the day, when the bees fly to take bribes, and only non-flying individuals remain in the evidence.
The configuration should take into account the climate zone. So, for example, in the south you can make one frame with brood and two frames with beebread and honey. In northern and central latitudes it is better to take two brood frames and two food frames. The feed must be at least 2 kilograms.
The brood must be sealed and mature. When forming the nucleus, be careful not to accidentally transfer the uterus. You can take about 300 bees in the south, and at least 600 bees in the north.
After selecting insects, frames with foundation are placed in place of the selected frames. The core itself needs to be insulated and the entrance reduced to allow the passage of one individual. Over time, the flying bees will all fly back to the hive and only the young ones will remain. It is also necessary to place a mature queen cell inside between the combs with brood. If the uterus is infertile, then it is placed in a cage and only released after a day.
Since young bees cannot obtain water themselves, they need to have a drinking bowl for the first 5 days. Approximately 5 days after the formation of the nucleus, all the brood should hatch. Now the frame can be removed from the evidence and another one with young larvae can be placed in its place. Thus, we will load the nurse bees. After 5 days, we again place the frame with the larvae until the young queen lays eggs herself.
Important! Each formed core can be separated from the rest; for example, they can be painted in different colors.
Many beekeepers themselves do not know what a nucleus is and are confused about the formation of a nucleus and layering. Branch to is a ready-made family. And the nucleus is a small family intended for storage, flight or for the emergence of young queens.
Nucleus is not intended for wintering. For example, you formed layerings according to the plan, there were 10 layerings, but only 7 layerings came out, what should you do with the remaining queens, that’s what the nucs are for.
In practice, beekeepers use different types of cores
- core for Dadanovskaya magazine frame (3 frame);
- core on the Dadanovsky case frame in the case;
- core on the Rutov frame (3 frame);
- core for the Rutov frame in the case;
- core for ¼ part of the Dadanovskaya case frame (6 frame).
I have given several types of nuclei, but there are also hive-nuclei, etc. Nuclei are formed only by young bees at the age of 25-31 days after sowing by the queen. Young bees are always near empty frames where the flying bee brings nectar, and they accept and process it into honey or feed the bee brood, but we don’t take bees near the bee brood, there is a possibility of transferring the queen to the nucleus.
Formation of the core in the cases
It’s easy to form nuclear corps, but there is one drawback: it’s difficult to control the main family. I divide the nucleus body into sections and place them side by side on a pallet insert (plywood bottom), then transfer 3 frames with bees to each section (2 printed brood with food and 1 feed), one thing should be taken into account, you need to remember about the queen so as not to transfer her to core, then they put sushi or foundation into the main family and close it.
And so 4 bee colonies pass through, when the nucleus body is filled, it is placed on a strong or medium colony, each section is covered with canvas and insulated with general insulation, the entrances are closed at night and the queens or queen cells are placed in the cage after 7 hours.
Young queens are kept in a cage for 24 hours; every other day they are released, having sealed the end with wax; the queen cells are not opened until the queen comes out, and then released. The queens in the nucleus fly around, begin to lay eggs, and then they are used for layering, replacing queens, etc.
Formation of a separate nucleus
Forming individual cores is a pleasure. Three sushi are placed in the core (1 preferably with honey, 1 with water and 1 sushi) or a set. From the main family they take a frame or two with bees and shake them into the nucleus (they don’t take frames from the brood part, so as not to transfer the queen), cover them with canvas and insulate them.
The nucleus is placed in the shade and the entrances are opened, the queen cells are planted or the queen cells are planted after 7 hours and left for a day, after a day the queens are released, the queen cells are kept until the queen comes out.
The queens in the nucleus fly around, begin to lay eggs, and then they are used for layering, replacing queens, etc.
Emergence of queens
After 2-3 days, the queens hatch in the newly formed group. Each of them needs to be found and carefully examined. If there are defects, then we remove it and after a few hours we install a new queen cell or queen from stock. Now we open the entrances by about 1 centimeter so that the queens can fly out to mate. After a few days, blackening begins. Now you can create a full-fledged family.
Bee family - composition and responsibilities
Typical hive structure and components
To make your own bee house, you first need to understand its basic structure. Any model must have the following components:
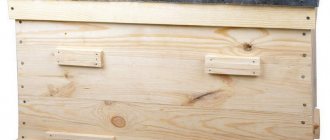
- Frame. It is located in the lower part of the structure and implies the presence of special grooves on which frames are installed. Depending on the size and type of hive, their number varies from 9 to 16. As a rule, such joints are installed parallel to each other. The walls of the housing are made with insulation, which is most often velite - a heat-insulating board made of paper impregnated with bitumen. Its main substitutes are linen mats and polystyrene foam.
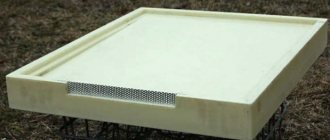
- Bottom. Simultaneously performs two functions - the base of the structure and the “runway” for bees. The bottom can be nailed or removable. From an operational point of view, the second option is optimal because it simplifies cleaning the nest. Between the bottom and the frames you need to create a sub-frame space of at least 20-25 mm in length. It is necessary for cleaning the hive before the spring migration of bees. Some beekeepers leave a space of 40-60 mm, and place a container with insect food under the frames. The sub-frame space forms a steam-air valve, without which the activity of the swarm state of the bee colony will decrease, since flying bees will not land on the honeycombs with brood.
- Letok. This is a hole that allows bees to fly freely and return to the hive. It is cut into the front of the case, often at the bottom, since the top hole takes about a third of the heat. It is closed with a folding valve attached to the front wall of the case using rotating hinges. Some models have two tap holes - upper and lower. The first of them opens in spring and summer and closes in winter. The lower entrance is opened slightly during the winter season to provide access to fresh air.
The classic twelve-frame standard with a frame of 300x450 mm is considered generally accepted. But these also include 8 and 10 frame hives for bees. Some beekeepers prefer weaning bottoms. They are easier to change and clean. Detachable bottoms for bee hives require special care: precision manufacturing of the component parts (to avoid blowing, moisture penetration). Some prefer tightly nailed bottoms, while others prefer single-hull ones with 2-3 magazine extensions. Such hives with bees inside can be built by a man with average static physical characteristics. Easy to lift and move. Store-bought half-frames are filled with solid honey, without bee brood. Therefore, time wastage is greatly reduced.
Features of the core design
You can install Dadan and Ruta frames in the mini-hive, they need to be placed lengthwise, if you want to install 12, then you need to do it across. The device fits up to 6 frames lengthwise. The entire space for frames can be increased if the nucleus can accommodate 12 frames; it is necessary to divide it into two equal parts so that up to two families of bees can be placed.
The device must have double walls; the roof and bottom can be single.
Be sure to fill the space between the first and second walls with polystyrene foam, so the core will be insulated for the winter.
A mini-hive requires insulation of the bottom and roof. Each wall contains up to two tapholes, making a total of 4 tapholes. If the family is weak, only two lets should be left. Making a mini-hive is not a difficult task; if you have a drawing, it’s easy to do it yourself.
Advantages and disadvantages of a polystyrene foam core:
- Thermal insulation, bees will not freeze in winter and will not be susceptible to various diseases, especially nosematosis.
- The bees will not need to expend their energy to regulate and maintain the microclimate inside the hive.
- Economical option.
The disadvantages are that bees can sometimes begin to chew on the entrances; polystyrene foam is not a durable material (How to make durable hives from polystyrene foam?).
Mini-hive made of polystyrene foam
Nests made of polystyrene foam are characterized by high thermal conductivity and durability; they are not at all afraid of wind and cold, and can also transmit sunlight. However, this material has insufficient strength. It is also inconvenient to cleanse propolis.
There are a large number of materials for making a mini-hive.
Before placing the bees in a new home, you need to place frames with food, wax, beebread or empty ones in a certain quantity in the mini-hive. Then you need to shake off the required number of insects into the nucleus and take it to the cellar for some time.
After this, it is recommended to move the mini-hive to another place. In this case, the bees will not be able to fly to the old home. A family with insects of different ages develops better. Then you need to give the queen cell and install the hive in the apiary.
Hive for the family
You can do it yourself, as is usually the case. Let's look at the options.
- In a separate, specially made, small hive. Pros: these will be good for work, they are easy to send or transfer somewhere. Cons: require a lot of space to arrange.
- Several in special hives. Pros: the work of settling in is easier. Space in the apiary and material consumption for production are saved: one 4-person hive requires less resources than 4 single-person hives. When we remove the jumpers, we get a relatively large volume. This will be more convenient if you are planning to convert it into a full-fledged family: for the first time, before relocation, there is enough space for development. Disadvantages: the possibilities of maneuver are narrowed, it is inconvenient to approach - there are entrances on all four sides.
- In a small compartment of a regular building, behind a blank partition, with its own separate entrance. Pros: often used in sunbeds if there is a side entrance. Cons: requires changes in the design of the home. The ability to keep the nucleus nearby should be provided for at the stage of manufacturing the hive, or better yet, earlier - when we are just making drawings for future dwellings.
When keeping bees in large-volume hives (beds), it is not difficult to adapt them with your own hands for additional layering. Anyone can make an additional hole for the taphole and install a plug-in blind partition with their own hands. Being kept close to a large family makes it easier to warm up and join that particular family. Although a single core is more mobile if you need, for example, to transport it somewhere.
Before making beehives with your own hands, you need to decide whether the bees will winter in them. This is a fundamental question! The usual size of the Dadan frame is 435x300 mm. Foundation is also produced for these sizes. For our mini-family, it’s worth making frames a quarter of this size with your own hands. Then, by connecting two at a time, we can use them in regular stores or cases, and there is no need to cut the foundation into pieces.
Important! When wintering, it must be possible to install two such buildings on top of each other. The supply of food within the frame is small, and it is difficult for the club to move sideways in the cold.
The body size for 6 small frames will be sufficient for wintering and spring development.
If we use it only in the summer, then we have complete freedom of action. Bees will master any volume. The minimum, practice-tested size is 4 small frames. This is enough for a short time until the uterus is fertilized. It is advisable to make a feeding compartment with your own hands; however, the frames contain a very small supply of food. The size between the frame frames is also important: 37.5 mm. It is determined by the size of the cell needed for breeding bees and the size of the insect itself: the width of the street is equal to twice the height of a walking bee.
Based on the required number of queens and the area of the apiary, we decide which hives for the cores need to be made. Then we start making them.
Do-it-yourself core manufacturing technology
For manufacturing, you will need to take polystyrene foam sheets no less than 30 mm thick. Stock up on the following tools: glue, a ruler, self-tapping screws, a stationery knife, a screwdriver.
How to make a nucleus
Of course, before you start making a core, you need to figure out how to make a core as correctly as possible. The core should start with a frame, which is assembled separately for each wall.
is knocked together from wooden blocks of any soft species, for example, pine. A fiberboard wall is nailed to one side of the frame, foam is inserted, and then secured with another layer of fiberboard.
This is how all the walls of the core, its bottom and roof are assembled. In addition, plywood trim is nailed to the roof.
Further, the creation of cores involves performing connecting work. To begin with, the side parts and ends are knocked together. Then the joints are coated with PVA glue. When assembling the walls, it is important that a right angle is maintained between them, and the edge to which the bottom will be nailed in the future must be smooth. The bottom is nailed to the assembled walls. A rack liner is nailed to the upper edges of the walls.
When the nucleus is completely assembled, holes are drilled into it, which should be located in the middle of the nest. It is important that the bottom entrance is in contact with the bottom (this allows the bees to throw debris through it).
Then comes the turn of finishing work. The outer side of the core needs to be oiled, and all the cracks in it need to be filled. However, the manufacture of cores is not limited to these works. The core is considered finally finished only after painting. Why are three colors of oil paint used? The first (white or silver) is for the roof, the second (yellow) is for one nesting area, that is, one side wall and end, the last (blue) is for another nesting area.
Removing a swarm of bees from a tree
Painting the roof and bottom should be done especially carefully. Moreover, the color of the bottom does not matter much. In addition, it is advisable to cover the roof with some kind of water-repellent material, for example, polyethylene.
The core manufacturing process includes the following steps
- Take polystyrene foam sheets and make markings on them using the dimensions of the drawing, cut them using a stationery knife.
- Lubricate the surfaces with glue, clamp it tightly, then use self-tapping screws to connect everything.
- Carefully make a hole for the tap hole; it can be round or square.
- Inside the core you need to make folds with plastic corners to which the frames will be attached.
- Dry.
- Mini-hives made from polystyrene foam can be painted on top.
Core frames
Creating cores also involves preparing special frames. Usually a core has frames of such dimensions that by fastening two half-frames together you can get one standard one.
That is why the upper hangers are attached with staples separately to the frame.
There are two types.
- The first (470 mm) is used to make one half-frame from two (to use it in a standard hive).
- The second (260 mm) is for assembling half-frames.
The semi-frame of the core has the same side side as the usual Rutov frame, which has permanent dividers. However, the width of its upper part is not 37mm, but 36mm, which is done to increase the brood. The wire is stretched as in a regular frame in four rows.
Check-in
- We prepare the housing, arrange frames with food, beebread, wax or empty ones in the required quantity. Yes, the nucleus is usually placed on small frames, one-quarter the size of a regular Dadan frame. These are very miniature families.
- Shake off the required number of bees, approximately 200 g each, and close the entrance.
- We take it to the cellar for a while. Goal: the bees must sense the absence of the queen, otherwise the queen cell or queen will be destroyed.
- We transport the hive to another location. Then the flying bees will not fly to their old place. A family with bees of different ages develops better.
- We give a queen cell or, if available, a barren queen.
- We install it in the apiary.
If we form it next to the main family, in a special pocket, then we act differently. We open the side entrance in advance: some bees get used to using it. We select the required amount into this pocket and install a blank partition. The advantage is that we use ordinary frames, and the nucleus has bees of all ages, including flying ones.
The design must provide for ventilation: the entrances are closed. Although in the cellar, in the dark, you can open it. You just need to wait a little for the bees to calm down. You can even keep it in the cellar for several days: the queen still has to “grow up”; the queen that has just emerged from the queen cell cannot be fertilized.
And the gathering of bees, if they were not transported to another area, will be smaller. It is necessary to check the availability of not only food, but also water. It is convenient to place it in bottles with a fabric wick next to the tap hole. You can simply pour it into the honeycomb when we form the nucleus.
Marking
First of all, you need to mark the foam sheets. You need to carefully examine the instructions and drawings. It is best to use a utility knife for cutting. After marking, cut it. Remember the rule: measure 7 times – cut 1 time. After the sheets are cut into blanks, you need to look at the drawing in which places you need to apply glue. They are marked in a special way.
Glue alone will not be enough, so the sheets must be additionally fixed with self-tapping screws. The finished box can be made stronger by using plastic corners. You must remember to cut (preferably round) tap holes of a certain diameter. Next, the product can be painted, but you need to use non-toxic paint so that the uterus does not get poisoned.
Wintering of nucs
Undoubtedly, wintering of cores has its own characteristics. Firstly, the bees spend the winter in it on Rutov’s semi-frames. Secondly, you need to make preliminary preparations for wintering.
For the nucleus, it is necessary to grow as many young bees as possible. Therefore, the last time the uterus is transplanted should be carried out no later than mid-July. Then on July 25, sowing will begin from it.
If suddenly the honey harvest has already ended by this time, fertilizing should be done. For this, sugar syrup (1:1.5) is used. At the same time, about 250-350g are usually required per day. However, you can use fertilizing every other day. In total, they are fed about two liters of syrup.
Feeding is carried out for each nest separately. In addition, you need to prepare 3-4 half-frames with honey for each nesting place in advance. They are usually taken from the main colonies where they were previously installed to be filled with honey and sealed.
Another option is also known. Nucleus drying is prepared in buildings for several families after honey collection. Then feeding with sugar is carried out so that the bees have time to seal the frames in time. After this, the half-frames are assembled and sent to the warehouse until the core is assembled for wintering.
How to transport?
If there is a need to transport “bee housing”, it is transported without a lid, with the holes of the entrance plugged.
The nomadic tray must be pressed tightly against the upper part of the partition so that the bees do not fly to neighboring parts during transportation.
This is the optimal method of transporting the structure and is recommended by the vast majority of experienced beekeepers.
