Expert opinion
Dobryshev Sergey Anatolievich
Professional rabbit breeder and hare breeder with 30 years of experience
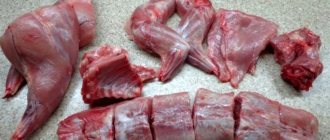
When engaging in rabbit breeding, you can not only raise the required number of animals, but also start preparing rabbit skins yourself. This will bring good additional income. Good quality of the resulting skins is only possible if all necessary requirements are met.
Start of the process
The preparation of rabbit skins at home goes through several stages. Before starting this process, it is necessary to competently slaughter the rabbit. This should be done in such a way as not to cause damage to the material that reduces its value.
After removing the skin, any remaining fat and muscle should be removed immediately. It is convenient to do this with a dull knife, stretching the skin over a special device. The knife should be held perpendicular to the skin, moving from the tail towards the place where the head was. If the skin has time to dry, this process will become more difficult.
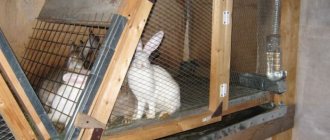
If the preparation of the rabbit skin is planned for a later time, then it is necessary to preserve it. To do this, you need to stretch it for drying on a special wooden device called a straightener with the fur inward. The rule is shaped like the letter “A” with a horizontal crossbar in the middle. The crossbar is movable so that it is possible to narrow or expand the rule in accordance with the size of the skin. To prevent the skin from bunching up, its lower end must be secured.
The rule with the skin stretched over it should be placed in a well-ventilated room, the temperature in which does not exceed 30°C. It is also impossible to store the rule with the skin stretched in the cold. In a damp room, the skin may become moldy, and in the sun or near heating devices it will become brittle. The skins should not be stored in this state for a long time, so as not to be damaged by moths.
If it is necessary to store a large number of skins, they should be placed in a closed box, with moth repellent placed there. In this form they can be stored for about one month.
Soak
Soaking preserved rabbit skins will return them to their former softness and elasticity. To do this, you need to prepare a special solution:
- one liter of water;
- 40-50 grams of table salt;
- antiseptic in the form of two formaldehyde tablets;
- one teaspoon of washing powder containing soda ash.
The water should have a temperature of 35-40 degrees. For one part of the weight of the skins you should take nine parts of water. The solution must be poured into a spacious container made of stainless steel, glass or enamel. Place the skins in the solution and press down on top with pressure. The amount of water above the stack should be at least two centimeters. For more uniform soaking, the skins should be periodically shifted.
The skins should not float to the surface, but float freely in the solution. If the soaking process lasts long enough, the solution should be changed regularly. To determine readiness, you need to try to pull out a few hairs in the groin area. If this happens easily, then the soaking can be completed. Another sign is that the skin easily wrinkles in any chosen place. After finishing the soaking, the skins are washed with clean water.
Flesh
This stage of dressing rabbit skins is necessary for thoroughly cleaning the skins from residual fat, tendons and muscles. This also loosens the tissue on the side of hair growth, which greatly facilitates subsequent processing, since tannins will be able to penetrate to a greater depth.
The process goes like this:
- Remove remaining moisture from the wet skin using a dry cloth.
- The skin in the form of a stocking is pulled onto a special blank or placed in another convenient way.
- Use a scraper or the blunt side of a knife to scrape, first along the ridge from the tail to the head, and then in different directions from the ridge.
If the skin has not been dried, but has just been removed, then scraping can be done simply by hand. It is necessary to ensure that the material has the same thickness over the entire surface.
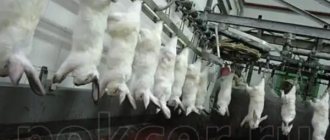
How to shoot correctly?
Most often, the skin is removed from a slaughtered animal using the principle of removing stockings (stocking method).
Algorithm of actions:
- Tie the hind limbs to a stick.
- Make the first circular cut on the hock joints of the hind legs.
- Make a second cut along the inside of the shin.
- Make a third longitudinal incision along the groin.
- Make circular cuts on the front legs along the wrist line.
- Trim ears and tail.
- Firmly grab the skin in the thigh area and pull towards you.
Slow, careful actions will help you remove the skin with the back side out, like a stocking.
Degreasing
In fact, this is an ordinary wash for the final removal of residual fat from the surface. It is made using soap or washing powder. You can also use a few drops of dish soap.
The temperature of the solution should not exceed 40°C. Washing should be continued until the skin acquires a light shade that is pleasing to the eye. The hairs of the fur will begin to creak slightly.
Washing should not last more than an hour so that the alkali contained in the detergents does not damage the material. After finishing, the skin should be rinsed several times in clean water and allowed to drain. Wipe the resulting flesh with a cloth soaked in gasoline.
Pickling
This is the classic way to prepare rabbit skins. After this, they acquire a special strength. To do this, you need to prepare an enamel container and pour oatmeal or rye flour into it. Pour a liter of hot water into it and mix the composition thoroughly. Then add 7 grams of yeast, 0.5 kg of baking soda and 30 grams of table salt.
Place the skins, skin side up, into the cooled mixture. Soaking in the solution will take two days. From time to time the skins should be moved and shifted. The material can be pulled out when the entire inner surface is covered with a white coating and the smell of fresh bread appears. The skins must be rinsed to remove traces of the solution from them. Before proceeding further, you should wait until the skins are completely dry.
Pickling
This is an alternative way to fermentation to give skins strength, but, according to farmers, it is more effective. First you need to prepare a solution called pickel. To do this, one liter of water is heated to a temperature of 35 degrees. Then add 50 grams of table salt and 12 milliliters of acetic acid into the water.
To process one kilogram of rabbit skins, you need to prepare three liters of pickel. The skins are kept in this solution for two days, stirring them periodically. To check readiness, fold the material tightly in the groin area four times so that the flesh is at the top. The resulting corner must be squeezed tightly and drawn along the bent line with your fingernail, then release the skin. The test is that if a white stripe, called a dryer, appears in this place, this indicates that the pickling was successful. The white stripe should last a few seconds before disappearing.
Pickling is used to change the structure of the skin fibers of the skin. It dehydrates and becomes denser, while acquiring roughness.
Required Tools
To make rabbit skins yourself, you need to acquire the necessary equipment for the work. It can be changed in each individual case.
Rabbit breeders who have extensive experience in dressing skins know that no special equipment is required, but they recommend having the following basic set:
- A reservoir with a large amount of water or direct access to a water supply (1 skin will require up to 10 liters of liquid).
- About 15 kg of salt.
- Approximately 2 liters of concentrated sulfuric acid.
- Up to 1 kg of caustic soda.
- Formalin.
- Chromium alum.
- 1-1.5 liters of battery acid (or saturated sulfuric acid).
- Laundry soap.
- Washing powder for hand washing (the most common, without additives).
- Ammonia solution.
- Tongs for working with hides.
- Wooden stirring rod.
- Sharp knives.
- Large tanks with a volume of more than 100 liters.
- Nails.
- Rubber gloves are dense, not sterile.
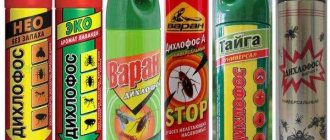
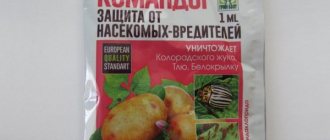
In addition to the specified set, it is advisable to acquire the tools shown in the figure:
Dressing is impossible without the use of chemicals. Therefore, you only need to work with gloves. And when working with saturated acid, you need to remember that it is poured into water, and not vice versa.
Tanning
One of the main stages of processing rabbit skins. This procedure will give the processed products strength, elasticity, elasticity, and wear resistance. After the tanning process, the skin will shrink less and become resistant to water.
There are two tanning methods - chrome method and tannin method. To use the chrome method, 7 grams of chrome alum and 50 grams of table salt are dissolved in a liter of water. The rabbit skins are soaked in this solution for a day, stirring them regularly. The process ends with neutralization.
Expert opinion
Dobryshev Sergey Anatolievich
Professional rabbit breeder and hare breeder with 30 years of experience
The tannide method is more common when tanning rabbit skins at home, although it takes longer. Oak decoction is possible, but not recommended as it will make the skins rough. In addition, it can color light fur in yellow tones, so it is only suitable for dark-colored skins.
It is best to use oak bark as a tannin. The bark is removed from young willow branches that are 2-3 years old and do not have large cracks or flaws. They retain their plasticity, so you can easily cut them with a sharpened knife in long strips. In addition to bark, you can use small twigs.
To prepare the tanning solution, you need to boil willow bark and its branches in a large saucepan for half an hour. Then pour the solution strained through cheesecloth into a suitable container, add warm water and add salt at the rate of 40 grams per liter of water, stirring it thoroughly. After the broth has cooled, add rabbit skins to it. The volume of tanning solution should be 4 times the volume of the skins. It is impossible to overexpose the laid material in the solution, otherwise it will become too hard.
Readiness can be determined using a magnifying glass by cutting off a small piece from the groin area. The tanning process can be completed when the yellow color is clearly visible on the leather.
It should be noted that the willow solution turns yellow or cream not only the skin, but also the fur. Therefore, if skins with light fur are to be tanned, for example, white giants, chinchillas, butterflies, then you should not soak them entirely, but apply the decoction manually with a brush to the skin. You can also use a cloth swab and a foam roller. After applying the tanning solution, the skins are turned inside out and placed in a pile, pressed with a weight, for 24 hours.
Turning the material fur side out, the skins are pulled onto wooden rules to dry. Periodically, the skins must be removed and slightly stretched in different directions. After they have completely dried, they need to be sanded and treated with fine-grained sandpaper until the feeling of velvety suede is obtained.
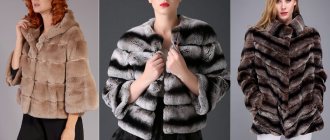
Types of skins
Finished products are divided into four quality classes. The first is considered the most expensive. Rabbit skins of the fourth class are rarely used as material for sewing clothes.
First
The skin is full-haired, the fur is smooth, thick, soft. There are no small bald spots or fur defects. The flesh is dense, clean, and has a uniform color. Only small blue or blue spots are allowed on the skins of gray and blue rabbits. The area of these spots should not exceed 3% of the total area of the product.
Second
In this case, incomplete development of spinous hairs and uneven fur density are allowed. In some places the pile may be incomplete. The flesh is thin, blueness along the line of the spine or spots up to 15-35% of the area is acceptable. It is already relatively difficult to beautifully tan a rabbit skin of this quality.
Third
Low, short pile in long-haired breeds. A small amount of fluff or partial absence of guard hairs. Dull thin core, blue discoloration and other color defects over the entire surface.
Fourth
Sparse uneven pile. Most often, this option is observed during unplanned slaughter during the molting period. There are bald spots, the pile falls out, there is no spine on the spine of the skin. The flesh is defective, has stitched tears (no more than 50%), blue color, lumps on the surface and other irregularities.
Curing rabbit skins of this type is not very profitable, since it takes a lot of time to give low-quality fur a good appearance.
Zhirovka
The next stage after tanning is fattening. The essence of the method is that collagen fibers are coated with a fat mixture. This will give skins intended for dressing an increase in important qualities: water resistance, ductility, strength.
Fatliquoring can be done using a mixture of glycerin and egg yolks in equal proportions. This mixture is applied to the skin of the skin in a very thin layer and left for several hours so that it is well absorbed. After this, the skins are dried again and kneaded well. Then the skin of the skins is rubbed with chalk or tooth powder so that it absorbs excess fat. After which the chalk is shaken off and the fur is combed.
Fattening can also be carried out using a water-fat emulsion, which contains 50 grams of grated laundry soap, 15 milliliters of ammonia, 0.5 kilograms of any animal fat (lamb, pork, beef) per liter of water. The emulsion is also spread on the flesh for several hours and then dried. For application, you can use an ordinary paint brush. It is convenient to do this when the skin is on the straightener.
THE FINAL MARATHET.
We perform mechanical kneading with movements reminiscent of removing dirt from clothing. To give the skin a marketable appearance and get rid of excess fluff and irregularities, use fine sandpaper or pumice.
KNEAD WELL until the skin of young rabbits up to 4 months of age is soft. If you want to process the skin of an old rabbit, especially a male one, you will have to work longer as the material will be rougher and thicker. At enterprises, special warm-up machines are used for these purposes.
We remove excess fat and make it whiter by rubbing with tooth powder or high-quality chalk. And finally, we knock out the skins and comb the pile using a massager. If you did everything correctly, you will have clean, shiny, soft and fluffy skins with elastic fur in your hands. Now you can safely cut them and use them to sew beautiful, warm and practical fur products.
I hope that after reading this article and watching the video, you will have no more questions and, having prepared the necessary reagents, you will confidently take up the preparation of skins.
But for the most ambitious of you, I have prepared material on how you can become a real pro, gain the necessary knowledge to open a new serious business, and perfectly master the honorable profession of sanding. We'll talk about this in the next article.
Please share this article with your friends on social networks:
Please rate the article. Ask a question, discuss on the forum.
Drying
This is the final stage of preparing rabbit skins at home. The ideal option is to dry it in a room with good air ventilation. In winter it is better to do this in a living room, and in summer in a barn or workshop. It is not recommended to dry skins near heating devices and radiators. You should also not hang them in the cold or in bright sun.
If the fur has an even color, then it is dried in this form. If there are defects, you can pre-tint these places.
Material storage
The skins can be processed immediately. If this is not possible, then they should be dried. This is carried out in a ventilated room with a temperature of +30 degrees for 2-3 days.
Over-drying is unacceptable, as the skins become brittle.
For drying, special sliding structures in the form of a triangle are made. The skin is stretched over the side walls and nailed to it. A bar is inserted from below, which pushes the side walls apart. Such products are universal; they can be stretched with fabrics of different sizes.
The material is placed with the fur inside. Moderation should be observed in tension. If the tension is weak, the skin will lose size. If it is strong, the fur will thin out. If you plan to start work immediately, then the workpieces are sprinkled with salt while the materials are being prepared.
Repairing cuts and tears
It often happens that when processing the skin with a knife, marks remain on it in the form of cuts and tears. It is necessary to repair these defects. Sewing is done by hand using a thick needle and white cotton thread size No. 10.
The skin is turned inside out and the edges of the cuts are carefully sewn together with a seam called “over the edge.” At the same time, you need to make sure that the skin does not tighten. The area that has been repaired should not be visible on the front side. To do this, use the same needle to tuck the hairs inside the seam.
Features of fur raw materials
Rabbit and hare fur has structural features that create a lot of interference in leather processing, which is why the process of tanning skins takes so much time. Rabbit flesh is essentially a series of films of a dense structure, firmly connected to each other. It is simply impossible to separate them during primary processing by scraping. At the first stage, you will be able to remove only the remnants of flesh and fat.
Before making rabbit skins with your own hands, you need to learn more about the structural features of the animal’s skin, prepare the appropriate equipment and antiseptic mixtures for processing.
It is important to remember that when soaking the skins, the skins are squeezed by hand in the direction of hair growth and in no case by twisting. Twisting will damage the hairs and tear the skin.
Alternative options
There are several other methods for preparing rabbit skins at home.
- Fermented milk. Fresh skins are rubbed generously with salt. Then they put several skins in a pile, with the skins facing inward, and leave them in this form for three days. Then the salt is shaken off, and the skins are immersed in a container with sour milk, the souring period of which is 5-7 days. After another three days, the skin is washed and dried.
- Fresh-dry. The skin is stretched on a straightener and secured to it with small nails. The skin should be stretched on the straightener so that the length is three times the width. The fur and skin are rubbed with a mixture of sawdust and gasoline, then cleaned off along with the debris with a clean rag. Then dry thoroughly.