Remember when you grew your first beans? Did you wrap the beans in a wet cloth, watch how the root hatched and the bean flaps turned into leaves, how the first real leaf appeared, how your vine began to grow, curl, and bloom brightly? And then you harvested the first harvest, carefully peeled the beans from the pods, and put them in storage. Spotty, clean, shiny, beautiful beans, carefully grown by your hands, were left to winter in the closet.
First bean harvest
Spring, you are getting ready to grow a new rich harvest, you open a bag of seeds, and there... Do you remember your feelings? Your beautiful beans are eaten away by round tunnels, swarming with beetles, and there is nothing but dust all around! Disgust, disappointment, anger! The harvest is irretrievably lost. How did it happen? What went wrong? Why are there bugs in the beans? Who is this bean beetle? Let's discuss and properly prepare for the next season.
There are bugs in the beans
Main pests of beans, prevention and control of them
Pests lie in wait for legumes at all stages of their life. The sprout fly feeds only on young sprouts and parasitizes on the roots of beans. Slightly grown stems and young leaves become prey for slugs. Aphids attack the adult leaves of the plant, sucking out all the juices from them. Mature pods with seeds are attacked by bean weevil. These are not the only, but the most common pests of beans. Let's take a closer look at them.
Bean grain
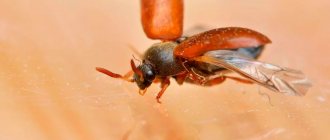
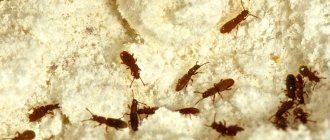
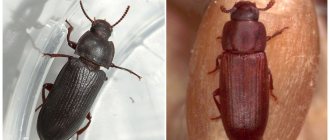
A heat-loving small beetle from the caryopsis family, only 2-5 mm in size, feeding mainly on mature beans. If you look at the insect under a magnifying glass, it seems quite cute: a small beige body completely covered with copper-colored hairs, short spotted wings, tenacious legs with sharp teeth. It does not tolerate cold at all, so it overwinters in granaries or other rooms with temperatures above +15°C. In winter, it feeds on beans or other grains. In the wild it produces 2-3 offspring per year; in storage or residential conditions it reproduces year-round. After overwintering, the beetle goes in search of food, flying up to 3 km a day in search of beans. Until the beans are ripe, they are content with their leaves and flower pollen, but can live completely without food for up to three months.
Bean grain
The bean weevil causes colossal harm to plants, as it damages not only the grains, but the flowers and leaves of legumes, preventing them from fully developing and bearing fruit. If beans are infested with bugs, the crop can be considered completely lost. The female gnaws through the pod and lays up to 20 eggs, only 20 microns in size, under the skin of the bean, from each of which mobile larvae hatch after 2 weeks. They feed on grain tissues and move inside it using legs, thus forming tunnels. After another 3 weeks, the larva pupates, later turning into a young beetle. The beetle emerges from the grain, gnawing a neat round hole in it. The cycle repeats...
So, you discovered that there are bugs in your beans. What to do?
If a pest is found in a summer cottage, it is necessary to remove all weeds and spray the insecticide Metafox or Decis on the crops. After 10 days, repeat the treatment.
If you have already found it at home, you need to carefully examine each bean and ruthlessly throw away all damaged and questionable specimens. Dry the remaining beans in the oven and store them according to the rules, which we will discuss in more detail below.
Sprout fly
A small midge, no larger than a bean grain (on average 3-6 mm), parasitizes legume seedlings. Outwardly, it is no different from the houseflies we are familiar with. The hairy body consists of a small head with huge eyes, a chest and a gray abdomen. The forehead is decorated with small mustaches. These are the insect's olfactory organs.
If the sprout fly does not find beans, it is content with other garden plants. Midges appear in April-May and find a mate of the opposite sex. After successful fertilization, many small white eggs are laid in the ground. They die in dry soil, but if you plant the seeds, water and fertilize the soil, the eggs turn into larvae in 9 days. The larvae penetrate the germinating beans and damage the root and stem. It is unlikely that the plant will be saved.
Sprout fly
Flies are extremely fertile, and their larvae are voracious. A newborn transparent larva, only 1-2 mm long, after 20-30 days of active growth and feeding on the tissues of germinating beans, reaches a height of 7 mm, thickens and turns into a mobile pupa. When the temperature drops, the pupa moves into the soil and buries itself at a depth of 10 cm, surviving the cold in this state. When spring comes, it turns into a midge, and the cycle repeats. In one summer, 3 generations of midges fly out of the ground: in April-May, June, July.
You can destroy the sprout fly with insecticides containing phosphorus, or simply plant already grown seedlings in the ground, to which the midge will not cause significant damage.
Sprout fly larva damaged beans
Slugs
A slug is a small, wet, soft-bodied pest that looks like a snail without a “house” on its back. Reaches a size of 5 mm, feeds on all parts of the plant. Since slugs are moisture-loving, in dry weather they take refuge under leaves, boards, cellophane and other objects that retain moisture. The appearance of a slug leads to the death or weakening of the entire vine, since it is omnivorous: it eats leaves, stems, flowers, and young pods with its teeth - using graters.
Slugs
To get rid of slugs, you need to properly dry the soil and remove all natural hiding places for parasites. In low humidity conditions, slugs die within a few days. To combat them, you can cover the soil with dried nettle, which will repel pests.
You can also use the original folk method of luring slugs with beer. To do this, you need to bury a small plastic bottle half filled with beer in the ground near the bean plantings. The neck of the bottle should not rise too much above the soil surface; the lid has been removed. Attracted by the smell of beer, the slugs will move into the bottle, but will not be able to get out. After a few days of repeating this procedure, all the slugs will be trapped.
Aphid
Aphids are such common insects that they are familiar even to people far from country life. Among the one and a half thousand varieties of this pest, the most dangerous for legumes is the melon aphid. Small parasites can appear seemingly from nowhere; the female molester is very active due to the presence of wings. Aphid colonies can start on one plant and quickly spread throughout the entire area of the garden. The insect uses a sharp proboscis to make a puncture in the tissue of a leaf or stem and sucks out all the liquid contents. The leaf curls and dries.
melon aphid
To get rid of aphids, you need to treat the plants with a soap solution or a solution of ash, which is diluted in a proportion of 2 cups per bucket of water.
Slugs
Worm-shaped mollusk up to 70 mm long. They secrete mucus that helps them move. They leave behind peculiar silvery trails on bean leaves.
The slug feeds at night and stays in damp, shady shelters during the day. If there are no wet places and the temperature drops to 7°C, the slug dies. An adult lives 6 months and lays up to 200 eggs. Overwintered eggs turn into adult slugs within two months. Mollusks feed on leaves and young beans. Significant damage is caused in cold, rainy years.
The presence of slugs is easy to notice by the silvery tracks on bean leaves.
Control measures
- Treat infected bean sprouts with superphosphate or ash.
- Mulch the crop with henna or dry nettle, then the slug will bypass the plant.
- Dig a plastic bottle into the ground and fill it halfway with dark beer. The slugs will quickly gather onto the bait and drown. By repeating this technique several times, you can say goodbye to unwanted guests forever.
Pest control only at first glance seems like something difficult and impossible. Just understand what your “neighbors” fear most, and success is guaranteed!
Preparing beans for storage
So, we have defeated all garden pests, collected a good harvest of beans, and are preparing to store them. First of all, the pods need to be dried. You can leave them in the sun if the climate allows, or spread them out on a clean cloth at home. Once dry, they will begin to open on their own. This is the optimal time for peeling.
The extracted beans must be carefully inspected and only absolutely healthy, undamaged specimens must be selected for storage. If you do not plan to use the seeds for planting, they must be heated in the oven for five minutes at a temperature of 90°C. This procedure will make your beans dry and unable to germinate. There is another way to get rid of bugs in beans - freezing for 72 hours at minus 18°C. After such a procedure, pests will have nothing to start from!
Drying the bean pods
More humane ways for pensioners
So, how to get bugs out of cereals in the kitchen? There is nothing better than good old Dichlorvos.
The disgusting thing is, of course, rare, but it kills bugs on the spot. But before you treat the surfaces, find a place where you can then sit for at least half a day so that it can air out.
The procedure in this case is as follows:
- 1. Go through everything you can and take it outside (or another room)
- 2. Wipe cabinets, floors, baseboards with a damp cloth
- 3. Wash dishes and jars for cereals and pour boiling water over them (to kill the larvae)
- 4. Treat everything with Dichlorvos (necessarily wearing a mask and glasses) and retreat to visit someone
We do not advise you to call all sorts of companies that guarantee disinfection. They haven’t invented anything new, but it costs a lot of money.
No, if you have extra funds, then you can call so as not to breathe in the chemicals yourself. But, if we talk about efficiency, then there is no difference: you carry out the treatment yourself or pay people, no matter what they say, that eradicating it at home is unrealistic.
Here we are not talking about humanity towards bugs, but about humanity towards provisions, and therefore towards pensioners. Still, if you don’t have enough money, throwing away the cereal is simply the height of madness.
Therefore, you can use this method of struggle:
- Step 1. Sift the cereal through a fine sieve and sort thoroughly.
- Step 2. Then bake it in the oven or put the bags in the freezer for 3-4 days.
- Step 3: Try to use this grain as quickly as possible.
- Step 4. Still treat the cabinets, floor and other surfaces. If you can’t use chemicals, then at least wipe it with vinegar, pour boiling water over the cracks, or you can use laundry soap (rub it and make a soap solution). You can also make a solution of boric acid.
- Step 5. Be sure to wash the dishes, as there may be larvae there.
After you put the grains back in the box, you can place “traps” there. Pour sunflower oil into the caps and the remaining bugs will certainly taste this treat. And they will drown in it, and you will simply fly out this oil and that’s it.
Then, you can place bay leaves and garlic in the cabinets. We don’t guarantee that this is very effective and will help remove the bugs forever, but it calms the soul.
Saving bean seeds at home
If there is no pantry or cellar, you can store the harvest in a city apartment. The optimal place would be a refrigerator with a temperature of plus 7°C or an insulated loggia in winter. Beans should not be kept in the cold for a long time; they may lose moisture and some of their taste. When stored at room temperature, the seeds may germinate if they have not been previously frozen or heated in the oven.
The grains selected for storage can be placed in glass jars and then closed with airtight lids. Lids should not allow air to pass through. You can use fabric bags that have been previously washed, soaked in saline solution, and dried with an iron.
Storing beans in a jar
Store beans in a bag
Where to store legumes - jars, bags or boxes?
The main storage containers are glass containers and bags made of natural fabric. Each method has its own characteristics.
Read more ► How to store horseradish at home: 5 storage methods and 3 preparation tips
Jar
Saving in glass containers is one of the most effective ways to avoid bugs. Before placing the fruits, about 4 cm of ash is poured into the bottom of the container.
The containers are sealed with metal and glass lids. A polyethylene lid is not suitable for these purposes, as it allows air to pass through.
The disadvantage of this method is that the legumes lose their ability to germinate.
The reason is that when the product is sealed so tightly, there is a lack of air not only for the growth of bugs, but also for normal respiration of the fruit.
The main storage containers are glass containers
The method is suitable if the beans will be used for cooking.
Bag or box
Linen bags and wooden boxes have their advantages. The fact is that such containers allow supplies to breathe. Before planting, the crop should be soaked for 30 minutes in salted water and dried well.
To prevent the appearance of bugs, dill seeds (20 g per 1 kg of legumes) and cut garlic cloves (4 pieces per 1 kg of product) are placed at the bottom of the bags and boxes.
The bags should be placed in a dry room out of direct sunlight. For this purpose, a kitchen cabinet with sealed opaque doors, which is located away from heating appliances, stoves, and ovens, is successfully used.
What to do if beans have bugs
If there are bugs in the beans, it is better to throw them all away. There is no good reason to use kernel-damaged beans. It is not suitable for planting, since it is impossible to accurately determine the presence or absence of pests in apparently undamaged grains. If you really want to plant damaged seeds, you will get weak and diseased seedlings that will not give you a good harvest. In addition, create conditions for the parasite to reproduce in your area.
Bugs in a can of beans
If there are only a few noticeable insects, and you really want to save at least part of the harvest for soup, you can sort through all the beans, examine them under a magnifying glass, and throw out any that are suspicious or obviously damaged. Freeze the remaining ones at minus 18-20°C for three days or heat them in the oven at +90-100°C , then store them using the technology described above.
Diseases
Beans, like any plant, are susceptible to disease. Often such problems arise due to improper agricultural practices. Often gardeners do not understand why young beans turn black. There may be several reasons. And all of them are associated with fungal or viral infections.
Powdery mildew
At first, the leaves are covered with a whitish coating, which then turns gray. Reduces bean yield by a quarter.
Anthracnose
The leaves and stems of plants are covered with depressed, oblong-shaped spots. Over time, they acquire a brownish-red color. All this leads to necrosis.
See also
What is the difference between white beans and red beans, which is better and healthier, what is the difference Read
White rot
Most often it appears where the plant comes into contact with the ground. It all starts with the appearance of watery spots, which are then covered with mycelium (similar to cotton wool).
Root rot
May be of bacterial origin. Very dangerous for seedlings and young plants. It appears in the form of hard pads with a white or lilac coating. There may be constrictions on the stems that prevent nutrients from reaching the plants.
Bean mosaic
The carriers are bugs and aphids. On the leaves you can see dark and light green spots forming a pattern. They then turn into blisters and deform the leaves. The process of plant development slows down.
Bacterial spot
She is very difficult to deal with. Characterized by dark brown spots with yellow edges. This disease causes the beans to become dwarfed and the grains to fail to fully ripen.
The fight gives results only in the initial stages of illness. The same measures are used as for fungal diseases.
Why do bugs appear and how to defeat them?
In nature, there is no miraculous phenomenon of insects out of nowhere. Pests must come from somewhere, so your case is no exception. There are two possible options:
- or the eggs of the beetles were originally laid in some beans, and became active during storage
- or you bought and brought home other legumes affected by the weevil.
To prevent this from happening, follow these simple tips:
- carefully inspect all beans being stored
- throw away any damaged or questionable copies
- When growing, use insecticides promptly. It’s easier to kill a pest at your dacha than to select one grain at a time at home
- Before storing, heat the legumes (freezing or heating in the oven)
- do not store beans in a warm place
- Place sharp-smelling plants next to the legumes - dill seeds or garlic
- Place the beans in different jars and close the lids tightly.
- Periodically inspect your supplies to notice the first signs of pests. Bugs will definitely show themselves in the beans (we have already described how to get rid of them above).
How not to lose your bean harvest
Protection measures
To protect plants from these diseases, it is necessary to get rid of pests, which often become their carriers. You should also provide optimal growth conditions for plantings and maintain humidity at the required level.
Preventive
If a summer resident is afraid that the beans will be affected by pests, he should prevent their occurrence. Most often, it is enough to use folk remedies that recommend covering the soil around the plants with dried nettles. You can also water the plantings with garlic broth, which will also repel pests.
Active
During the growth of the crop, the gardener is obliged to monitor the timeliness of development and the condition of the legume plant . This is necessary to identify the presence of a pest or disease at an early stage. Timely treatment will save not only the plant, but also the harvest.
