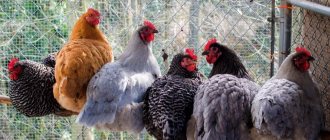
Before you get chickens or other poultry, you need to take care of the poultry house. It is important that it is well lit, warm, dry and clean, and also does not allow drafts, but is well ventilated. Many breeders and farmers use traditional materials when building chicken coops: wood, concrete, brick, slag and foam blocks. However, not everyone knows that a good poultry house can be made from polycarbonate, which has almost all the qualities of an ideal material for construction. This article will tell you what its main advantages are and how to properly make a polycarbonate chicken coop.
How to convert a greenhouse into a chicken coop. Advantages of polycarbonate chicken coops
The design for birds made of this material has the following advantages:
- Small financial costs. Polycarbonate is inexpensive.
- Space saving. There is no need to waste space on the site to build a separate bulky building for birds.
- Acceptable level of protection. A chicken coop made of a polycarbonate greenhouse, just like a full-fledged house, will protect chickens from adverse weather conditions (low temperatures, snow, rain) and small predators.
- The material is transparent, so during the day artificial lighting inside the chicken coop is not required. This will save energy.
As you can see, a polycarbonate greenhouse can take on not only the role of a greenhouse, but also does an excellent job of protecting birds from the cold.
Disadvantages of polycarbonate chicken coops
This option also has its disadvantages. For example:
- The procedure for insulating the foundation and walls of a polycarbonate greenhouse is mandatory. This will require certain time and financial costs. However, they, of course, cannot be compared with building a full-fledged separate chicken coop from scratch.
- The room will need to be equipped with everything necessary for a comfortable life for birds: perches, nest houses, bowls for food and water. If, after winter, plants are planned in the same place, then, naturally, all this equipment will then need to be removed.
Question answer
- Is it effective and safe to use a chicken coop in a polycarbonate greenhouse in winter?
- — With the right equipment, yes, absolutely.
- Is a polycarbonate chicken coop suitable for broilers?
- - Yes.
- Can young birds hatch in a polycarbonate winter house?
- — If the structure is properly arranged and the birds are well cared for, yes.
- How long will the construction and equipment process take?
- — If you take it with enthusiasm, you can convert a greenhouse into a chicken coop in just 1 day.
- How big should the chicken coop be?
- It depends on how many chickens you keep. The size of the building must be appropriate.
You can calculate it using the formula: 2 birds per 1 sq. m. In the case of broilers - 3 chickens per 1 sq. m. m., since this breed is inactive and can feel comfortable in a smaller area. So, for 20 chickens 10 square meters is enough. m. (for broilers - about 7 sq. m.).
- What is the optimal height?
- — For chickens, 1.4–1.5 m will be enough, but make sure that it is convenient for you to come in and check how the birds are doing there.
- Why might such a design be needed at different times of the year?
— A winter chicken coop made of polycarbonate will protect the birds from frost and snow. In the off-season, such a dwelling also protects from coolness and rain. Summer - gives chickens a sense of security in their house, allows them to raise young animals, and prevents attacks from small predators.
Is it possible to use a polycarbonate structure only in winter, and then return the greenhouse to this place again?
- Yes, you can, you just have to take all the equipment out of there.
How to make a chicken coop from a polycarbonate greenhouse with your own hands?
Step-by-step instructions on how to make a polycarbonate chicken coop with your own hands:
- Step 1 – Cleaning the room. Before setting up a home for birds, remove everything unnecessary from the greenhouse: garbage, garden tools, potted plants.
- Step 2 – Thinking through the ventilation scheme.
- Step 3 – Design lighting so that there are 12-14 hours of daylight in total (daylight + artificial lighting when the sun has already set or has not yet risen).
- Step 4 – Preparing for winter frosts. This stage includes insulating the foundation and walls, equipping the greenhouse with additional heating equipment if necessary.
- Step 5 – Create a suitable cover on the ground. To prevent the animals from feeling cold and walking hard, bedding is placed on the floor.
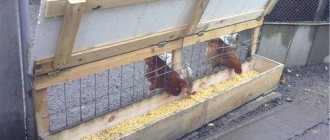
- Step 6 – Creating “home comfort”. To give the birds a place to roost, it is necessary to add perches and bowls for food and water into the greenhouse. It is also worth taking care of houses or cages for birds. They will increase the feeling of security, which will have a positive effect on the number of eggs laid.
- Step 7 – Refit for Summer. If you are going to use a polycarbonate greenhouse chicken coop in the summer, then the winter version will need to be slightly modified to suit other weather conditions.
Microclimatic conditions
This is one of the main issues that a breeder has to solve if he plans to build a poultry house with his own hands. It is necessary to equip a quality building. Unlike geese, which hardly freeze, roosters and chickens cannot live normally in the cold. If the breeder also expects good productivity at any time of the year, he needs to make a warm and reliable home for the bird.
For chicken, the optimal air temperature will be +15…+28°C. If the temperature regime is disturbed, it immediately affects the life of birds
Experts note that not only warmth in winter is important for chicken, but also coolness in summer. You shouldn't build a chicken coop where there is too much sun.
If it is not possible to protect the building from hot rays, then special attention should be paid to ventilation to ensure maximum access to fresh air. It is advisable to plant tall trees on the site, which in the future will be able to create enough shade
Keeping a chicken coop cool is much easier than keeping it warm in winter.
Therefore, when drawing up a project and estimate for future construction, it is necessary to pay attention to such points as the thickness of the walls, which when building a chicken coop made of stone or timber should be at least 20 m, as well as additional insulation of the floor and roof. It is advisable not to leave gaps to ensure ventilation.
It is better to seal them hermetically, but be sure to make vents or a ventilation pipe for access to fresh air.
The best option would be to install autonomous heating. To do this, you can install a potbelly stove or heater. But you need to take into account that heating devices can cause a fire in the chicken coop, so they need to be built in a special place that the birds cannot reach. If you install a stove indoors, you will have to constantly replenish it with fuel, which is inconvenient and expensive. Heaters are also expensive, but often those who have chosen a chicken coop made of timber or stone cannot find a better solution.
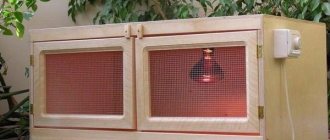
Recently, a very interesting option for heating a house for chickens has been gaining momentum. We are talking about infrared lamps, which not only create a suitable atmosphere in the room, but also provide the necessary lighting in winter. For cold weather this is the best option. Such devices can save energy and are inexpensive. An infrared lamp is suitable for both a stone chicken coop and a timber structure. Depending on how many birds the house will be designed for, you can choose one or another power of the device.
How to build a chicken coop in a polycarbonate greenhouse
Many people have subsidiary plots on their plots. A chicken coop in a polycarbonate greenhouse will help provide the birds with convenient and comfortable conditions.
In the modern world, people have begun to care about consuming organic products and, as a result, have acquired summer cottages and farmsteads. This way you can control the environmental friendliness of your food. People themselves choose food for birds and animals, and select fertilizers for plants themselves. And if beds with vegetables and fruits can be found in almost all summer cottages, then with the residence of livestock and poultry, more questions arise.
In any case, having several chickens in the yard is much easier than keeping large livestock, since it is much cheaper and requires less effort for the owners. However, before you get chickens, you need to know where they will live, in what conditions and how to create their future chicken coop.
Advantages and disadvantages of polycarbonate chicken coops
Covering material is often used for glazing greenhouses. If you decide to build a chicken coop out of polycarbonate, you need to know its positive and negative features.
Advantages:
- Low costs compared to the construction of a permanent building.
- The structure can be easily disassembled if there is no longer a need to keep chickens.
- Polycarbonate will protect chickens well from bad weather, winter frosts, and predators.
- For a summer chicken coop, single walls are made. Polycarbonate transmits light well. There will always be light inside the poultry house.
- You can convert an empty greenhouse into a chicken coop.
Flaws:
- A chicken coop without insulation cannot be used for the winter. It will be necessary to create double walls made of polycarbonate and improve the foundation.
- Steam will constantly accumulate inside the house. Polycarbonate sheets do not allow air to pass through. An effective ventilation system will be required.
- If a greenhouse has been converted into a chicken coop, nests, perches and other devices will have to be removed from it with the onset of spring. In addition, the greenhouse must be thoroughly cleaned of droppings and disinfected.
Summarizing the listed features, it is easier for the owner to decide whether he needs such a chicken coop.
Thinking through ventilation
To ventilate the room, you can install folding windows. However, birds are afraid of drafts, so make sure that all the holes are on the same side of the adjustment. If they are opposite each other, drafts will be created. If you are building a polycarbonate chicken coop for the winter, then so that the air entering during ventilation is not so cold, you need to install a supply and exhaust ventilation device with recovery.
The second option is natural ventilation. It is more suitable for summer. This scheme consists of two pipes: one is from the bottom right, the second is from the top left. For better air distribution, a fan is installed inside.
How to make a polycarbonate chicken coop with your own hands
There are two options for the poultry house: summer and winter. The complexity of manufacturing depends on the choice of design.
How to make a summer chicken coop from polycarbonate
The construction process begins with design. A place for a chicken coop is usually chosen in the backyard or courtyard, or in a designated area of the garden. A drawing of the future structure is sketched out on a sheet of paper. Dimensions are calculated taking into account the number of birds. According to sanitary standards, there are 2-3 chickens per 1 m2. Having a diagram in hand, calculate the required amount of building material.
Advice! A new poultry house will not be cheap for the owner, but a multifunctional polycarbonate structure can still be used instead of a greenhouse. The best option is a greenhouse combined with a chicken coop, where, due to forced heating of the birds in the adjacent pavilion, seedlings can be planted in early spring.
The materials to create the frame will need timber. You can make the skeleton of a chicken coop from a profile, but you will need welding skills and a welding machine. Transparent polycarbonate sheets are purchased for glazing. Additionally, self-tapping screws with sealing washers are needed. To join the sheets, a connecting profile is prepared.
A foundation is being built for the chicken coop. Lightweight polycarbonate construction. There is no point in pouring a concrete strip. You can get by with a regular columnar base:
The area is marked with stakes and cord. A trench is dug around the perimeter. Its depth corresponds to half the thickness of the bottom trim beam, plus a margin of 10 cm for sand backfill. Holes are dug at the corners of the trench and every 1.5 m. The bottom is covered with crushed stone 10-15 cm thick. Pillars are built in each hole
They can be laid out from cinder blocks, and asbestos-cement pipes filled inside with concrete can be installed. Attention! The tops of all foundation pillars must be at the same level.
After constructing the pillars, part of the trench is covered with sand and compacted. A beam with a cross-section of 150 mm is treated with protective impregnations, and the foundation frame is assembled
It is attached to the poles with anchors. Waterproofing material is placed underneath the timber. You can use two layers of roofing material.
The finished foundation with frame is checked again with a level.
The bottom frame of the chicken coop frame is already ready. Now you need to attach the stands to it. Supports made of timber are placed at each corner, along the perimeter of the base in increments of 80-100 cm, in places where the doorway is formed. The racks are connected at the top with timber. The upper frame forms an exact copy of the lower frame. For the stability of the structure, jibs and spacers are installed.
The roof of the chicken coop is made gable. Polycarbonate is easier to attach to an arched base, but it is difficult to make from wood. It is easier to choose a roof with two slopes, where the angle of inclination is approximately 40 degrees. The rafters are assembled on the ground. The finished triangles are lifted onto the frame and attached to the top skin. To prevent the rafters from collapsing, they are fastened together at the top with a batten, forming a ridge girder. The finished chicken coop frame is painted to protect it from rotting.
Glazing begins with cutting polycarbonate sheets. They are attached to the roof first. The sheets are positioned so that the cells face the ground. When the cells are arranged horizontally, moisture and dust are retained inside. Polycarbonate loses its transparency.
Each sheet is drilled at the fastening points. The polycarbonate is fixed with self-tapping screws with sealing washers at 20 cm intervals. A connecting profile is placed at the joining points. The ends of the sheets are closed with plugs. To avoid drafts in the chicken coop, the cracks remaining after glazing are filled with silicone. Rubber seals are inserted from below between the walls and the trim beam. The resulting chicken coop with single-layer glazing is suitable for summer use.
How to make a winter chicken coop from polycarbonate
If chickens are to be kept year-round, a winter version of the poultry house will be required. Initially, a summer building is erected using the technology discussed. Polycarbonate for the winter chicken coop can be taken in any color. Transparency is not needed here, since the walls will still be double. An additional frame is created inside the chicken coop. A gap of 15-20 cm is left between the walls.
The external glazing of the frame is made of thick polycarbonate. Thin sheets can be used inside. The void between the polycarbonate walls is filled with mineral wool. You can use polystyrene foam, but the plates must be tightly joined together. The foundation of a winter chicken coop is similarly insulated.
Insulation
The decision will depend on the type of foundation:
- The pile and column walls are surrounded around the perimeter with wooden boards and foam plastic is laid on top.
- The tape is also covered with boards, then the foam is wrapped in film and laid around the perimeter. The whole thing is covered with thermal insulation material (any kind) and covered with earth.
The walls can be insulated with an additional layer of polycarbonate 4 mm thick from the inside. For greater effect, you can lay foam plastic between the two layers, but this will make the greenhouse opaque, and it will need to be artificially illuminated during the day.
The floor is the coldest part of the greenhouse. You need to approach its equipment very carefully. To make it warm, pour sand in a layer of 1 cm, put a protective mesh on it, place a heating cable with a thermostat and a relay on it, then put another mesh and cover it again with a thin layer of sand.
How to build and arrange a chicken coop correctly
So, you decided to deal with chickens, you bought chickens or a rooster with laying hens. But they need to be settled somewhere. A regular shed is not suitable for this. For these birds, a special housing should be built, which is called a chicken coop.
Only in a chicken coop can you create the most ideal conditions for raising chickens in winter and summer. And, in principle, this is not so difficult to achieve. The main thing is to know the basic rules by which such structures are usually created.
Materials for construction can be taken at hand. The chicken coop does not require the use of any special technologies. We just need to make sure that the birds can live in relative comfort both in winter and summer.
Chicken coop project
The very first thing you should do is draw up a design for the chicken coop. This does not mean that you need to draw a detailed plan on tracing paper, you just need to think through the design and decide what will be located where.
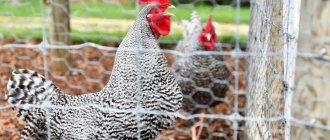
A chicken coop usually consists of two parts - a house in which chickens can lay eggs and spend the winter, and a run - an enclosure fenced with a net so that the chickens do not scatter around the yard and along the street, but graze peacefully on the grass in an enclosed space.
The house can be placed on the ground, which will require a foundation, or it can be raised on poles, thereby increasing the space for walking. In addition, chickens can hide under the house from the hot rays of the sun or from the rain during walks.
Place for a chicken coop
The choice of location for the chicken coop also needs to be made taking into account the characteristics of these birds. The best option is in the very corner of the site, where chicken fuss would not disturb the residents of the house. However, under no circumstances should the chicken coop be placed in a low area, where water accumulates during rain and evaporation occurs. Chickens don't like dampness.
It is better to place the bird house on a hill so that the ground is dry and the chicken coop is constantly illuminated by the sun - both in the morning and in the evening. You also need to make sure that there is no noisy road near the corner where the birds will be placed - the noise of cars will very frighten the birds, and they will not lay eggs well.
How to build and equip a chicken coop?
Materials for building a chicken coop
Now you can start construction. Any available materials are suitable for this. If you decide to build a chicken coop on stilts, then beams or boards knocked together are perfect for this.
Four such timbers (solid or knocked down) are coated with bitumen or resin so as not to rot. And they dig into the ground in the form of a square or rectangle. It depends on the shape of the chicken coop. A grillage made of strong boards or the same beams is laid on top.
Subfloor boards are laid on the grillage; the bottom should be lined with tin or sheet iron so that all sorts of rodents and small predators that adore chicken do not penetrate through the floor. Cross members are installed across or along them, and insulation is laid between them.
It can be anything - either mineral wool, or sawdust, you can use expanded clay, slag, but in no case polystyrene or other polymer materials.
Walls, doors and windows
Next you need to put up the walls. The frame of the house is made from the same material from which the support pillars are made. The frame racks are connected with spacers crosswise, the outside of this structure is sheathed with boards, then a vertical layer of insulation is laid, and the whole thing is sewn up with boards from the inside.
When installing walls, you cannot forget about doors and windows. The doors are arranged in such a way that they can be entered for cleaning. The windows are positioned so that as much daylight as possible enters them both in summer and winter.
The best side of the chicken coop for them is the south; you can make an additional window on the east or west side. In the summer, the windows are covered with mosquito nets so that as few flies and mosquitoes as possible fly into the room. For the winter, they are glazed and insulated - it should not be cold in the chicken coop.
What to make a chicken coop roof from
The roof can be anything! But the best option is a sloped one, so that rain or melt water does not linger on it. What is the best roofing material for this type of roof? These are, of course, bitumen shingles, which dampen the noise of falling drops during a rainstorm, and prevent hail from frightening the birds in the chicken coop.
Yes, such tiles are expensive, but you don’t need much of it for a chicken coop, so it’s still worth the fork. If you install a “noisy” roof, for example, metal tiles, slate, or even roofing felt on boards, then during prolonged rains the chickens will become very nervous and may stop laying eggs altogether.
You can arrange a small attic under the roof, which will serve as a warehouse for equipment or a place to store bird food.
We continue to explain how to build and equip a chicken coop correctly and comfortably for laying hens.
Installation of end frames
During the installation of end frames, it is necessary to prepare openings for future windows and doors, as well as vents necessary for ventilation during the hot season. The door recess can be made like a regular door. For the frame, it is enough to prepare a thinner profile - forty by twenty millimeters. The window frame may have an even smaller thickness - twenty by twenty millimeters.
Option for converting a greenhouse into a chicken coop
Installation of the pipe frame should begin with securing the end frames. They can either be welded with a machine or screwed using self-tapping screws and bolts (it all depends on the material from which it is made). After this, you can fasten the remaining frames, which are connected by crossbars from the inside.
Setting up a greenhouse for chickens for the winter
If there is a greenhouse on the site, arranging it for a chicken coop is not so difficult.
Basically, it needs to be insulated and equipped inside with feeders, drinkers, perches, nests and, if necessary, forced ventilation and heating.
To use a polycarbonate greenhouse as a chicken coop, you will need the following tools and materials:
- wood saw;
- hacksaw for plastic;
- screwdriver;
- hammer;
- gun for using sealant;
- nails;
- rubberized gaskets;
- thiokol or polysulfide mastic;
- polycarbonate sheets up to 4 mm thick;
- round wooden beams or poles;
- polystyrene foam 5 cm thick;
- lutrasil;
- boards for constructing chicken nests and a ladder leading to the perches;
- electric wires; electric lamps; electrical outlets.
Step-by-step instruction:
- To prevent drafts, use rubberized gaskets to seal all cracks at the joints of the structure.
- Eliminate gaps between polycarbonate sheets using a sealant in the form of thiokol or polysufide mastic.
- In areas with a cold climate, insulate the room from the inside with a second layer of polycarbonate up to 4 mm thick or bubble wrap.
- Dig out the foundation and cover it with foam plastic slabs 5 cm thick.
- Tighten polycarbonate walls from the inside with lutrasil to prevent condensation and for additional insulation.
- Install electrical wiring into the greenhouse for lighting, heating and forced ventilation.
- Place perches made of round timber or poles inside at a rate of 25 cm for each bird. Perches are placed higher because warm air rises. A ladder or wooden ladder should lead to them.
- For laying hens, make nests in the form of boxes measuring 30x40x30 cm with a mesh bottom covered with sawdust or hay. The nests are located in the least lit part of the room.
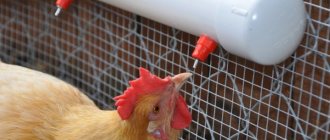
- Install feeders for dry and wet food raised above the floor surface. Install an automatic nipple or vacuum drinker.
Laying and insulating the foundation
If a polycarbonate greenhouse has not yet been built, then a strip foundation 30 cm deep is poured under it.
Its main purpose is to prevent digging by foxes, weasels and other predators who want to diversify their diet with available chicken.
In order not to lose 25% of the heat through the foundation, the hardened concrete must be covered with a layer of waterproofing and insulated in one of four ways:
- foam boards wrapped in polyethylene;
- extruded polystyrene foam;
- spraying polyurethane foam;
- expanded clay.
The width of the expanded clay layer is at least half a meter. Experts consider extruded polystyrene foam to be the highest quality and most durable, and expanded clay to be the most affordable.
The strip foundation of the finished greenhouse is dug up and also insulated using the chosen method.
Columnar and pile foundations are surrounded by planks, asbestos or profiled panels, on top of which a layer of insulation is placed.
When laying the foundation, drainage must be provided
Greenhouse insulation
A winter chicken coop in a greenhouse should not have drafts, so first seal all the joints. Rubberized gaskets work well between the foundation and the frame.
The gaps between the polycarbonate plates are treated with a sealant, which, after hardening, forms a plastic surface. Thiokol and polysulfide mastics are recommended.
At the next stage, the walls are insulated. The question of how to insulate a greenhouse for chickens for the winter is solved differently, depending on the degree of snow and frost in a particular region.
If the frame is metal, insulation can be done with snow. However, here you need to carefully study the technical characteristics of the polycarbonate of a particular greenhouse and the shape of its slope.
Otherwise, there is a risk of the structure collapsing.
Insulation of polycarbonate buildings
First of all, chickens must be protected from drafts; this is done by installing thermal insulation and insulating the foundation. Pile or columnar greenhouses are surrounded by boards that are fastened to each other. Such a fence is made of two layers, placed in the ground, and foam plastic slabs are laid between the boards. If the base is strip, then the work is carried out in the following sequence:
- the foundation of the chicken coop is dug up;
- the perimeter is lined with foam plastic wrapped in film;
- Additionally, everything is covered with waterproofing materials;
- soil is being laid.
The inside of the greenhouse is covered with film, leaving a small margin of a few centimeters for laying the soil, which will act as additional protection. All these actions allow you to insulate a polycarbonate chicken house without using additional heating.
For a cold region, the insulation option presented above is insufficient, and therefore you will have to take care of the heating system. You can use water heating or ground heating.
The floor is leveled and covered with 1 cm of sand. A protective mesh is laid on top, and an electric heating cable is placed on top, which is connected to a thermostat and relay. This system allows for automatic temperature control to heat the poultry house. A mesh is laid on top and again sand in a layer of 1 cm; it is necessary to pour soil and compact it properly.
Proper maintenance of birds and the good conditions created by them, especially in winter, make it possible to obtain egg products all year round and at the same time preserve the health of the feathered inhabitants.
Using greenhouses that were idle during the winter to house chickens turned out to be a fruitful idea. Its implementation was especially successful when using the polymer material polycarbonate.
The winter maintenance of chickens in a polycarbonate greenhouse will be discussed in the article.
Should I use polycarbonate?
This material received a lot of positive feedback. The thing is that making a polycarbonate poultry house with your own hands is not so difficult. This will require a minimum of heating and lighting. The work is carried out in the same way as making a plastic greenhouse, but the only difference is that here you will need to create a foundation and ventilation first. As for the base, it must be properly insulated. To do this, it is worth using polystyrene foam, which will allow the birds not to freeze in winter. But basically, the chicken coop-greenhouse warms up well at any time of the year, so often no additional heating is required even in winter. As a last resort, you can purchase an infrared lamp.
Otherwise, the work is minimal, so making such a chicken coop with your own hands will not be difficult. Initially, a metal frame is prepared, which is attached to the foundation, and then sheathed with polycarbonate. It is advisable to make windows in the chicken house. They are needed not for light, there will be plenty of it anyway, but for access to fresh air.
A polycarbonate chicken coop must be equipped with feeders, perches and drinkers. Additional shade will have to be built for the nests so that the laying hens feel comfortable enough. It is best to make several separate wooden houses, cover them with straw and place them in the far corner, where there will be minimal noise. This will be an ideal place to hatch eggs.
There are many advantages to outbuildings made of polycarbonate. One of the main advantages is efficiency. It is quite warm and light, so electricity will be consumed much less. Moreover, the construction of a chicken coop from plastic panels itself will not take much time and effort, and most importantly, it will not require serious investments. Polycarbonate is considered a fairly durable material that can withstand any weather conditions. Therefore, the chicken coop will not require repairs often. Chickens in such a room feel no less comfortable than in wooden or stone houses, which gives them the opportunity not to reduce productivity even in winter.
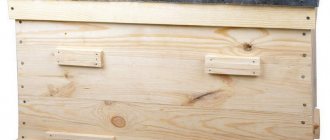
A little about the foundation
The timber was installed on brick posts and secured in the ground. I drove the earth along the inner perimeter of the timber, a square pipe and screwed it to the timber with self-tapping screws.
Just in case, so that it doesn’t fly away to the neighbors in hurricane winds.
Beam foundation
From the outside, around the perimeter. I attached sheets of roofing iron to the beam with self-tapping screws, deepened them and buried them with earth. By closing the gap, since the timber is on posts.
External timber filing
Otherwise, a do-it-yourself greenhouse chicken coop is installed like any ordinary greenhouse.
How to feed chickens correctly
- grain mixture or mixed feed;
- bran moistened with water.
The grain can be boiled, so chickens eat it better, but it can also be given in dry form, there is not much difference. Birds do not disdain food waste, so everything will go into use. Chickens love to nibble green grass, but in winter, unfortunately, this is an unaffordable luxury. It is best to take care in advance and dry the nettles, because with the onset of spring the birds will need vitamins.
If you want your hens to lay a lot of eggs, you will need to choose the right diet for them.
In winter, the body requires replenishment with macroelements and minerals. Greens can be easily replaced with root vegetables and silage. Beets and pumpkins are ideal for laying hens. A huge advantage of such nutrition is that they are stored very well, until spring, until the grass appears. It would be a good idea to add zucchini and their seeds to your diet, which contain a lot of vitamins and calcium. A lack of calcium in chickens is immediately visible by the condition of the eggshells. She becomes soft.
- Carrots, rich in carotene, will also be an excellent treat in winter. It will affect the ability of chickens to lay eggs, while improving their immunity. If you still have sunflower cake after squeezing the oil out of the seeds, you will definitely need to include it in the diet of laying hens. It contains a lot of protein and fat, which are so lacking in winter for life.
- In a separate bowl you need to put chalk, which the chickens will peck little by little. Laying eggs requires a lot of calcium, so you shouldn't forget about minerals.
- Drinkers need to be re-equipped in winter. Water should be heated to a temperature of 15-20 degrees.
- After you stop drinking from the feeder, the water should be poured out to prevent it from freezing. This is necessary so that the birds do not catch a cold.
In order to ensure that keeping chickens in such an unusual structure for them does not cause problems, it is necessary to follow a number of rules.
- , in which birds are located, is not recommended if the outside temperature is below - 15 degrees.
- Chickens begin to lay eggs at the end of February, when the first spring sun appears. It is at this moment that special boxes should be placed for them. Birds lay one egg at a time from the beginning of spring until late autumn; young hens lay eggs more often, but their eggs are smaller in size.
- It is worth noting that keeping birds in a greenhouse is only suitable for a small number, 5-6 individuals. Everyone knows that plants produce oxygen. With birds it's the other way around. They inhale oxygen and exhale carbon dioxide. Metabolism in a chicken’s body occurs very quickly, so one individual produces up to 50 grams of carbon dioxide per day. The carbon dioxide released by 5 chickens is enough to stimulate plant growth. Thanks to this symbiosis, egg production in chickens increases, and the percentage of growth in plants increases.
- For convenience, chickens need to be placed in a small cage. You can also hang it, but not too high. A tray should be placed under the cage to make cleaning the room easier. To avoid unpleasant odors in the greenhouse, it is recommended to clean it frequently. There is another way: add about a 15-centimeter layer of sawdust, which will make your work easier in the future. The layer of droppings accumulated during the day is sprinkled with straw or hay dust. After a while, you will have some excellent organic chicken manure that you can use to grow your plants.
Egg production directly depends on factors such as maintenance. In order to increase the egg production of chickens, it is necessary to maintain comfortable conditions for their living in the greenhouse. The air temperature should be + 15 degrees. Chickens are daylight dependent, so it is necessary. At the same time, daylight hours should not exceed 14 hours. Much depends on the nest where the hen will lay her eggs. The most important thing is to create conditions for the chickens in the greenhouse so that they feel as comfortable as they do in the chicken coop in the summer.
Tricks and subtleties
When leaving chickens for the winter, you should remember that a greenhouse and a greenhouse are different structures. It is not advisable to keep laying hens in a greenhouse, since it cannot be fully equipped according to the needs of the birds.
The greenhouse provides ample opportunities for housing chickens, caring for them and cleaning. In a greenhouse, they can even lay eggs in winter, although not as actively as in summer.
For example, such popular breeds as Leghorn or cross Highsex are capable of producing up to 300-310 eggs per year, some of which, naturally, occur in the winter.
To ensure that the egg production of chickens does not decline, it is necessary to think through the birds’ diet and even the dishes from which they will eat.