Bee colonies need to be fed at least twice a year to stimulate their brood. The first feeding should be done in the spring, before the honey plants begin to bloom, and the second in the fall, before the winter feed is replenished. To organize feeding of bees, you need to use special feeders. They come in different types and can be made from scrap materials at home.
Requirements for the feeder
Structures for feeding bees can have different sizes and shapes, but the standards for them are the same and look like this:
- the capacity of the feeder should be up to 4 kg;
- insects must have free access to food at any time of the day and in any weather;
- bees should not drown in sticky syrup while feeding;
- when feeding food, any contact with insects is excluded;
- the beekeeper has the opportunity to assess the volume of syrup remaining in the feeder in order to add a new portion as necessary;
- the design is easy to maintain, since in the future it must be regularly cleaned and washed;
- insects from neighboring hives are blocked from accessing the contents of the food supply reservoir.
If the feeder is poorly designed, it is dangerous for the bees, as they will drown in syrup, get injured or become hypothermic, which will ultimately lead to a drop in the hive's productivity.
How to make it yourself
No special skills are required for manufacturing. It is important that it has two compartments - for filling with food and for feeding the bees. If it is installed inside the hive, it is worth providing passage to the feeder and return to the hive. The volume can be varied. From one glass, if it is possible to regularly replenish food supplies, and up to several liters.
For regions where dry, warm weather prevails, you can make outdoor bee feeders. But they are not suitable for winter. A homemade feeder can even be much more convenient and practical than a purchased one.
Types of structures
There are a large number of models of bee feeders, which can be made from a variety of materials - wood, plywood, metal, plastic and even foam. At the same time, these structures are conventionally divided into several types, which we will consider below.
Ceiling
This type of feeder is great for multi-hull hives because it can be easily installed under the ceiling. It is a rectangular body, the inner part of which is divided by vertical partitions. When making it homemade, experienced beekeepers recommend taking into account the following nuances:
- Splinters and twigs can be used as internal partitions. In this case, you need to have some experience working with these materials, since there is a risk of bees dying on sticky splinters.
- Additionally, you can make a raft from four-layer plywood, the size of which at each edge is 4 mm smaller than the feeder itself. In this rectangle you need to cut tracks 3-4 mm wide, and then cover everything with wax. This raft is very comfortable for the shoulders, as they do not get dirty or get stuck in syrup.
- You can make a small space in the feeder so that the bees cannot get inside. The box should be covered with glass or a pillow. To fill the container with food, just move this partition.
- It is convenient to use funnels to pour syrup into the feeder. This will be possible if you initially make a hole in the feed compartment of the appropriate size.
It is better to hang a ceiling feeder in the summer so that the bees receive incentive feeding. Initially, you can use a decanted bar. The bees will take honey from it and begin to build honeycomb cells, which will later serve as rafts.
At the end of December, insects should be fed with dissolved honey, which should fill half the feeder. It is necessary to check the nest every few weeks to ensure that food supplies are replenished in time. This must be done until the cleansing flight.
The ceiling feeder is easy to use and has a structure that is comfortable for bees, since they do not drown in syrup. In addition, it allows you to maintain the optimal temperature of the food, since the bees warm it during flights.
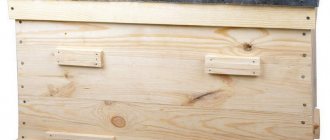
Framework
This feeder is a small wooden container with an open top. It has the length and height of a regular honeycomb frame, but is slightly larger in width. It is installed in the hive in two ways:
- placed on a special bedding;
- hung on the wall near the nest using special protrusions on the upper bars or hooks.
Sugar syrup is poured into the frame feeder through a funnel. To prevent insects from drowning while feeding, you need to place a special raft or grid inside the container.
Overframe
This is a box type feeder that is placed in the hive above the frames. It completely blocks the bees' nest, so they have no opportunity to fly out during feeding. 2-3 compartments are made in it, one of which serves as a passage (8-10 mm), and the rest as cells for filling with sugar syrup or honey.
Materials that are not afraid of corrosion are used to make the feeder box. These include wood, aluminum and plastic. The shape of such a box should be rectangular, and the volume should be from 0.5 to 2 liters.
The upper wall in the box is installed in such a way that its upper edge rests against the lid, and a gap of 2-5 mm is formed at the bottom for the flow of food. The top of the over-frame model can be covered with plywood, glass or other transparent material to control the volume of syrup or honey. You need to make holes in the lid to supply food.
A similar design is shown in the photo:
Such a feeder should be installed on a canvas, directly above the frames of the hive. In this case, the feed slot must run across the frames. In order for the bees to enter the feeder, you need to make a small hole in the canvas opposite the entrance.
The container can be filled with food in a thin stream through the outer opening. To attract the attention of insects, you need to drop food in front of the bee entrance and on the frames. After this, the feeder can be closed with a lid and insulated with a pillow.
Outdoor
External type feeders consist of a dense box, which is closed on top with a lid held on hinges. When making it, you need to take into account the following rules:
- To ensure the free entry of insects into the box, you need to make a small hole in its back wall.
- In the container itself you need to place a special bowl for filling with food. You need to put a raft in it so that the bees are completely safe and do not drown in the syrup.
The finished feeder can be hung on the back wall of the hive or installed at some distance from it, and then filled with syrup and, if desired, added branches, rafts or grass. Thus, the feeding process is very simple, especially if there are no other apiaries nearby.
An external feeder has a significant drawback - the feeding in it quickly cools and ceases to attract bees. In addition, it is quite difficult for a beekeeper to control the amount of food received by a particular family.
What types of bee feeders are there?
Depending on the installation method, feeders can be internal or external . The latter, in turn, are divided into free-standing and mounted. We do not recommend using outdoor feeders as they have many disadvantages. In particular, they:
- may attract wildlife such as wasps, raccoons, birds or even bears;
- lead to the fact that bees fight among themselves, which means that weak bee colonies become even weaker;
- increase the risk that bees will transmit parasites and diseases to each other.
There are different types of bee feeders.
Internal structures according to the installation method can be floor or ceiling. Frame feeders are installed on the side walls, and bags, boxes, and plastic bottles are installed on the ceiling. External canisters are also often used, which are accessible only from the hive.
Table. Main types of internal feeders.
| Name, photo | Short description |
| Such designs consist of a tray inserted into the entrance and an inverted container with syrup inserted into it (it remains on the outside). The advantage of inlet feeders is that it is easy for the beekeeper to see how much food is left. But in cold weather, such feeders do not work well, which is explained by the tendency of the liquid food medium to freeze. |
| They are, by and large, an ordinary bag of syrup; insects drink the contents through a crack. Moreover, the syrup does not freeze, which is facilitated by the warmth of the hive. |
| Feed structure with dividing board. Has the same shape as the brood frame. Made of plastic/wood, placed in the hive instead of one of the frames. It is located inside, which means insects can protect it without any problems. On the other hand, bees drown in such a feeder, and if it is empty, they will build a comb in it, that is, they will use it as a frame. Finally, if the frame feeder is glued, then, among other things, it may leak. |
| They are an inverted container located in the inner lid above the inlet. The bees will not drown, and there is no contact with air. But there are disadvantages - low stability in case of strong winds, as well as significant weight of the structure filled with syrup. |
| They are installed above the lid in a special extension. There are different types, but not all are convenient. The main disadvantage is that the beekeeper needs some kind of mold inhibitor to prevent its appearance in the container. |
Feeding bees
Video - Homemade bee feeders
About outdoor feeders
Such structures, as the name suggests, are installed on the outside of the hive. They can be plastic or wooden, made in the form of a box or other container. Food is poured inside. A passage is made through the wall for insects, and a raft is also installed inside the structure, on which the bees sit while feeding. The main drawback is the dependence of the feeder on the outside temperature. If the air is cold, the food cools down and insects are reluctant to eat it.
How to make feeders from a plastic bottle?
Such feeders are considered a real boon for beekeepers, since they do not require large costs to manufacture and have a simple structure, but at the same time they allow you to freely control the supply of food due to the ability to seal excess holes with tape. In addition, such designs are very easy to use, since they are easily and quickly washed.
Plastic bottle feeders are ideal for hives with low lids.
It should be noted that intra-hive plastic feeders can be horizontal or vertical. Let's look at how to make each of them separately.
Horizontal
To make such a feeder you need to prepare:
- 2 liter dark plastic bottle;
- scotch;
- a nail (awl) with a diameter of at least 1.5 mm;
- pencil or marker.
The product is assembled in the following order:
- On one side of the bottle, closer to the neck, draw a line and draw 5-7 points with a diameter of 1.5 mm at the same distance from each other.
- Lay the bottle flat and use a hot nail to make holes at the marked points. The insects will feed through them. The hole diameter of 1.5 mm is optimal, as it will allow the bees to easily reach the food without falling inside the feeder.
It is better to make the holes with a hot nail, since in this case they will have melted edges, so the insects will not be injured during feeding.
- Seal the prepared holes with tape, and then pour the syrup into the bottle.
The finished feeder can be installed in the hive in two ways:
- Make supplies from two wooden blocks on which to place a bottle of syrup horizontally, so that the holes point down. Place the feeders inside the hive, and then peel off the tape.
- On the ceiling of the hive, prepare a mounting location for the feeder - a hole cut in the shape of a bottle, but smaller in size, otherwise the container will fall on top of the honeycomb frames. You need to install the feeder in the prepared opening with the holes facing down, and then remove the tape.
It should be noted that the syrup for feeding has a viscous consistency, since the sugar concentration in it is about 60-70%. In this regard, it will not flow out of the tank too quickly, so the bees can feed on it without any obstacles or restrictions on quantity.
Vertical
To create a vertical type feeder, you will need the same items as in the previous version, namely:
- plastic bottle with a volume of 1.5-2 l;
- nail (awl);
- pencil or marker;
- scotch.
A similar container is made as follows:
- At a distance of 1-3 cm from the bottom of the bottle, make holes with a diameter of 1.5 mm using a hot nail. It should be borne in mind that the thicker the fertilizer, the more holes need to be prepared. There can be up to 12 of them in total.
- Seal the holes with tape. In the future, with a similar manipulation, you can regulate the number of holes, that is, the speed of feeding consumption.
- Pour 3/4 of the syrup into the bottle through the neck, screw on the cap, and then turn it upside down.
- Place the container vertically in the hive between the wall and the frame, and then peel off the tape.
It is worth noting that the vertical feeder can be made of a box type, as shown in the photo:
In this case, it is necessary to make several feeders, which will need to be installed in a ready-made cassette, which must be attached near the bee nest.
The following video clearly shows how you can make simple and effective bee feeders from plastic bottles:
It is better to use a bottle ceiling feeder in the fall, since during this period the bees need a concentrated viscous syrup. In the spring, they need water, so the feeders need to be filled with liquid food. It will quickly flow out of the bottle container, which is unacceptable, so you will have to use a different type of feeder.
Pros and cons of DIY bee drinkers
- If the bees are provided with water, the insects will not need to waste their efforts searching for it.
- When plastic is used for construction, it quickly heats up with the help of the sun and will prevent insects from catching a cold.
- You can learn how brood develops by transferring water.
- The material for the devices is available and inexpensive.
- It is not difficult to make a drinking bowl for bees with your own hands; the diagram is simple and accessible.
- Possibility to add water frequently.
- Drinkers are short-lived.
- Such devices are suitable for different hive designs.
- Light weight and easy to handle.
Thus, a drinking bowl with water is extremely necessary for bees; without it they will not be able to fully exist, collect nectar and pollen.
Homemade feeders from cans
In every household you can find a tin or glass jar. It can also be used to make a homemade feeder using the instructions below.
From a tin can
It would seem that a can of canned food is an unsuitable material for making a feeder, but this is not at all the case, since this material has a number of advantages:
- has thin walls that conduct heat well, so the food in the tank does not freeze for a long time;
- Easy to clean, which greatly simplifies the maintenance of the feeder.
To make a feeding tank, it is better to choose wide and small jars. The instructions are:
- Wash the jar with detergent, then wipe dry and add fertilizer.
- Cover the top with a cotton cloth so that its edges reach the middle of the jar. As an alternative, you can use gauze, but it will need to be folded in 3-4 layers.
- To prevent the fabric from slipping, secure it with an elastic band.
- Turn the container over and place it above the nest above the frames. For better access to the feed, it can be raised slightly by placing bars under it. In this case, small gaps must remain.
From a glass jar
In this case, the principle of action is almost the same. The instructions are:
- Prepare a 1 liter glass jar into which to pour the nutrient syrup.
- Fold a large piece of gauze into 8 layers, moisten it with water and squeeze it out, and then attach it to the neck of the jar and tie it or secure it with an elastic band.
- Place plywood on top of the gauze, and then turn the jar over and place it in the hive on the top platform. After this, the plywood can be removed. The syrup will gradually seep through the gauze fabric, so the bees can feed.
Top dressing
Beekeepers use feeding bees. For this purpose, honey, vitamins, and medicinal supplements can be used. Syrup is often used, which allows you to create reserves that cannot be accumulated naturally. Natural honey is considered the best product. It must be left in sufficient quantity to enable the family to survive the winter.
Thanks to autumn feeding with sugar syrup, it will be possible to preserve the product for your own purposes, so this method is used by many specialists. This will save commercial honey.
Bees are fed in the following cases:
- Weather when there is no honey harvest.
- The stocks were created from honeydew honey, which undergoes rapid crystallization and leads to gastric upsets in insects.
- As compensation for collecting the main bribe.
- If there is no natural bribe for oviposition in the uterus.
- If the bees need to be given medicine.
Feeding is useful, especially if you need to support families before the cold winter. But if possible, it is better to take natural honey for these purposes. Beet or cane sugar will do. Feeding is considered a responsible procedure for caring for bees. It is necessary to carefully select products, as well as feeders.
Instructions for making a ceiling feeder
A similar box-type tank is universal and can be made by beekeepers who have carpentry skills. Its structure is as follows:
This feeder is a box, the length of which corresponds to the length of the hive from the back to the front wall. It is divided into three sections, as can be seen in the diagram:
Let’s find out in more detail what these branches are:
- Compartment where syrup needs to be poured.
- Feed compartment with a raft for bees, which can be made from several materials - polystyrene foam, plywood veneer with drilled holes, mosquito net plastic. The partition that separates the first two compartments should be at a distance of 1-3 mm from the bottom.
- A small compartment through which insects gain access to the feeding compartment. The partition between them should be at a distance of 8 mm from the top. There is no bottom at the bottom, so bees have free passage.
Having understood the principle of constructing a feeder, you can make its parts using the following drawings:
When making a box-type tank, the following recommendations should be taken into account:
- Make grooves on the top of the side walls in which to place the lids.
- Cover the feeding compartment and passage for bees with a common glass lid to be able to control the volume of syrup and the feeding process. The filling compartment can be covered with a fiberboard cover.
- The end and side walls are made of wood, and the bottom is made of fiberboard or plywood, with its smooth side facing the inside of the tank.
- The structure must be assembled, glued and knocked down with nails or screws. In this case, it is advisable to use sealant and PVA glue with the addition of small sawdust.
- Treat the joints with wax or mastic made from equal amounts of rosin, paraffin and wax. The hot composition must be applied to the walls and grooves of the structure, and then heated with a blowtorch. Thanks to such manipulations, the feeder will be completely sealed.
The finished structure must be installed directly into the folds or on the shelf. In the second case, it is necessary to provide in advance a hole through which the bees can gain access to the syrup.
You can clearly see the process of assembling a ceiling feeder made of wood in the following video:
Framework
The frame feeder is made in the form of a compact wooden container with an open top. The length and height of the model repeats the classic frame with honeycombs, but it is larger in width.
The structure can be installed in 2 ways:
- placed on a special bedding in the hive;
- hanging on the wall near the nest on hooks or protrusions.
The syrup is added to the feeder through a special funnel. To prevent the bees from dying during feeding, it is necessary to secure a raft or lattice inside.
Overframe
This box type is installed in the hive above the frames. The product covers the nest, preventing the bees from flying away. It has 2-3 compartments: one (8-10 mm in diameter) is intended for passage, and the rest are used as cells for storing contents.
To make the box, you should use corrosion-resistant materials such as plastic, aluminum or wood. The feeder should be rectangular in shape and hold from 0.5 to 2 liters.
The wall in the box is fixed so that its upper edge is in contact with the lid, and in the lower part there is a gap of 2-5 mm for feeding feed. The structure can be covered with plywood, glass or other transparent material for easy monitoring of the amount of honey or syrup inside. The lid has holes for feeding food.
The product can be mounted on the canvas in front of the frames, making sure that the syrup slot runs across the frames.
The syrup is poured into the box in a small stream, using the outer hole. To attract bees, a little food is dripped onto the frames before entering the hive. Then the product is covered with a lid and a pillow for insulation.
Outdoor
Outdoor feeders are a small box with a lid that opens and closes with hinges.
During the assembly process you need to adhere to a number of rules:
- Make a slot in the back wall through which the bees will suck out the feeding mixture.
- Place a bowl in the box itself where the food will be stored. It should contain a raft that ensures the safety of the bees during the feeding process.
The finished product is hung on the back wall or installed at a short distance from it.
The disadvantage of the external type is the rapid cooling of the contents, which is why it ceases to attract bees. It also becomes difficult for the beekeeper to monitor the syrup level.
Other designs
Some craftsmen make high-quality feeders from a simple bottle in a few minutes, with the help of which it is convenient to control the supply of syrup. If necessary, the beekeeper can seal unnecessary slits with tape.
In the role of a primitive feeder, you can consider a homemade product based on a simple package. In this case, it is enough to pour the composition into a clean package and tie it tightly. After this, you should make a number of holes in the bag and lower it inside the hive.
A simple feeder made from a plastic (food) bag
To create an economical version of the feeder, you can use a regular medium-sized food bag. You need to act this way:
- Pour the syrup into a clean bag and then tie it tightly.
- Open the hive lid and lay out the prepared bag.
- Using a syringe needle, make 7-10 holes in the bag.
- Close the hive lid.
The simplest and cheapest options
Among the types of feeders, the bottle design is common. This, according to the experience of beekeepers, is one of the simplest and easiest models that can be easily made with your own hands. A regular plastic bottle with a volume of 1.5 - 2 liters will do, preferably a dark color. Make holes in the bottle with a hot nail approximately 1.5 mm in diameter. The syrup will flow out through these holes. It is worth considering the fact that the more holes, the more syrup will flow out. You can regulate the supply of syrup to the hive with tape - just cover the extra holes with it.
To supply food to the hive, you need to make a hole in the ceiling for the length of the bottle using a chisel.
Place the bottle horizontally in this slot, with the holes facing down, and pour the syrup on top. To maintain warmth, wrap the feeder with insulation.
This design is very convenient for hives with a low lid; it is easy to wash and replace with a new one. It is very cheap, and even the most novice beekeeper can do it with his own hands.
The types of feeders can be very diverse - the imagination of experienced beekeepers is practically unlimited. You can also make your own bee feeder from used canned food cans. To do this, pour honey or syrup into a clean, dry jar. Place several layers of cotton fabric or gauze on top and secure with an elastic band. Place on top of the frames over the nest so the syrup can flow through the fabric. For better feed delivery, place the jar on the blocks. Moss is placed inside the jar, and wooden sticks are placed on top. This is done both for the convenience of the bees and to preserve heat. These feeders are also easy to use and maintain.
How to make a feeder from foam plastic?
You can make a reservoir for feeding feed from high-quality foam plastic. It is better to choose a material that is used for packaging furniture and equipment, but you will have to abandon loose construction foam. In addition, it is worth considering that good material does not smell.
To make a feeder you need to prepare:
- foam sheet;
- a conical container made of food-grade plastic with a diameter of 20 cm (the neck of a plastic bottle);
- calico fabric;
- knife;
- an elastic band.
Having prepared everything you need, you can begin assembling the structure:
- Cut a 3 cm thick disc from polystyrene foam, which should completely match the diameter of the neck of the bottle. To do this, you can use a heated knife or wire.
- Place the disk on the bottle so that their surfaces are in the same plane.
- Make small grooves 5 mm wide on the outer part of the disk so that they run perpendicular to each other from one edge to the other. The distance between them should also be 5 mm. To conveniently cut grooves, it is better to use not a knife, but a melted hot metal rod.
- Prepare several holes with a diameter of 7 mm in the central part of the disk, and then melt 4 grooves on its sides, the depth and width of which should be 5 mm.
- If the feeder has a large diameter or the foam is not strong enough, you will need to increase the strength of the structure. To do this, you need to install a spacer between the disk and the bottom of the neck. To make a spacer, you can use a plastic bottle, cutting off its bottom and neck to make a cylinder. Along its edges you need to make a groove for the passage of air and feed.
- Make a filter using calico fabric. From it you need to cut a circle, the diameter of which is several centimeters larger than the diameter of the container. Fill the feeder with syrup, and then secure the prepared fabric with an elastic band. Its folds need to be straightened, and then the structure should be turned upside down and placed over a baking sheet on slats.
- If syrup spills out, the filter is too thin. To allow less feed to pass through, you can use fabric folded in several layers. If the surface of the filter remains dry, it is too dense and will need to be replaced with a thinner cloth.
Ideally, a little syrup should come out through the filter - no more than 1 tablespoon.
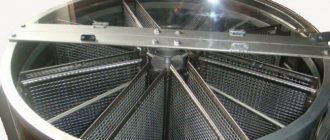
Kovalets ceiling feeder and its advantages
Making a feeder for bees of this variety will take a little time. Figure 1 shows a feeder, which is a board (ceiling), 100 mm wide and 25 mm thick. Using a cutter, a small groove is selected in the center (length 250-280 mm, depth 20 mm, width 10 mm).
A small nylon lid (an ordinary lid for glass jars) is placed in the very center of the groove and ceiling, traced with a pencil and a nest 1 centimeter deep is selected in the formed circle. To the left and right of the nest it is necessary to make two verandas (height no more than 10 millimeters), which are covered with glass. In the verandahs of the bee feeders, through holes are made on both sides of the groove for the entry of bees, 10 mm wide and 50 mm long.
1 – ceiling of the feeder;
2 – small groove;
3 – socket for installing a can;
5- entrance for bees.
So, everything is ready. Now you should ask yourself the question, is it better to buy bee feeders?
After all, here we describe in detail how to make a bee feeder yourself.
The structure is installed as follows: a jar of syrup (it is previously closed with a nylon lid and a hole is made in the center, 10 mm in diameter) is placed in the nest of the feeder. Next, the syrup comes in small doses from the jar and gradually fills the groove to the level of the bottom of the nest. The bees climb into the verandas and through the through holes they take the syrup from the gutter.
Making an over-frame feeder Cornflower
Cornflower is a type of over-frame feeder in the form of a rectangular container, the inside of which is divided by a partition. There are special “volcanoes” in the center of each compartment. They need to be covered with glasses or plastic buckets with a volume of 500 ml. The finished structure must be installed on the hive cover or on the roof cover.
When constructing the Cornflower, it is better to use transparent plastic, as it will increase the rate of feeding of insects and is easy to clean.
Season to use
Each season requires its own approach to providing bees with drink. This must be done in order to maintain the health of the family.
Winter
Winter watering is carried out when wintering occurs:
- On honeydew honey.
- On crystallized flower honey.
- At temperatures above + 7°C. In this case, increased humidity in the house helps calm the insects.
Spring
In the spring, providing the hive with drink contributes to a faster change from winter bees to young spring bees. In addition, if there is liquid in each house, then the insect will not be forced to leave the nest and go out en masse in search of drink in bad weather.
Useful tips
When making feeders with your own hands, preference should be given to natural or environmentally friendly materials. To make the right choice, you should consider some nuances:
- If polyethylene material is used, it is better to choose transparent food grade polyethylene, since it consists of fewer harmful substances.
- It is better not to use colored polyethylene and plastic materials, since they are made from recycled materials.
- Foam is one of the cleanest and safest materials.
There are a large number of designs for feeding bees that are safe for insects and easy to use. To save money, you can easily make a feeder yourself by choosing environmentally friendly materials, as well as by reading the instructions and drawings provided.
0
0
Copy link
Buy or make
Beekeepers can debate endlessly on the topic “Make bee feeders yourself or buy them.” Several decades ago, beekeepers practically made all the equipment in their own workshops.
A purchased item costs money, you need to go for it or wait for delivery when ordering, and paying for a feeder that is used for a couple of weeks a year is not the smartest decision.
Creating a homemade one requires up to an hour and a half of time and a little material, and the simplest bee feeder - made from a jar - will take ten minutes.
Parameters of fishing feeders
The function of bottom feeders is to deliver food to the fishing point. This takes into account the casting distance, the current at the fishing spot, and the test of the rod. Since it is impossible to put all the properties into one product, different types are produced. The main parameters are as follows:
- volume;
- weight;
- form;
- material (plastic, metal);
- type: closed, open, feeding;
- classical, flat method.
Depending on the fishing conditions, the angler chooses one or another modification. For example, fishing is carried out on a standing reservoir with a soft bottom. In this situation, the flat method is suitable, which will not bury itself in the mud when falling. Then the food will remain on the bottom surface.
The situation is absolutely the opposite when you have to fish on a river with a fast current. Here you will need not just heavy feeders, but ones that cling to the bottom. That is, there is a combination of two parameters - weight and shape. Here is an example of such a solution.
With spikes for fishing in the current
Feeders usually have a standard set of feeders that they take for fishing. This is true in cases where the fishing session is held in an unfamiliar place. In this case, it is wise to use a special handbag with compartments of this type.
Sets of avid feeders
Having assessed the fishing conditions, a person selects the appropriate equipment and feeder.
When to use plastic and when to use metal?
As mentioned above, feeder feeders have a metal and plastic body. What is the difference and what is the purpose of these types? Plastic is beneficial in cases where there is no strong current. During reeling, such feeders easily float up, which is very convenient when you need to overcome the grass carpet at the bottom.
Metal products are suitable for fishing in strong currents. Such feeders are not carried away by the current away from the fishing point. However, they lose to plastic when exhausted. If they float up after several revolutions, then the metal ones often go in the water column, which additionally loads the reel. With them it is more difficult to overcome steep edges, especially those overgrown with grass. Another drawback is that such models can corrode with prolonged use.
Weight value
The most important parameter. The casting distance and stability at the bottom depend on it. A classic feeder consists of a body, a lead weight and a fastening element. The load can be in the form of a strip, like rectangular or round ones, or in the form of a puck, drop or sphere, like a bullet. Manufacturers indicate the weight in grams on the product so that a person can immediately select it.
Weight is indicated directly on the feeder
The angler must take into account the test of the rod and the weight of the feeder + feed. The feeder form indicates the maximum weight that he can throw.
Feed capacity
The main task of the feeder is to hold the fish at the point in the maximum quantity. To be able to do this, the fisherman sends food parcels one after another to one place. The result is a kind of bait table. Since feeder fishing involves frequent casting, the angler must correctly calculate the amount of feed. So that it is enough to attract fish, and on the other hand, so as not to overfeed it. For these tasks, products of different sizes are used.
To keep the fish in one place, the angler chooses a larger feeder. While fishing, you can reduce the size, or fill not the entire volume.
Classification by size
Manufacturers mark products by size. Above is a line of 7 positions. This set is enough for a full fishing session with different conditions.
For current and still water
For fishing in the current, heavy feeder feeders weighing 100–150 grams are used. Feeders with a metal mesh body with lugs. According to the manufacturers, they cling well to the bottom. They are often labeled as River. When the current leaves no other options for fishing, this is the optimal solution.
The inscription River means - river
When fishing in still water or in reservoirs with minimal current, it is wise to use light method feeders weighing up to 40 grams. Due to the wide sole, they do not sink into the silt, and all food is washed out to the bottom surface.
Method for standing water