354
no comments yet
1
Author:
Rasskazov Pavel.
Reading time: 5 minutes
In order for geese to grow quickly and gain weight, to be healthy and active, they need to be fed well. At the same time, not only food is important for the health of birds, but also the container where they get it from. Therefore, let’s figure out what types of feeders for geese there are, what their advantages and disadvantages are – and how to make a feeder with your own hands.
Device for goslings
If you're wondering how to make a water bottle for goslings, it's quite simple.
You must prepare a cone-shaped container so that its height is at least 25 cm. Sometimes large jars are used, sometimes plastic bottles are preferred. The lower part of the device can be created from an ordinary frying pan. It is enough to take a vessel and fill it with water, cover it with the bottom and turn it over. The point of this device is that water will automatically flow into the pan. Another way to make a drinking bowl for goslings. Here the vessel must be grooved. An excellent option is made from plastic pipes. Most often, such a vessel is placed when the herd is quite large. If you decide to create a flow of water from a pipe, then there is nothing difficult about it. But if the idea has crossed your mind to create a device from a sheet of iron, then quite extensive skills are required here, because you will have to make the sheet in a curved shape and weld the joints so that liquid does not leak out.
The size of the main part directly depends on the age of the bird. For very small geese, the height should be smaller, but for adults it can be made taller, but the width should be larger.
The prepared part must be installed on legs. They are also racks. The height of the apparatus should depend on the growth of the goslings. It is best to install in places where the device cannot interfere with the movement of goslings. Such places can serve as corner parts of the pen. In principle, such a drinking bowl is difficult to distinguish from the devices of other animals. Making them with your own hands is quite easy, so even those people who have never encountered such a field of activity can build devices, especially since there are a huge number of videos that can clearly demonstrate the process.
How to make a drinking bowl
A do-it-yourself drinking bowl for goslings must meet the following requirements:
- Containers and water in them must be clean.
- The water temperature should always be room temperature and not freeze in winter.
- There should be constant water in the drinking bowls. Birds should not get wet while drinking, especially in cold weather.
- A sufficient number of drinking bowls so that the birds always have access to them.
- Different types of drinkers are suitable for geese of different ages.
- The drinking bowl should be high, the bottom should be 3 cm above the back of the individual.
Water should not splash outside the drinking bowl and wet the birds. In order to keep the area near the drinkers dry, you need to install them on metal sheets covered with mesh or slats on top.
Drinking bowls for goslings up to a month old
For small chicks, a simple vacuum automatic drinker consisting of a plate and a jar is enough. The jar filled with water is covered with a plate of suitable size and turned over.
An example of a simple vacuum drinker
Capacitive, with divided drinking front
They are used in private households in the form of an ordinary basin with water, on which a high cone made of mesh is attached. Geese drink water by sticking their heads through the mesh cells, and cannot climb into the basin with their legs, sliding off the cone to the ground.
Pros:
- clean water in the drinking bowl;
- no splashing or dirt around;
- ease of adding water;
- easy cleaning of the basin;
- all-season - the ability to replace water with snow in winter.
Minuses:
- it is necessary to constantly monitor the emptying of the pelvis.
Types of drinkers for older chicks
The following types of water devices are mainly used: nipple, cup and self-contained.
The cup device consists of a container and a valve that maintains the liquid level.
Operating principle of a cup drinker
The design of this device comes in two types:
- The valve is opened and closed by a float. You can make one from the drainage system of a toilet cistern.
- The device is connected to the water supply. The bowl acts as a float. The water supply is adjusted using a special rod.
Note! The advantage is ease of care. The container is easy to remove and wash. Disadvantage: if the device breaks down, the birds will be left without water.
Nipple devices are easy to maintain and provide birds with free access to water. They are constructed from several components:
- water tank;
- nipples;
- pipes;
- connecting elements.
Nipple drinker
These drinking bowls are installed in large farms. The advantage is a dosed supply of water, so it is always clean and fresh. The disadvantage is unreliability; the nipples often break and become clogged, stopping the release of water.
Self-contained sippy cups are usually very simple designs. These include:
- vacuum;
- siphon;
- grooved;
- an ordinary container of water (bucket, trough).
At home, as a rule, simple devices are used. They are made from plastic, metal or other available materials.
Tray
Made from plastic, wood or steel sheet. They have a round (diameter 11-15 cm), rectangular or trapezoidal cross-section with a depth of 7-10 cm and a width of 10-15 cm. They are supplemented with devices that interfere with the bathing of geese.
Pros:
- variety of designs;
- Possibility of watering automation;
- DIY production;
- availability of materials.
Minuses:
- splashing water around with the formation of dirt;
- unreliability of homemade float mechanisms, broken by geese.
Trough drinkers
The original version is made from sewer plastic pipes. The size of the main part directly depends on the age of the bird. The tightness at the watering hole makes
drinking bowl is ineffective. For an adult, 40 cm of the length of the structure is sufficient. If the age is 2-4 weeks, then 6 cm is enough, from 8 to 12 weeks - you will need 9.5-13 cm, over 12 weeks - 15 cm.
Trough drinker and feeder made of plastic pipes
Drinking holes are made in the upper part of the structure so that the birds have free access to water. It is more rational to install tees with plugs at the ends of the pipe. If you need to draw water, remove the inlet plug; drain it using the drain plug. You can connect the system to a water supply and fill it with water as needed.
It is advisable to install sippy cups along the walls or in the corners of the pen. Such a system is secured with clamps to ensure the immobility of the structure.
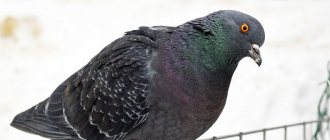
Basic requirements for pigeon feeders
Each feeder must meet certain standards, which makes the process of caring for and feeding birds easier. Convenience of eating creates comfort for the birds, cleanliness eliminates the risk of disease. Size is considered important, since adults and young animals need feeders with different parameters.
What requirements must be met:
- feed should not be contaminated;
- Maintaining the feeder (cleaning, adding food, etc.) should be simple;
- the body and legs of birds should not come into contact with the food - only the beak;
- grain should not fall out of the feeder;
- the material must be selected environmentally friendly;
- long service life;
- the ability to wash the structure without consequences;
- Direct access to feed is required.
Requirements for creating a device
If you decide to create drinking bowls for geese with your own hands, then you need to consider several important factors.
The water needs to be clean
It is important to ensure that the water supply is constant. It is necessary to ensure that during the winter the water is not covered with ice. The water temperature must be optimal, because low temperatures can lead to illness in the animal. Geese should not get wet when drinking water. The drinking bowl for goslings must be placed so that the bird can safely drink water. It is worth minimizing the number of queues and collisions. If you decide to make a drinking bowl for goslings, then it must be suitable for a certain age of the bird.
That is, it is necessary that drinking bowls for small birds differ from those for adults. It is necessary to maintain a constant water pressure. Its absence can negatively affect the well-being of geese. Disinfect the feeder. Cleanliness must always be present.
Trough drinker for adult ducks
It is best to make a drinking bowl for ducks and any other birds from materials that are resistant to rotting and quite durable.
In this sense, a large-diameter plastic pipe is perfect:
The instructions for its manufacture are obvious - you need to cut several identical holes (for ducklings - small, for adult ducks - 3-4 times larger in all dimensions) and install it on a pre-designed durable stand. One end of the pipe is screwed with a plug, and an angle is installed on the other, through which water is poured.
The simplest drinking bowl for ducks is a sewer pipe with holes.
The only drawback of such a device is that, together with water, it is quite heavy, and ducks will caress their beaks quite often, so the water will also have to be changed often. You will need the help of a second person to pull out the pipe, holding it on both sides.
Mistakes you can make when making drinking bowls
Even experienced poultry farmers sometimes make some mistakes:
- Making drinking bowls from wood material . It doesn't matter whether it's board or plywood. Plywood is worse because glue was used in its manufacture. Wood swells and rots from water. Rot will not add health to the birds. Swollen and delaminated plywood will begin to let water through.
- A drinking bowl made from a drainpipe does not have a reliable attachment to the wall . Birds, trying to climb onto a pipe (chickens are in the habit of climbing onto a roost, and waterfowl in the hope of swimming), will overturn such a pipe. In the best case, only the water poured into the pipe will spill out. It’s worse if an automatic drinking bowl is made from a pipe. The flood is guaranteed.
- Securing the drinker tightly . Drinkers must be washed periodically. It is impossible to clean a tightly fixed drinker properly.
What should a good feeder look like?
Feeders for pigeons are either boxed or automatic. The type you choose depends on how your birds are used to getting their food. The fact is that most wild pigeons can eat normally only when they see grain in front of them, that is, box ones will be suitable for them. In contrast, purebred pigeons, which are kept in special cages, can safely eat from automatic feeders.
Read also: Giant talker
Basic design requirements:
- it must provide protection against feed contamination;
- make it convenient for birds to eat;
- easy maintenance and cleanliness;
- eliminating the possibility of the bird's body and paws coming into contact with food, but it should be easily accessible to the beak.
Regardless of the design chosen, a pigeon feeder requires a small tray and must be covered.
The need for the first is explained by the fact that birds scatter grain widely during feeding. The second condition is of particular importance if the dovecote is located on the street.
The material from which the food or water container is made is also important. Most often, wood or plastic bottles and tin are used for this purpose. You can also use a cardboard box for the feeder, but it will quickly get dirty and will not last long. It is best to spend a little time and make a comfortable and durable wooden structure.
Content temperature
Caring for day-old goslings in the first days involves creating an optimal temperature regime. The fact is that in the body of goslings, thermoregulation is very poorly developed in the first 10 days of life. Therefore, the room in which the goslings are kept must be heated.
How to properly raise goslings: temperature table
| Age (days) | Temperature (degrees Celsius) | Air humidity (%) |
To find out if the temperature is right for the goslings, you need to evaluate their behavior. At the optimal temperature, the chicks are always cheerful, feed well, during rest they gather in small groups (3-5 birds each), run and frolic.
If there is not enough heat in the room, then the goslings begin to eat poorly, gather in large groups, and this can lead to mortality among the young.
When the temperature is too high, the chicks begin to drink a lot, their appetite decreases, their beaks are constantly open, and their wings droop.
Hopper feeder
All feeders that have two main components can be considered bunkers: a compartment for storing food and an outlet for dosed feeding.
There are two types of bunker devices:
- Hanging - directly with a compartment and tray where the food is poured.
- Above ground - these are made from a barrel and turning a plastic pipe that is inserted into holes cut in the barrel.
Let's consider the second type of bunker container, since it is more convenient to use and allows you to fill a larger amount of food.
To make such a design, you will need:
- plastic or metal barrel;
- hacksaw for metal;
- pieces of plastic pipe with an angle of 90°;
- hot melt adhesive.
Instructions
The progress of work looks like this:
- To begin, mark the barrel according to the diameter of your pipe. The markings need to be applied at a level of 30-40 cm from the bottom of the container, so that it is convenient for the goose to get food from such a height.
- Then take the pieces of plastic pipe and cut them according to the angle of rotation.
- Cut holes on the barrel to the size of your pipe and insert its parts into the resulting holes.
- Insulate the edges of the resulting structure with hot glue. This way the pipe will not rotate while eating; Hot melt adhesive will also reduce the risk of moisture getting in from the outside.
- To further isolate feeding from moisture, you can make metal or plastic canopies over the food opening. It is better to make such a canopy at a distance of 10 cm from above the edge of the pipe.
- Pour goose food into the barrel and cover with a lid on top.
We recommend reading about making chicken feeders from PVC pipes.
Drinkers made from plastic bottles
From a large plastic bottle
For the drinking bowl you will need: a large 5 liter bottle and a plastic container, with a diameter wider than the bottom of the bottle and a side, 10-15 cm high.
Drinking bowl from a plastic bottle
Making a drinking bowl is very simple:
- You need to make a 1 cm hole in the bottom side of the bottle (you can use a hot nail or a soldering iron). It should be 2 cm below the height of the side of the drinking container.
- Place a bottle of water in the container and water will fill it through the hole.
This convenient, practical drinking bowl will keep you clean and full all day long.
To prevent the geese from accidentally throwing it over, you need to place the drinker near the wall, securing the neck of the bottle with a rope.
Diagram of a vacuum drinker
There are two bottles of different diameters
Another vacuum drinker is made like this:
- For the bowl, cut off the upper part of a larger bottle (7-10 cm from the neck).
- The covers, inserted into one another, are connected with self-tapping screws. The result is a connecting piece that unites the two containers.
- Holes are made in a smaller bottle (5-8 cm from the neck).
- A bowl is screwed onto a bottle filled with water using a double cap. Then the structure needs to be turned over. Fill the bowl with water to the level of the holes.
- Secure the device in a special frame or secure it with ropes to the wall of the enclosure.
Such waterers can be used for all types of poultry. Both chicken and duckling will happily drink water from them.
Wooden feeder
A wooden container is suitable for feeding geese with hay and grass. In addition, when using it, it becomes possible to save space for feeding, because it can be easily mounted on the wall of the barn.
You will need the following materials and tools:
- 4 wooden slats: 2 narrow and 2 wide;
- wooden plugs on the sides of the structure;
- a wooden block along the length of the slats;
- nails;
- hammer.
Instructions
The sequence of work is as follows:
- Take wide and narrow slats and build a box. The bottom of this box should be edged at 90° for easy filling of food.
- Place caps on the sides of the structure. At this stage you will have a kind of trough.
- Attach a wooden rail on top of the plugs, which is needed for convenient movement of the feeder.
- Attach hangers to the back wall so that you can place the container on the wall.
- If you want to place the feeder on the ground, attach two parallel boards to the bottom for it to stand on.
Video: DIY grass feeder
So, making feeders for geese at home is quite simple. When choosing its type, you need to focus on the number of birds on your farm, and also take into account the type of food for your birds. We should not forget that in addition to quality food, geese should always have access to clean water.
Diagram and step-by-step instructions
There is no need to explain for a long time how to make a regular drinking bowl for domestic geese with your own hands from any container of water. Pour water into a pot or jar, cover the pan and turn it over.
For an adult bird, the device is made in exactly the same way, only from a cylinder and a tray.
To make a float structure from a pipe, holes about 30 cm in size are cut above its middle. The distance between them should be 15 cm. The same from the ends. An elbow and a plug are attached to them on both sides. A hole is made in the second plug for the hose. A plug is placed on the knee. The hose is threaded so as to provide convenient fastening of the float system. The second end of the hose is connected to the water supply.
When making a nipple structure, drill as many holes as there are nipples. The tool makes a place for water supply. The ends of the pipe are closed with plugs. Having secured the pipe securely, you can insert nipples and a water supply system equipped with a pressure regulator. To prevent water leakage, it is recommended to use a sealant. The device is ready. All that remains is to connect a special drip catcher. An even more economical version of such a device is made using only a tube, reservoirs, nipples and armed with a screwdriver.
Read also: Keeping geese at home for beginners
What else you need to know about the masonry period
There is always a way out
When the goose chooses a place for laying, it will begin to pluck fluff from its own plumage. In this way, it insulates the nest and ensures better contact of the eggs with the body.
The female will get used to the new nest better if she lays her first egg in it. Sometimes, despite all the owner’s tricks, the goose refuses to choose from the options offered to it, or at the right time there is simply no place for it.
Then she can settle down directly on the ground or concrete. The farmer can only make such a nesting site comfortable and safe. To do this, construct a ceiling from slate or a wide board, placing it at an angle to the wall, and the bottom is insulated with foam plastic and bedding material.
Each goose has a separate place
Usually the goose prefers to lay eggs and hatch them in the same nest. Therefore, it is good when each female has her own place.
If birds are raised in families, each of them needs to have a separate corner in the house.
As a rule, there are 3-4 geese per gander; in this case, one spacious nest per family will be enough. You just need to protect the family from other birds. If geese are raised in a common herd, there should be enough seating space for each head.
It is important to ensure that during the breeding season the females do not fight for space, and the males do not distract the hens. At this time, ganders are not allowed to go where the nests are located.
Varieties of homemade wooden feeders
There are various options for wooden feeders, which we suggest you familiarize yourself with in more detail.
Hopper feeder made from pieces of wood
Excellent for those breeders who do not have the opportunity to periodically add grain.
To assemble such a structure, first of all, you need to prepare:
- boards made of durable plywood or wood;
- electric drill, set of drills;
- a couple of loops;
- sandpaper;
- saw;
- screwdriver;
- pencil;
- roulette
The instructions for making a bunker feeder look like this:
- Draw a drawing, which is then transferred to the tree, carefully drawing out the details of the future structure:
- bottom – 29x17 cm;
- two side walls 40 cm high, 29 cm long (you will need to cut a wedge in the side walls, as shown in the diagram below);
- two rectangles for the front wall - 28x29 and 7x29 cm;
- top cover – 26x29 cm;
- back wall – 40x29 cm.
- Cut out all the parts, moving along the drawn marker lines.
- Drill holes for screws in the required places using an electric drill.
- Sand the entire surface so that the feeder is smooth and safe for birds.
- Assemble all elements into a single structure using screws. To achieve maximum density, a clamp should be used. In addition, it is worth considering that the back and front walls must be connected at an angle of 15°.
- Attach the cover to the back of the side walls using hinges.
- Treat the feeders with an antiseptic, remembering that the use of paints and varnish is strictly prohibited.
The assembled feeder will be spacious and convenient, operating in automatic mode.
An example of a bunker feeder assembled from wooden blocks is given in the following video:
Feeder in the form of a trough
It is a simpler design, suitable for those who keep a large number of chickens.
To assemble the structure you will need:
- thick boards or plywood;
hammer; screws or nails; saw; pencil; roulette.
The feeder can be assembled according to the following instructions:
- Draw a diagram of the future feeder, accurately defining all the elements, their dimensions and installation locations for fasteners.
- Transfer the drawing to the tree in compliance with the parameters specified in the drawing above.
- Cut out all the design details along the marker lines. It should be borne in mind that the bottom must be thick and heavy, otherwise the birds will be able to easily turn the feeder over. In addition, the height of the walls should be comfortable for chickens.
- Connect all the parts together, leaving no gaps, since through them the food will get out. There is no need to further process the wood.
This feeder is durable and strong, and is also universal regarding the type of food used, that is, it is suitable for feeding both dry and wet food.
How to assemble a wooden chicken feeder is explained and shown in the following video:
Two-story feeder
This option is primarily used for dry food, although a variety of mash can also be served in it. Such a feeder can be made for a small room, since the second tier allows you to compensate for the lack of free space. It looks like this:
Having prepared the bars and screws, you can begin assembling the feeder:
- Prepare all the details of the future feeder. Among them, the main one is the lower tier, 40 cm long and 50 cm wide. The length can be adjusted according to the number of livestock. The second floor is a small filling bunker - a trough with a front wall height of 10 cm and a back wall of 20 cm.
- Make a flap that will divide the lower tier into 1/3 parts.
- Install the second floor on the ends of the first.
- Attach a lid that will cover the food from debris getting inside.
Hopper feeder
All feeders that have two main components can be considered bunkers: a compartment for storing food and an outlet for dosed feeding.
There are two types of bunker devices:
- Hanging - directly with a compartment and tray where the food is poured.
- Above ground - these are made from a barrel and turning a plastic pipe that is inserted into holes cut in the barrel.
Let's consider the second type of bunker container, since it is more convenient to use and allows you to fill a larger amount of food.
To make such a design, you will need:
- plastic or metal barrel;
- hacksaw for metal;
- pieces of plastic pipe with an angle of 90°;
- hot melt adhesive.
Instructions
The progress of work looks like this:
- To begin, mark the barrel according to the diameter of your pipe. The markings need to be applied at a level of 30-40 cm from the bottom of the container, so that it is convenient for the goose to get food from such a height.
- Then take the pieces of plastic pipe and cut them according to the angle of rotation.
- Cut holes on the barrel to the size of your pipe and insert its parts into the resulting holes.
- Insulate the edges of the resulting structure with hot glue. This way the pipe will not rotate while eating; Hot melt adhesive will also reduce the risk of moisture getting in from the outside.
- To further isolate feeding from moisture, you can make metal or plastic canopies over the food opening. It is better to make such a canopy at a distance of 10 cm from above the edge of the pipe.
- Pour goose food into the barrel and cover with a lid on top.
Size
For the goslings
When choosing or making a feeder for goslings, you need to proceed from the following:
- height - depending on age, but no more than 2-3 cm above the back of the chick. The optimal option is from 5 to 10 cm;
- volume – also depending on age, but not less than 5-10 cubic meters. cm for each gosling.
For adult birds
The following sizes of feeders are suitable for adult geese:
- height – up to 15-20 cm;
- volume – at least 15 cubic meters. cm for each bird.
DIY wooden bird feeder
Winter is coming and birds are finding it difficult to find food and shelter in an environment that is constantly being changed by humans.
This is why it is so important to provide them with food and shelter in the garden. Here's how to make a bird feeder out of wood with a roof and a perch inside so the food stays dry even in winter and the birds can sit safely while feeding! No prior knowledge required to make a bird feeder
You can expect to spend about half an hour on this project. First cut all the parts. Two boards with a 45° cut should be placed sideways. They are attached to a base 14 cm wide. The roof is assembled from boards 15 and 14 cm long. The last board will be the floor of the feeder. Be sure to pre-drill the holes with a small wood drill bit before inserting the screws to prevent the wood from cracking. Then attach two hooks to tie the rope and hang the feeder.
Photo source: blog.manomano.de/so-baut-ihr-ein-vogelfutterhaus-und-einen-nistkasten/
Hanging bird feeder
This project looks like a birdhouse, but is actually a wooden bird feeder that is difficult for squirrels to get into. For this feeder you will only need one 1 x 6 board approximately 180 cm long and up to 20 minutes of time. The rest of the supplies you can probably get by with are the ones you already have - maybe nails instead of screws or a chain instead of rope?
Photo source: 100things2do.ca/diy-bird-feeder/
Feeders for different feeds
A do-it-yourself geese feeder is as easy to make as a waterer.
The strength and harmlessness of the feeder are important factors for the life of the flock. Feeding devices are used for wet and dry goose food.
Simple feeder
The type of food determines the material for the feeder. Metal or plastic products are used for wet food. The best material for a dry food feeding device is wood. From it you can make structures of various shapes and volumes. The raw materials themselves are harmless to the health of birds.
Hopper feeder
Feeders consisting of a compartment for containing grain and an outlet for dosed delivery of food are called bunker feeders. They are very easy to use and make it possible to pour a lot of grain feed.
Feeder from a barrel
To build such a feeder you will need the following materials:
- barrel made of plastic or metal;
- hacksaw for metal;
- plastic pipe scraps having an angle of 90°;
- hot melt adhesive.
Procedure:
- First you need to mark the location of the pipe on the barrel. The markings are made at a height of 30-40 cm from the bottom of the barrel, for the convenience of the goose when getting food.
- Then pieces of plastic pipe are taken and cut according to the angle of rotation.
- Holes in the barrel are cut according to the markings, and pieces of pipe are inserted into them.
- The edges of the structure must be insulated with hot glue. This will fix the pipe and it will not rotate while eating.
On a note! Grain is poured into the barrel and covered with a lid.
Grass feeder for geese
The wood feeder is suitable for grass and hay. Its use allows you to save space, as it is easily attached to the wall of the barn.
Materials:
- slats: 2 wide and 2 narrow;
- wood plugs on the sides of the product;
- a wooden block equal to the length of the slats.
The length of the slats should be calculated according to the number of individuals - 20 cm for each head.
Procedure
The box is knocked down from the slats. The bottom of the box is placed edgewise at an angle of 90° for convenience when loading grass or hay. Plugs are nailed to the sides. The product resembles a trough. A rail is attached to the top of the plugs, which is necessary for easy movement of the device. Suspensions are attached to the back wall to fix the structure on the wall.
Metal feeder
For floor use of such a feeder, two parallel boards can be placed on the bottom.
Grass feeders can be made using materials such as mesh and metal.
Goose barn project
Before you start building a gooseneck, you should first design it on paper. This will help avoid mistakes during construction.
Dimensions
The area and size of the building depend on the number of future residents. When building a stationary goose barn, 1 individual should have at least 1 square meter. m, mobile - at least 0.5 sq. m.
The height of the shed must be at least 200 cm so that it is comfortable for a person to stay and clean it. In addition, in low rooms the air circulates worse - moisture accumulates in large quantities on the walls and causes wood to rot. The rear wall has a height of 160-170 cm, since the roof is made with a slope for easier snow shedding and rainwater drainage.
The window area should be 10% of the total wall area. It's better to make them square. A bright room has a beneficial effect on the productivity of geese.
The figure below shows an approximate diagram for calculating the dimensions of the gooseneck:
Floor materials
Usually it is made of wood or concrete, sometimes adobe:
- Tree. This is a natural, environmentally friendly material that allows air to pass through well. But it rots, does not protect against rodents and has a short service life. Treating wood with special compounds allows it to last longer.
- Concrete. More durable than a tree, a rat or mole is unlikely to gnaw through it. However, concrete floors are cooler than wood floors. Using deep litter solves this problem. But concrete does not allow water and air to pass through.
Wall and roof materials
The walls of the barn are erected from the following materials:
- Brick and cinder blocks. They are considered one of the most durable materials for goose barn walls. But this is a cold material and contributes to moisture retention in the room.
- Wooden logs. They allow air to pass through perfectly, but are subject to severe rotting.
- Adobe. It is considered the best material for walls in dry climates. This is a raw brick made from clay soil with the addition of straw or other fibrous plant materials. If you first soak the adobe in lime, this will prevent rodents from appearing in the barn. For insulation, the inside and outside facades are treated with a mixture of clay and straw.
Sheets of wavy slate or polycarbonate are laid on the roof, but the latter material is a short-lived type. It is forbidden to use metal, since in hot weather it becomes very hot and creates unbearable conditions inside the gooseneck.
Thermal protection
In regions with harsh winters, the choice of insulation is approached responsibly. For these purposes use:
- mineral wool - it is easy to install and allows air to pass through, but at high humidity it begins to rot, and also settles and breaks;
- polystyrene foam or expanded polystyrene - this thermal insulation material is easy to install and retains heat well; on the other hand, it takes up a lot of volume and does not allow water to pass through, as a result, the humidity in the gooseneck increases;
- sawdust - they allow air to pass through well, but quickly rot.
Plywood bird feeder drawing
Do you see such a cute, neat house in the photo? Here is a very simple bird feeder made of plywood on a platform.
It is essentially a thick sheet of plywood with a feed box mounted on it. The box itself is decorative, designed in the shape of a house, you can even make it with plastic windows, it’s convenient and attractive. Use materials left over after repairs; the birds are unlikely to object. This project is very profitable, the materials are not expensive and can be reused, and everything is done quickly and simply.
On the right is a drawing from which it is clear what parts to cut and why they are needed. The main thing you need is material, a thick plywood sheet. To cut it, a circular saw is recommended; however, you can use any saw. You need a drill and a grinder, although grinding work can be done manually. Simply by following all the recommendations, you will get a more professional result. To connect the parts, take nails; you will need hot glue. Having assembled all the parts and polished them, you can fill the finished bird feeder with seeds. To do this, turn the threaded rod that serves as a hook and remove the lid of the feeder house, which looks like its roof.
Photo source: web.archive.org/web/20071228124735/www.blackanddecker.com/ProjectCenter/ProjectDetail.aspx?DOC_ID=p_2_99_23589_23593.html
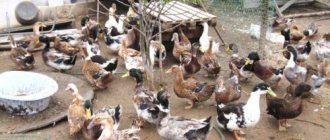
Bird feeders and drinkers :)
I looked on the forum and there is no such topic! So let's post here photos of drinking bowls and feeders for different birds :) you can post the so-called HandMay :) Otherwise everyone is running around on different topics and asking about feeders about drinking bowls, but here everything will be clear and understandable :) and there is no need to look in others topics:):):)
Vacuum drinkers for chickens Files: 5_6.jpg
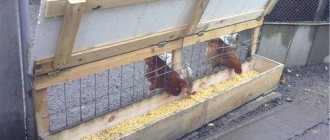
Feeders for chickens, turkeys, guinea fowl, pheasants Files: kormushki-dlya-ptic.jpg
Feeder for poultry (chickens, geese, turkeys, quail).Files:tovar-5977.jpgpic2_0.jpg
Anyone can make this at home, just choose a container that is more stable, otherwise this one will be turned over quickly, and there will be a signature “Bad” Files: ac3e30542f5e.jpg
Another feeder for chickens and turkeys with sizes Files: chertezh4.jpg
But I personally use this one for small quails, it’s very convenient and lasts for a long time =-) Files: poilkav.gif
Here is another feeder for chickens Files: 71101.jpg
Floor feeders, the advantage is that they will not be able to scatter the food and row their feet in it =-) Files: 50777_0.jpg
Feeder for wet food Files: kormushka.gif
But anyone can make a HandMay feeder, even I =-))))))))))))
Assembled device: 1 – bottle; 2 – hole for a funnel; 3 – bottle segment (funnel); 4 – ring; 5 – cork (cut off the bottom); 6 – ring-washer; 7 – hole for chickens to access inside the feeder. Files: feeder.gif
Here is a drinking bowl for chicks Wall Files: 70103_1.jpg
And here are the nipple drinkers =-) Files: drinking-line.jpg
Well done Stevie!
I try for beginners
Tell Stevie: Can these nipple drinkers be bought online?
Lulek, well, it’s probably possible =-) Write in the search engine Buy nipple drinkers, and I’m sure there will be several links =-)
Tell Stevie: Can these nipple drinkers be bought online?
Look here in “offers” - I’ve definitely seen both nipple and microcup ones.
And here’s another very convenient feeder, or for those who want a drinking bowl for chickens, it’s stable and will fit well against the wall =-) Files: 1505600.jpg
And here are the feeders for quails Files: 02-19.jpg
Here is the “vacuum” waterer we use for our ducks.
It’s quite stable, you can only knock it over when it’s empty. Made from a 5 liter water bottle. Place a plastic basin in the middle depth. There is a slot at the bottom about 2x3 cm. Files:poilkaizbutylki.jpg
Well, thanks to one good person - I made a water bowl for the birds - and now, until the cold weather, you can forget about watering. This is from a cutting of a gas pipe and water is supplied using fittings from the toilet tank. Files: img_3609.jpgimg_3605.jpg
Meat quails (Texans, Manchus, Pharaohs), meat-egg quails - Estonians. equipment for keeping and slaughtering quails, cages, brooders. Meat and hatching egg,
dimali is an interesting drinker, but maybe more photos (in different poses), and descriptions of the installation, operating principle and connection to the tank.
Hi all! Dima, turkeys will tear up these drinking bowls quickly - they are a strong and curious bird! Now I don’t sing them like that - the devils cut them off!
They're still intact, but yes, they are very curious. -They'll probably break it.
Meat quails (Texans, Manchus, Pharaohs), meat-egg quails - Estonians. equipment for keeping and slaughtering quails, cages, brooders. Meat and hatching egg,
In your case, it will probably be difficult to do, but my quails have a fine filter at the outlet of the water tank - a regular car filter. It gets clogged with dust about once a month, or a little more often. Menu. It helps very well to prevent dust and dirt from getting into the drinking bowl. And if dust gets into the drinker, it can start to leak.
Yes, I remember, I saw it with you. I had a coarse filter - and today I bought a car one. I have this for testing, so to speak - of course it won’t suit turkeys - I’m planning a larger container for them, but also with fittings from a toilet cistern. Next year my birds will sit separately.
Meat quails (Texans, Manchus, Pharaohs), meat-egg quails - Estonians. equipment for keeping and slaughtering quails, cages, brooders. Meat and hatching egg,
Well, thanks to one good person - I made a water bowl for the birds - and now, until the cold weather, you can forget about watering. This is from a cutting of a gas pipe and water is supplied using fittings from the toilet tank.
An interesting thing, and most importantly, very necessary. We ask for photos and comments.
So everything seems to be clear - 3 micro-cup drinkers are built into the pipe below and fittings from a tank with a float are installed at the top. The water is kept at the same level - and if suddenly there is no water in the water supply, then there are 10 liters of it in the container itself. Instead of a pipe, you can use something else - a tank, for example... The fittings from a toilet tank are sold in plumbing stores and cost less than 100 rubles.
Meat quails (Texans, Manchus, Pharaohs), meat-egg quails - Estonians. equipment for keeping and slaughtering quails, cages, brooders. Meat and hatching egg,
{SOURCE}
Original feeders
The following types of feeders, some of which are made from scrap materials, will certainly appeal to the reader:
Feeder based on cutting board
To make this device you will need:
- cutting board;
- plastic cup;
- funnel (it’s better if it’s also plastic);
- hose with transparent walls;
- silicone sealant.
You need to act in the following sequence:
- The wide part of the watering can is placed on the cutting board and outlined with a pencil.
- Within the drawn circle, many holes are drilled in random order using a drill.
- Next, using sealant, the watering can is glued to the board in exactly the position in which it was held when circling the wide part. Both items need to be held together for a while until the sealant sets.
- A hole is drilled in the cup near the bottom with such a diameter that a hose can be threaded into it, but at the same time the latter fits tightly enough.
- Now you can start assembling the feeder. One end of the hose is put on the spout of the watering can and fixed to it with a clamp; the second one is inserted into the cup through a hole made in it. If the hose in the cup does not hold very tightly, you need to use sealant as a seal.
The feeder is ready. The grain poured into the watering can will flow through the tube into the cup.
Feeders for supplying dry feed for poultry can be conventional or automatic. An automatic chicken feeder is good because it saves feed and preserves it.
For instructions on how to make a bird feeder with your own hands, see here.
Hopper bucket feeder
Any container can act as a feeder hopper. You can make such a feeder very cheaply from a plastic bucket in which some kind of construction mixture was packed. In addition to it, you should prepare the bottom of the same, but larger bucket, or a sectional bowl for pets, or a plastic container for seedlings. This part of the feeder should have a diameter 10–15 cm larger than that of the bucket.
Plastic bucket feeder
The manufacturing technology is extremely simple:
- Holes are cut in the side wall of the bucket near the bottom.
- Next, the bucket is installed in the center of the bowl or menagerie and screwed to it with a bolt and nut.
All that remains is to pour the food into the bucket and close it with a lid. Some of the food will spill through the holes into the bowl and while the birds eat it, it will spill out again and again.
PVC pipe feeder
A very affordable material are plastic parts for sewer assembly. Here's what you need to prepare:
- pipe with a diameter of 150 mm;
- a pair of plugs for it;
- tee.
DIY chicken feeders made from plastic pipes
Make a feeder like this:
- A) Three fragments are cut from the pipe: two are 10 and 20 cm long, the third is of arbitrary length (this will be a bunker).
- A long piece of pipe, acting as a hopper, is inserted into the tee on one side, and on the other - a piece 20 cm long. The free ends of these pieces are closed with plugs.
- A 10 cm long piece is connected to the outlet of the tee.
The structure is filled with grain or other dry food, after which it is installed with the long part up. And they fix it. A short piece attached to the tee outlet will act as a tray. You can also close it with a plug at night.
Are there a lot of squirrels in your area? Build a squirrel feeder and these little animals will delight you in cold weather.
Read about the features of making silicone molds for paving slabs in this article.
Hopper feeder made from 5-liter plastic bottles
This container, used for packaging purified water, is quite popular today. To make a feeder you will need two copies. Here's what to do with them:
- From one bottle you need to cut off the upper tapering part so that what remains is something like a glass with smooth walls.
- A window is cut into one of the side walls of this “glass”, wide enough for the chicken to stick its head through.
- The edges of the window should be covered with fabric electrical tape or adhesive tape so that they, being sharp and rigid enough, cannot injure the bird.
- You need to cut off the bottom of the second bottle.
- Near the lid itself, you need to make several holes in the wall of the 2nd bottle.
- Let's start assembling. We turn the 2nd bottle, that is, the one that we have deprived of the bottom, upside down and insert the 1st bottle into a glass-like bottle. In this case, the cap of the 2nd bottle should touch the bottom of the 1st.
The feeder is ready. Now you need to pour the grain into the inverted 2nd bottle and cover it with some kind of lid. This feeder works in the same way as all other bunker-type feeders.
Types of structures
First, briefly about the different types of feeder designs.
Open – for dry and wet food
This is the simplest option, which is simply a shallow container open at the top into which food for the geese is poured or placed.
Its advantage:
- Simplicity. It's easy to make yourself by simply taking a small plastic bowl and filling it with food. It is even better to use a basin to feed a large number of adult birds.
- Ease of processing. All types of feeders require care - they must be cleaned and washed regularly. The easiest way to care for an open feeder is to shake out the remaining food, spray it with a hose – that’s it, it’s ready for a new filling.
However, there are also disadvantages:
- Each adult bird needs at least 20 cm of free feeder space. So if you have a large population, then the feeders will be large.
- From open feeders, geese constantly scatter food across the floor of the poultry house, and if the container is large, they can climb into it with their feet.
With windows
This is a type of open feeder. It differs in that the container is equipped with a lid on top, where holes are made through which geese can stick their heads and eat - but cannot crawl through entirely. Another design option is a feeder, covered on top with a grid with cells of sufficient size to give the geese access to food.
Advantages:
- Simplicity. The simplest option is a structure of two boards, knocked together to form a right angle. Triangular or square caps are attached to the structure at the ends, and limiting slats are placed between the boards.
- Scalability. This feeder is easy to make for both adult birds and young birds. Only the sizes will change.
- Ease of use. There is no need to worry about the birds scattering too much food.
But there are also disadvantages:
The simplest wooden feeders of this type are only suitable for dry food. To use wet food, other materials are needed - and the design becomes more difficult to manufacture.
Bunker
A bunker feeder solves the problem of food spreading even better. Its design includes two main elements:
- A closed bunker in which feed is placed - grain mixture, soaked feed, etc.
- Actually a feeding trough.
Expert opinion
Novoselova Sofya Ivanovna
Farmer. 20 years of experience.
Ask a Question
The principle of operation is based on the fact that the feed is gradually poured from the hopper into the feeder under the influence of gravity. This happens as the geese eat food - and therefore such designs are convenient precisely because they only need to be refueled once or twice a day, and the feeding time for birds is not limited.
Advantages of this type of feeder:
- Autonomy. It is enough to fill the feeder once and it will provide the geese with food for a long time.
- Complete closure. The bulk of the food is out of reach of the birds.
- Customizability. Almost always, the feeder can be adjusted to reduce or increase the rate at which bird food arrives.
The only drawback can be considered the complexity of the design.
Automatic
Automatic feeders are designed to provide birds with portions of food without human assistance. The simplest option is a bunker device, however, there are more complex designs that include the following:
- Reception bunker.
- Feed distribution pipes.
- Individual feeders.
- Gearmotor.
- Fastening and suspension system.
Typically, such feeders are used on large farms for hundreds and thousands of birds. Advantages of automatic lines:
- autonomy;
- productivity - any quantity of poultry can be provided with feed, as long as the capacity of the bunker is sufficient.
The main disadvantages are the high cost and complexity of the design.
Types of feed containers
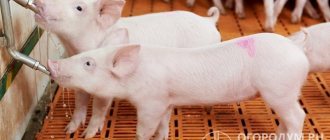
Feeders are divided according to purpose for dry, wet and mineral feed. Taking this factor into account, the necessary material is selected: for dry - wood, for wet - metal or plastic. It is worth noting that goslings will need another separate container for feeding mineral supplements.
Feeders with dry food are placed suspended on the wall; this is necessary to save space in the poultry house. You should also accurately calculate the capacity of each product so that they can accommodate the daily amount of feed. For wet mash, structures made of metal or plastic (buckets, basins) are most suitable.
Hopper feeder
All feeders that have two main components can be considered bunkers: a compartment for storing food and an outlet for dosed feeding.
There are two types of bunker devices:
- Hanging - directly with a compartment and tray where the food is poured.
- Above ground - these are made from a barrel and turning a plastic pipe that is inserted into holes cut in the barrel.
Let's consider the second type of bunker container, since it is more convenient to use and allows you to fill a larger amount of food.
about the technology of manufacturing feeders for farm animals: rabbits (bunker, hay barn), piglets, chickens (bunker, for broiler chickens), pigeons, ducks, quails.
To make such a design, you will need:
- plastic or metal barrel;
- hacksaw for metal;
- pieces of plastic pipe with an angle of 90°;
- hot melt adhesive.
Instructions
The progress of work looks like this:
- To begin, mark the barrel according to the diameter of your pipe. The markings need to be applied at a level of 30-40 cm from the bottom of the container, so that it is convenient for the goose to get food from such a height.
- Then take the pieces of plastic pipe and cut them according to the angle of rotation.
- Cut holes on the barrel to the size of your pipe and insert its parts into the resulting holes.
- Insulate the edges of the resulting structure with hot glue. This way the pipe will not rotate while eating; Hot melt adhesive will also reduce the risk of moisture getting in from the outside.
- To further isolate feeding from moisture, you can make metal or plastic canopies over the food opening. It is better to make such a canopy at a distance of 10 cm from above the edge of the pipe.
- Pour goose food into the barrel and cover with a lid on top.